For Machines Mfg. Since 7/09 | O P E R A T I O N | Model SB1016/SB1036 |
Tools Needed | Qty |
Tool Post | ............................................... 1 |
Steel Shim | As Needed |
Cutting Tool | 1 |
Fine Ruler | 1 |
Tailstock Center | 1 |
To align the cutting tool with the tailstock center:
1.Mount the cutting tool in the tool post, then turn the tool post so the tooling faces the tailstock.
2.Install a center in the tailstock, and position the center tip near the tip of the cutting tool.
3.Lock the tailstock and quill in place.
Micrometer Stop
The micrometer stop on this lathe will NOT automatically stop the carriage or disengage the power feed! Failure to heed this notice could result in the carriage crashing and causing severe machine or property damage.
Use the micrometer stop as a guide to help judge when to stop the carriage movement. The scale increments are 0.001" where 360°=0.050".
Tools Needed | Qty |
Hex Wrench 8mm | ................................................. 1 |
4. Adjust the height of the cutting tool with a | To adjust the micrometer stop: | |||
1. | DISCONNECT LATHE FROM POWER! | |||
steel shim, so the tip just touches the end of | ||||
|
| |||
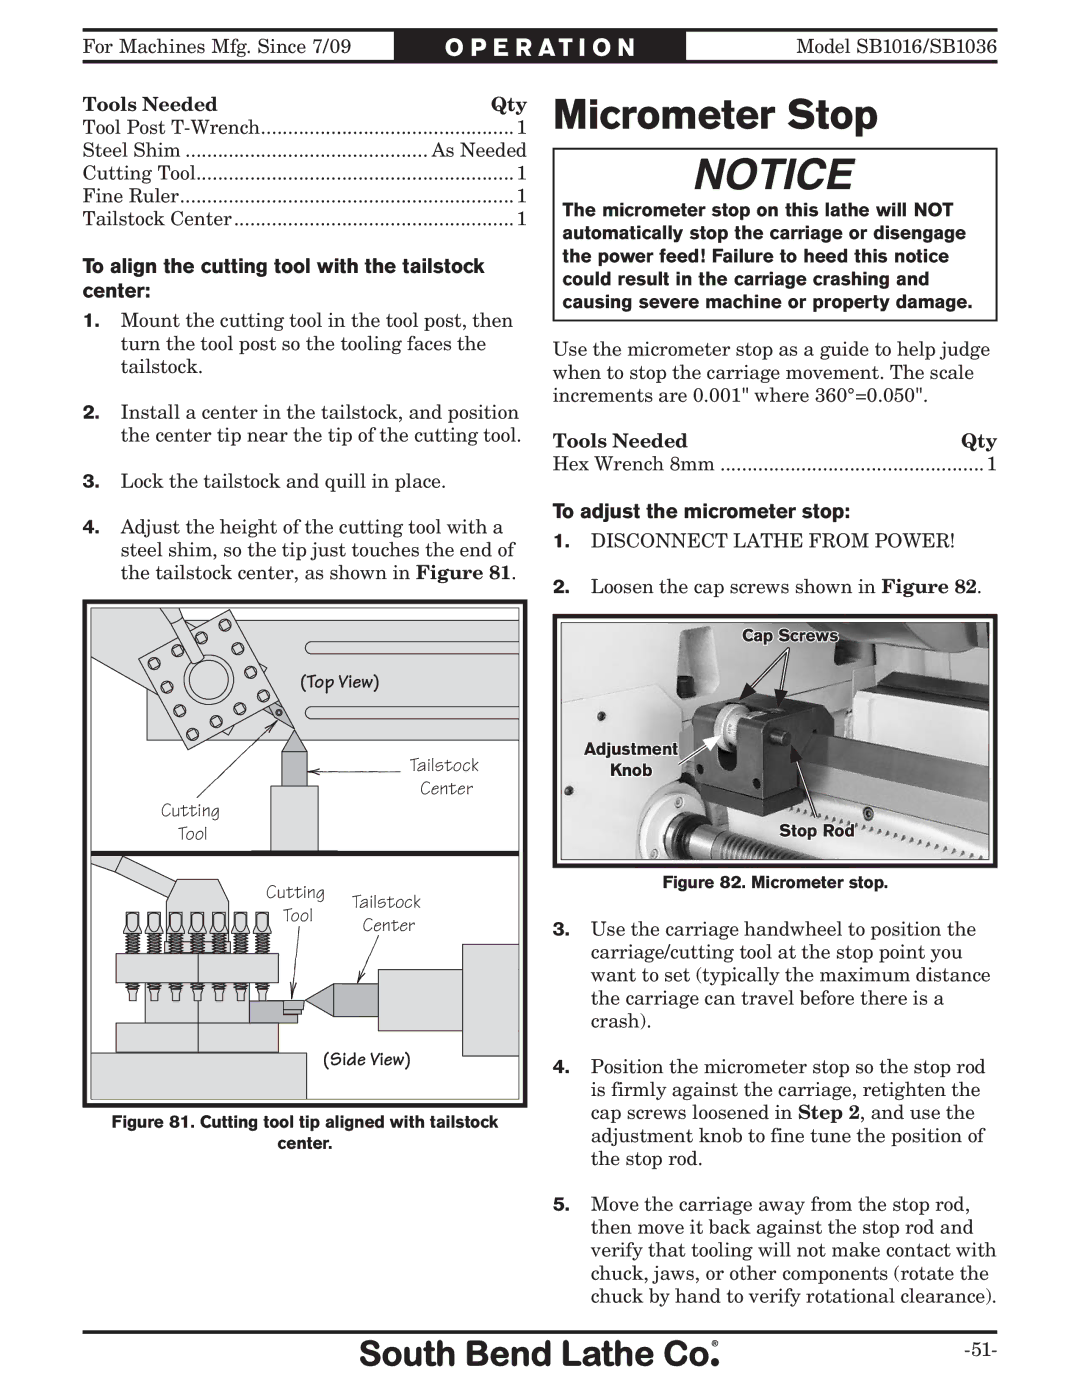
the tailstock center, as shown in Figure 81. | 2. | Loosen the cap screws shown in Figure 82. | ||
|
| |||
|
|
| Cap Screws | |
(Top View) |
|
| ||
| Tailstock |
| Adjustment | |
|
| Knob | ||
Cutting | Center |
|
| |
|
| Stop Rod | ||
Tool |
|
| ||
Cutting | Tailstock |
| Figure 82. Micrometer stop. | |
|
| |||
Tool |
|
| ||
Center | 3. | Use the carriage handwheel to position the | ||
| ||||
|
|
| carriage/cutting tool at the stop point you | |
|
|
| want to set (typically the maximum distance | |
|
|
| the carriage can travel before there is a | |
|
|
| crash). | |
(Side View) | 4. | Position the micrometer stop so the stop rod | ||
|
| |||
|
|
| is firmly against the carriage, retighten the | |
Figure 81. Cutting tool tip aligned with tailstock |
| cap screws loosened in Step 2, and use the | ||
| adjustment knob to fine tune the position of | |||
center. |
|
| ||
|
| the stop rod. | ||
|
|
| ||
|
| 5. Move the carriage away from the stop rod, | ||
|
|
| then move it back against the stop rod and | |
|
|
| verify that tooling will not make contact with | |
|
|
| chuck, jaws, or other components (rotate the | |
|
|
| chuck by hand to verify rotational clearance). | |
|
|
| ||