Scanning
Storage Properties
These properties apply to the Destination Application named Transfer to Storage. If a CD burner is attached to your computer, you also use this dialog box to start the Burn to CD process. See the section “Scan and Burn to a CD” on page 71.
NOTE: The Burn to CD option is only available for Windows XP or Windows Vista with a CD burner installed on your computer.
You can also set up multiple configurations to store scanned items in separate locations. See “The Storage Options Tab (Archive)” on page 60 and “Scanning to Multiple Folders” on page 61.
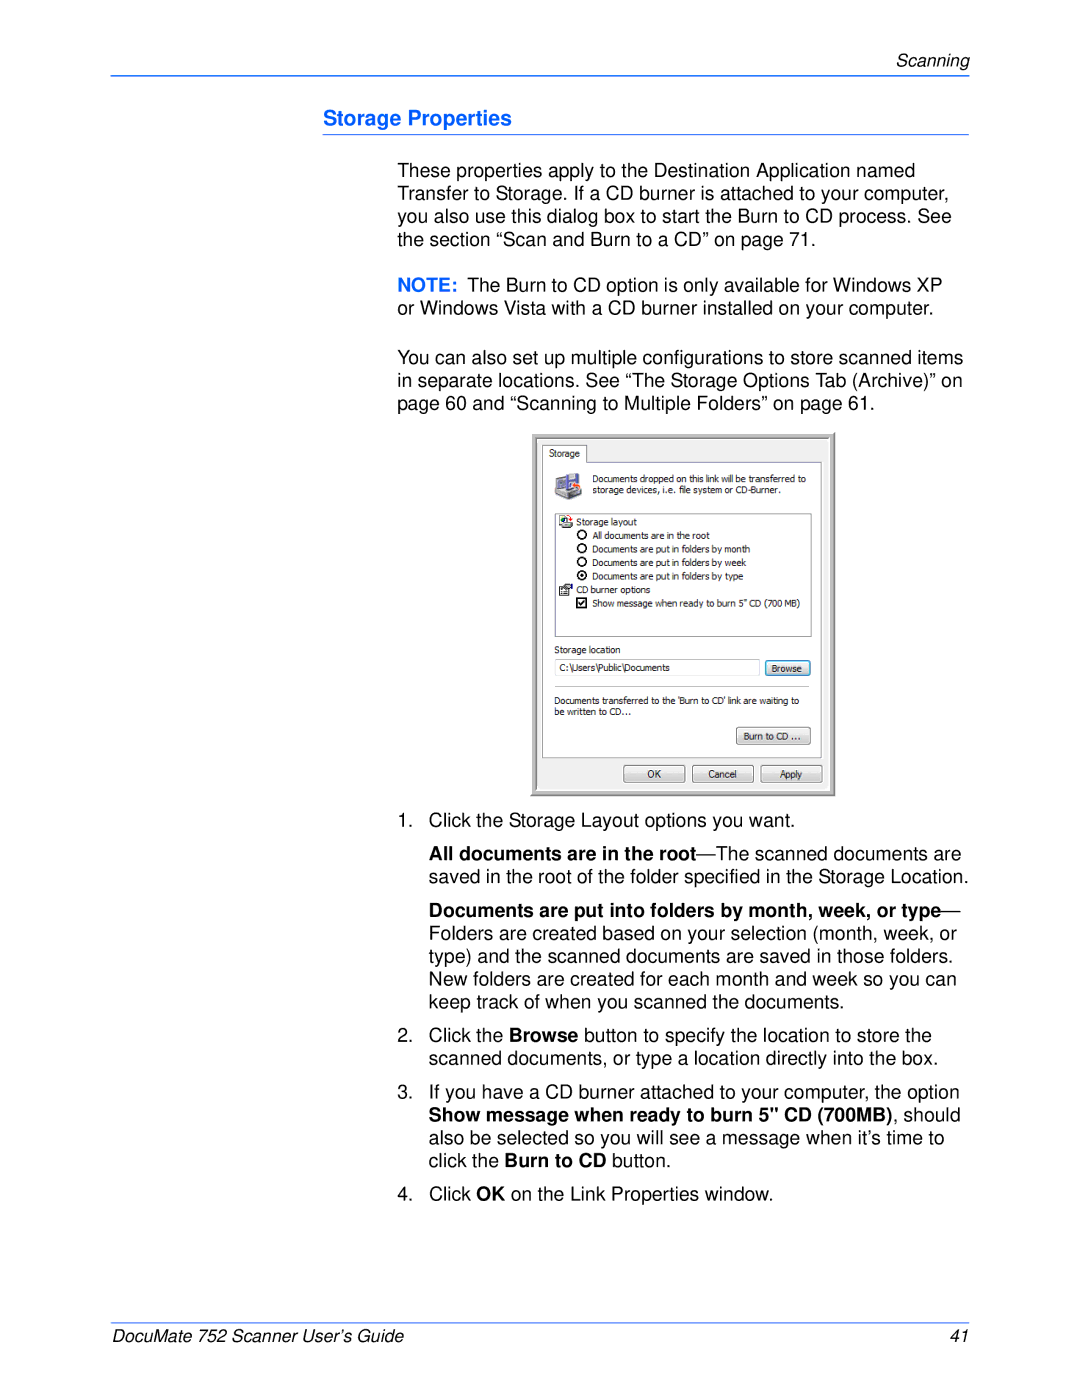
1.Click the Storage Layout options you want.
All documents are in the
Documents are put into folders by month, week, or type— Folders are created based on your selection (month, week, or type) and the scanned documents are saved in those folders. New folders are created for each month and week so you can keep track of when you scanned the documents.
2.Click the Browse button to specify the location to store the scanned documents, or type a location directly into the box.
3.If you have a CD burner attached to your computer, the option Show message when ready to burn 5" CD (700MB), should also be selected so you will see a message when it’s time to click the Burn to CD button.
4.Click OK on the Link Properties window.
DocuMate 752 Scanner User’s Guide | 41 |