Scanning
folders by type, the default location of scanned archive documents is at C:\Documents and Settings\<your user name>\My Documents\My One Touch Archive\TIFF Documents.
3.If you want to store your archive documents in some other location, click the Browse button to specify the new location.
4.Click OK or Apply.
Scanning to Multiple Folders
When archiving documents with the Transfer to Storage option, you can scan them to multiple folders. For example, one folder might be for “Business Receipts,” a second folder might be for “Personal Receipts,” and a third folder might be for “Annual Receipts.”
To scan to multiple folders, you create multiple scan configurations with Transfer to Storage as the Destination Application, and assign each scan configuration to one of the buttons.
Setting up multiple folders for transfer to storage:
1.Using Microsoft Windows, create the folders that you want to use for storing scanned items. Note that you can also create the folders later while creating the new scan configurations.
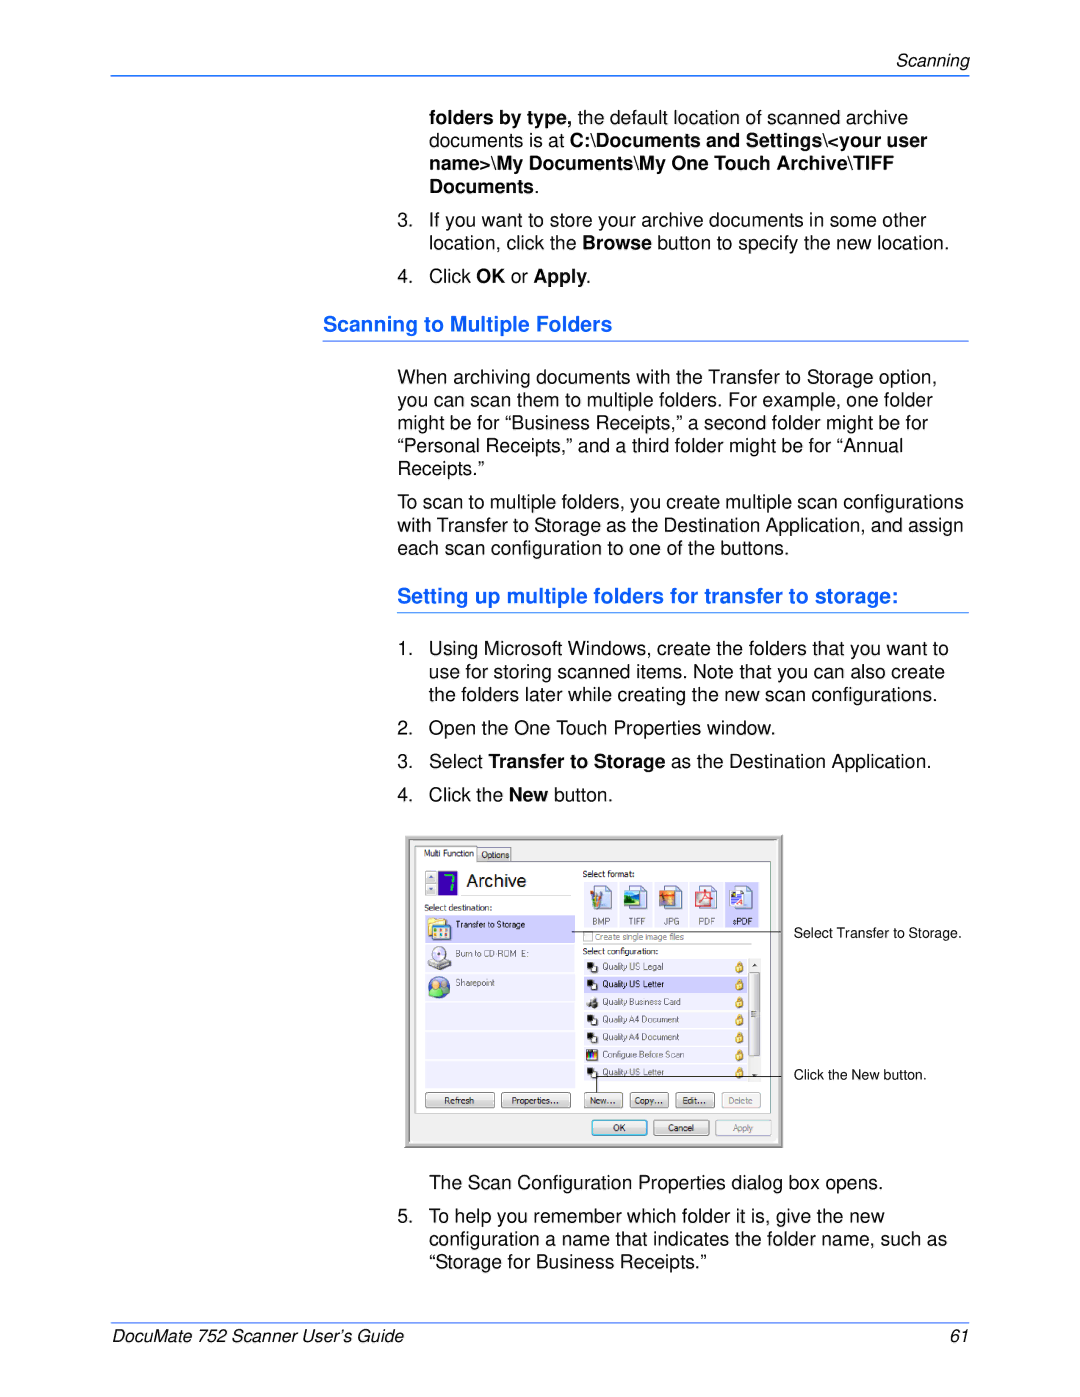
2.Open the One Touch Properties window.
3.Select Transfer to Storage as the Destination Application.
4.Click the New button.
Select Transfer to Storage.
Click the New button.
The Scan Configuration Properties dialog box opens.
5.To help you remember which folder it is, give the new configuration a name that indicates the folder name, such as “Storage for Business Receipts.”
DocuMate 752 Scanner User’s Guide | 61 |