Scanning
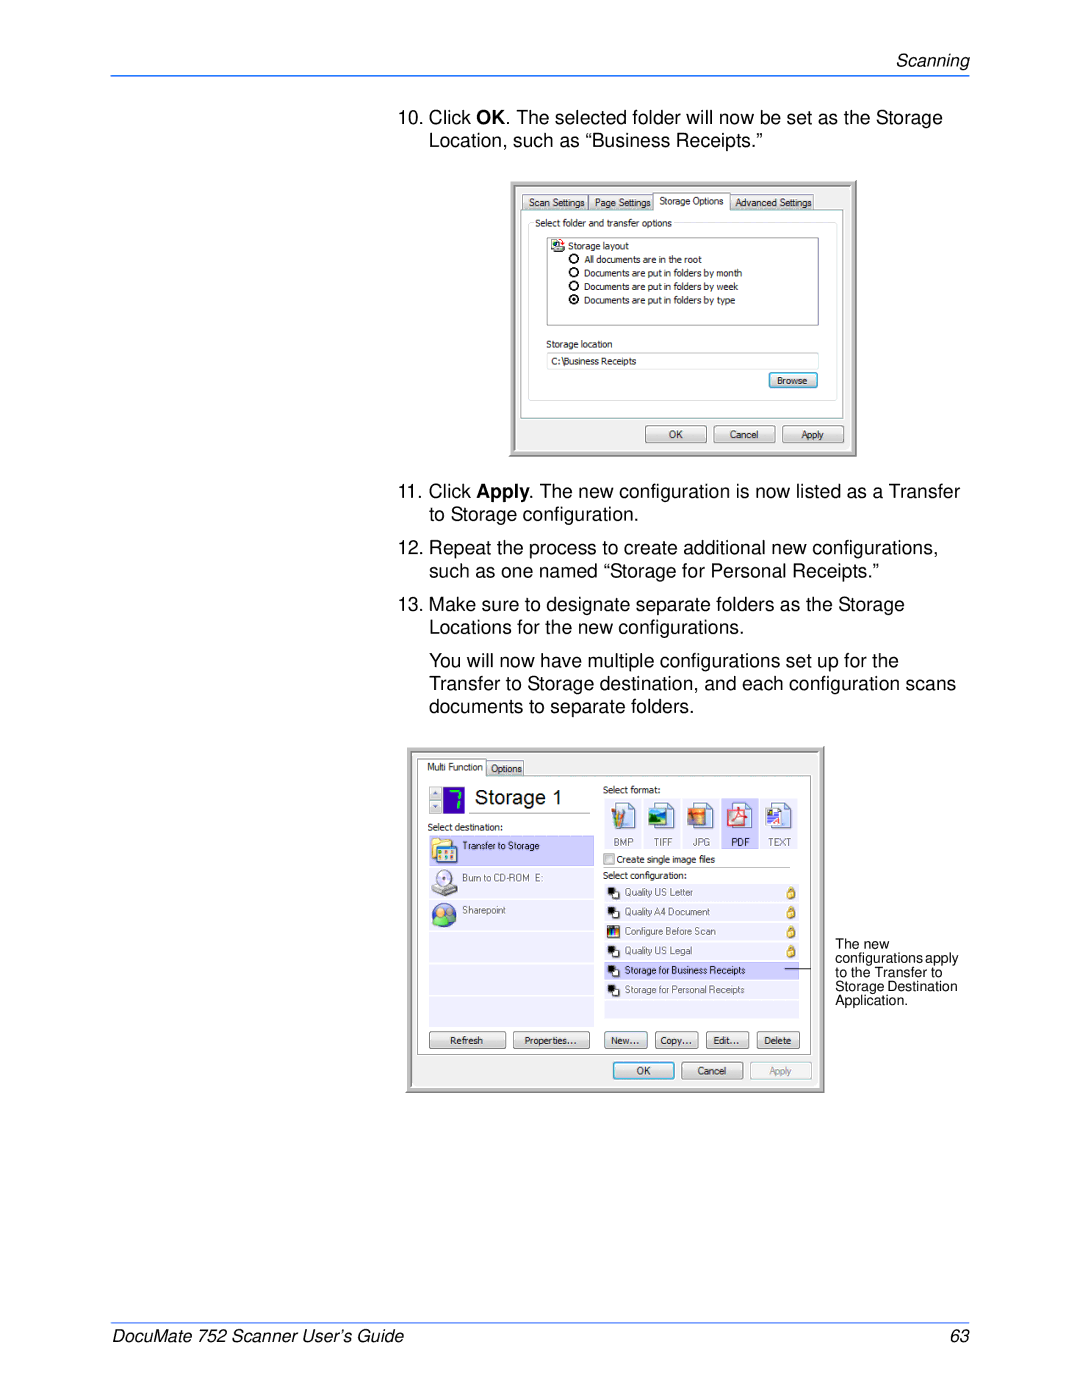
10.Click OK. The selected folder will now be set as the Storage Location, such as “Business Receipts.”
11.Click Apply. The new configuration is now listed as a Transfer to Storage configuration.
12.Repeat the process to create additional new configurations, such as one named “Storage for Personal Receipts.”
13.Make sure to designate separate folders as the Storage Locations for the new configurations.
You will now have multiple configurations set up for the Transfer to Storage destination, and each configuration scans documents to separate folders.
The new configurations apply to the Transfer to Storage Destination Application.
DocuMate 752 Scanner User’s Guide | 63 |