Maintenance Information
Removing DIMMs
This section discusses the procedure for removing DIMMs from your RSP8.
Use this procedure to remove the existing DIMMs:
Step 1 Turn off the system power and follow the steps in the “Removing the RSP8” section on page 16 .
Step 2 Place the RSP8 on an antistatic mat or pad and ensure that you are wearing an antistatic device, such as a wrist strap.
Step 3 Position the RSP8 so that the faceplate is toward you and the bus connectors are away from
Step 4 Locate the DRAM DIMMs on the RSP8. The DIMMs occupy U12 (bank 0) and U15 (bank 1). (See Figure 2.)
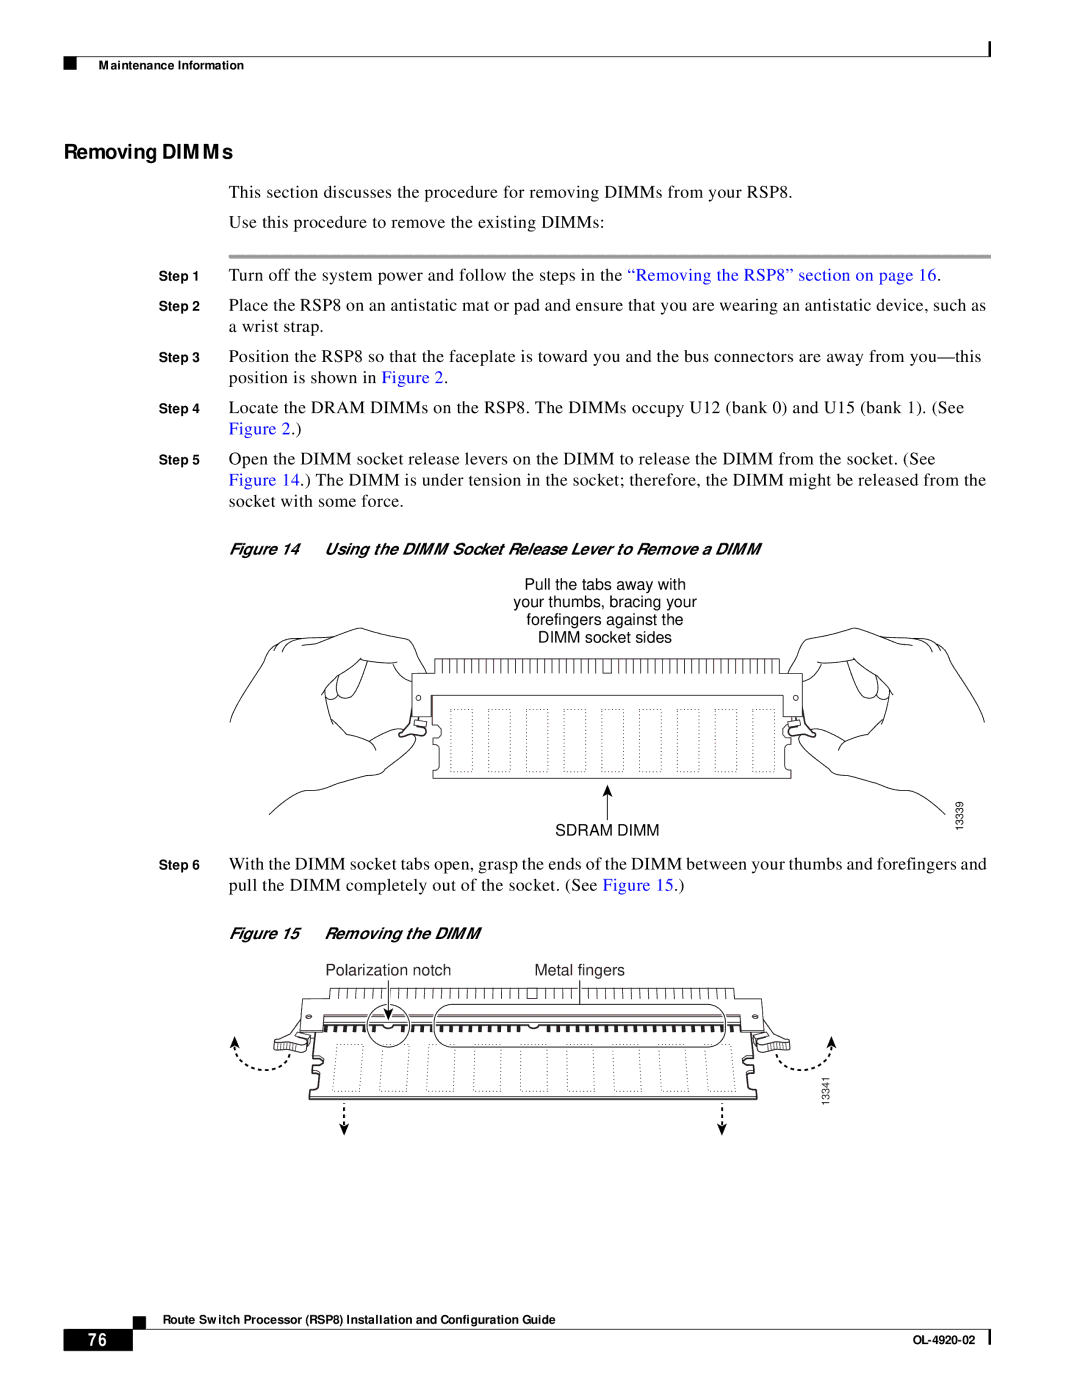
Step 5 Open the DIMM socket release levers on the DIMM to release the DIMM from the socket. (See Figure 14.) The DIMM is under tension in the socket; therefore, the DIMM might be released from the socket with some force.
Figure 14 Using the DIMM Socket Release Lever to Remove a DIMM
Pull the tabs away with
your thumbs, bracing your
forefingers against the
DIMM socket sides
SDRAM DIMM
13339
Step 6 With the DIMM socket tabs open, grasp the ends of the DIMM between your thumbs and forefingers and pull the DIMM completely out of the socket. (See Figure 15.)
Figure 15 Removing the DIMM
Polarization notch | Metal fingers |
13341
Route Switch Processor (RSP8) Installation and Configuration Guide
76 |
| |
|
