Chapter 11
Using Multimedia
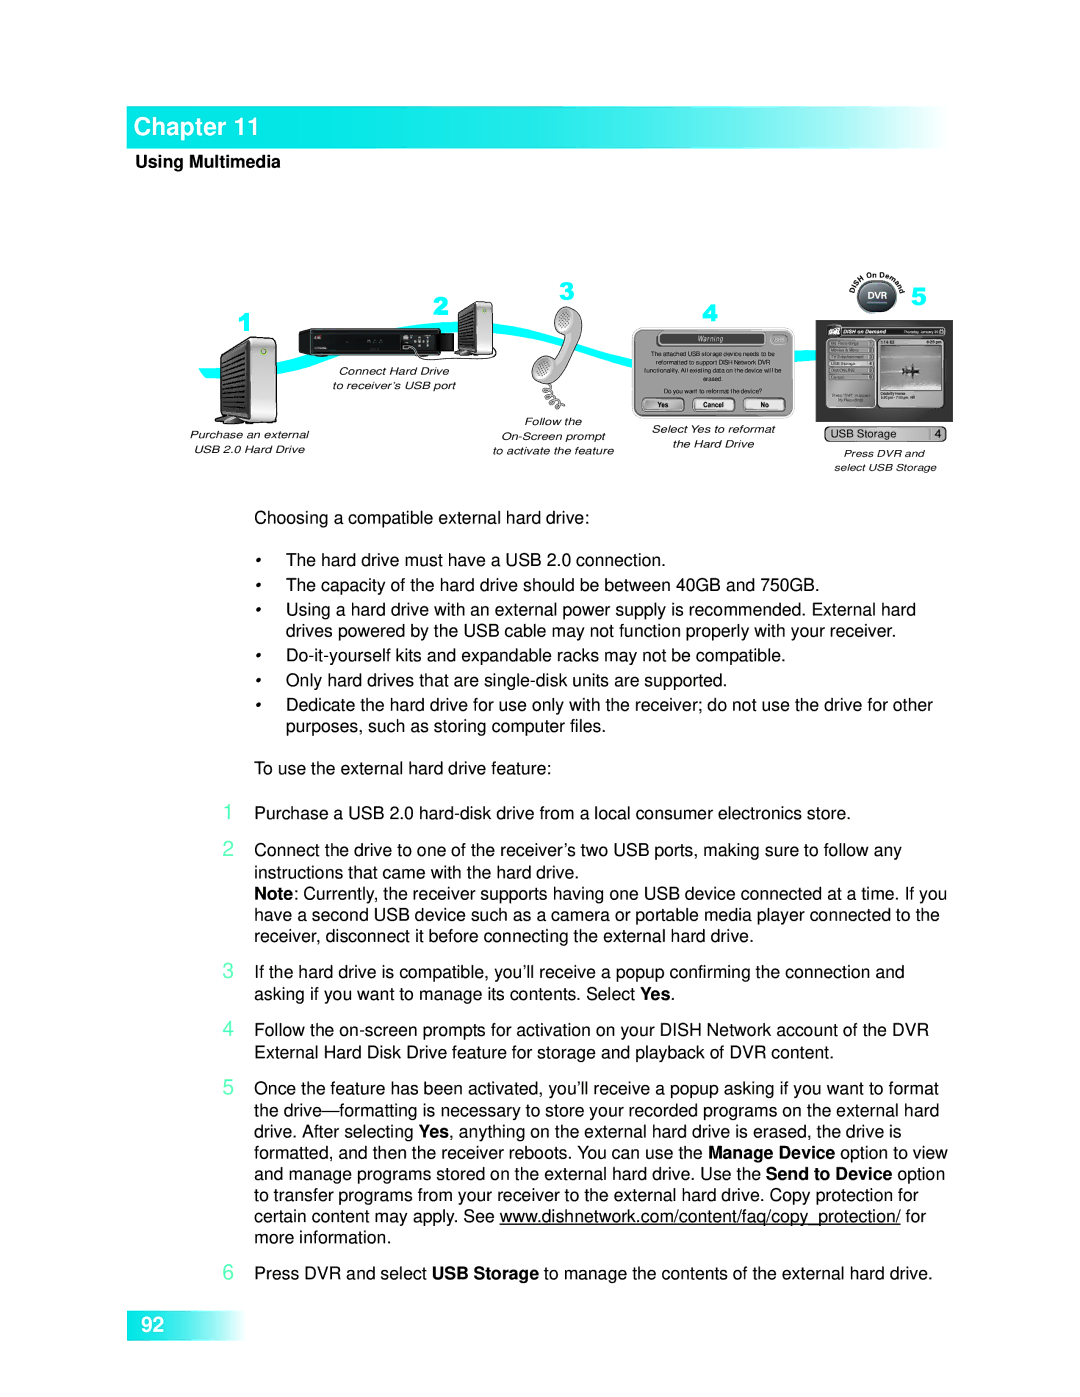
| Connect Hard Drive |
| to receiver’s USB port |
Purchase an external | Follow the |
USB 2.0 Hard Drive | to activate the feature |
Warning865
The attached USB storage device needs to be reformatted to support DISH Network DVR functionality. All existing data on the device will be erased.
Do you want to reformat the device?
Select Yes to reformat
the Hard Drive
My Recordings
Movies & More
TV Entertainment
USB Storage
DishONLINE
Cancel
Press “DVR” to access
My Recordings.
USB Storage
Press DVR and select USB Storage
Choosing a compatible external hard drive:
•The hard drive must have a USB 2.0 connection.
•The capacity of the hard drive should be between 40GB and 750GB.
•Using a hard drive with an external power supply is recommended. External hard drives powered by the USB cable may not function properly with your receiver.
•
•Only hard drives that are
•Dedicate the hard drive for use only with the receiver; do not use the drive for other purposes, such as storing computer files.
1Purchase a USB 2.0
2Connect the drive to one of the receiver’s two USB ports, making sure to follow any instructions that came with the hard drive.
Note: Currently, the receiver supports having one USB device connected at a time. If you have a second USB device such as a camera or portable media player connected to the receiver, disconnect it before connecting the external hard drive.
3If the hard drive is compatible, you’ll receive a popup confirming the connection and asking if you want to manage its contents. Select Yes.
4Follow the
5Once the feature has been activated, you’ll receive a popup asking if you want to format the
6Press DVR and select USB Storage to manage the contents of the external hard drive.
92