Connections and Setup
Connecting to Your Dish Antenna
CONNECTING TO YOUR DISH ANTENNA
If okay,
select Done,
then select Done again
1Before you can begin connecting your receiver to your dish antenna, you must first complete the preceding sections to connecting your TVs to the receiver.
2Connect two
Note: If you are installing your receiver into a system with DISH Pro or DISH Pro Plus LNBFs (and/or switches), you can have as much as 200 feet of cable between the LNBF and the receiver. However, you must use only
3Peel off the blue stickers and affix them to the cables close to where they connect to the SATELLITE IN 1 and SATELLITE IN 2 connections on the back of the receiver. The stickers are in the front cover of this guide.
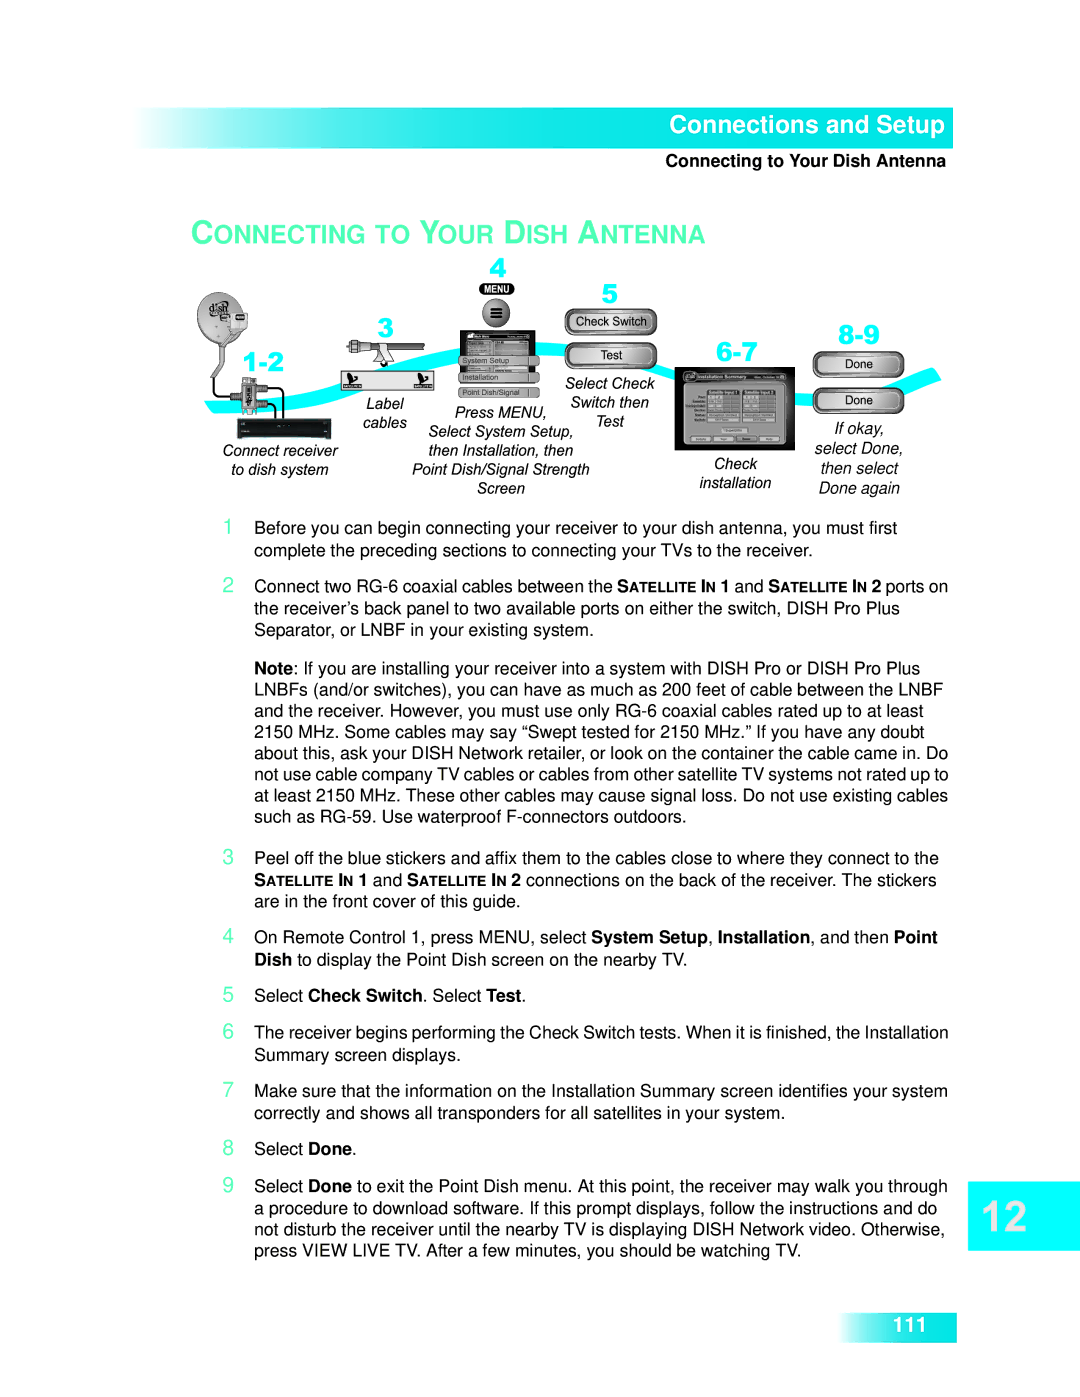
4On Remote Control 1, press MENU, select System Setup, Installation, and then Point Dish to display the Point Dish screen on the nearby TV.
5Select Check Switch. Select Test.
6The receiver begins performing the Check Switch tests. When it is finished, the Installation Summary screen displays.
7Make sure that the information on the Installation Summary screen identifies your system correctly and shows all transponders for all satellites in your system.
8Select Done.
9Select Done to exit the Point Dish menu. At this point, the receiver may walk you through a procedure to download software. If this prompt displays, follow the instructions and do not disturb the receiver until the nearby TV is displaying DISH Network video. Otherwise, press VIEW LIVE TV. After a few minutes, you should be watching TV.
111