Dish Network 722k important safety instructions Select Chan Display

Models: 722k

1 165
Download 165 pages 10.17 Kb
Page 45
Image 45

Receiver Customization

Customizing the Guide and Channel Lists

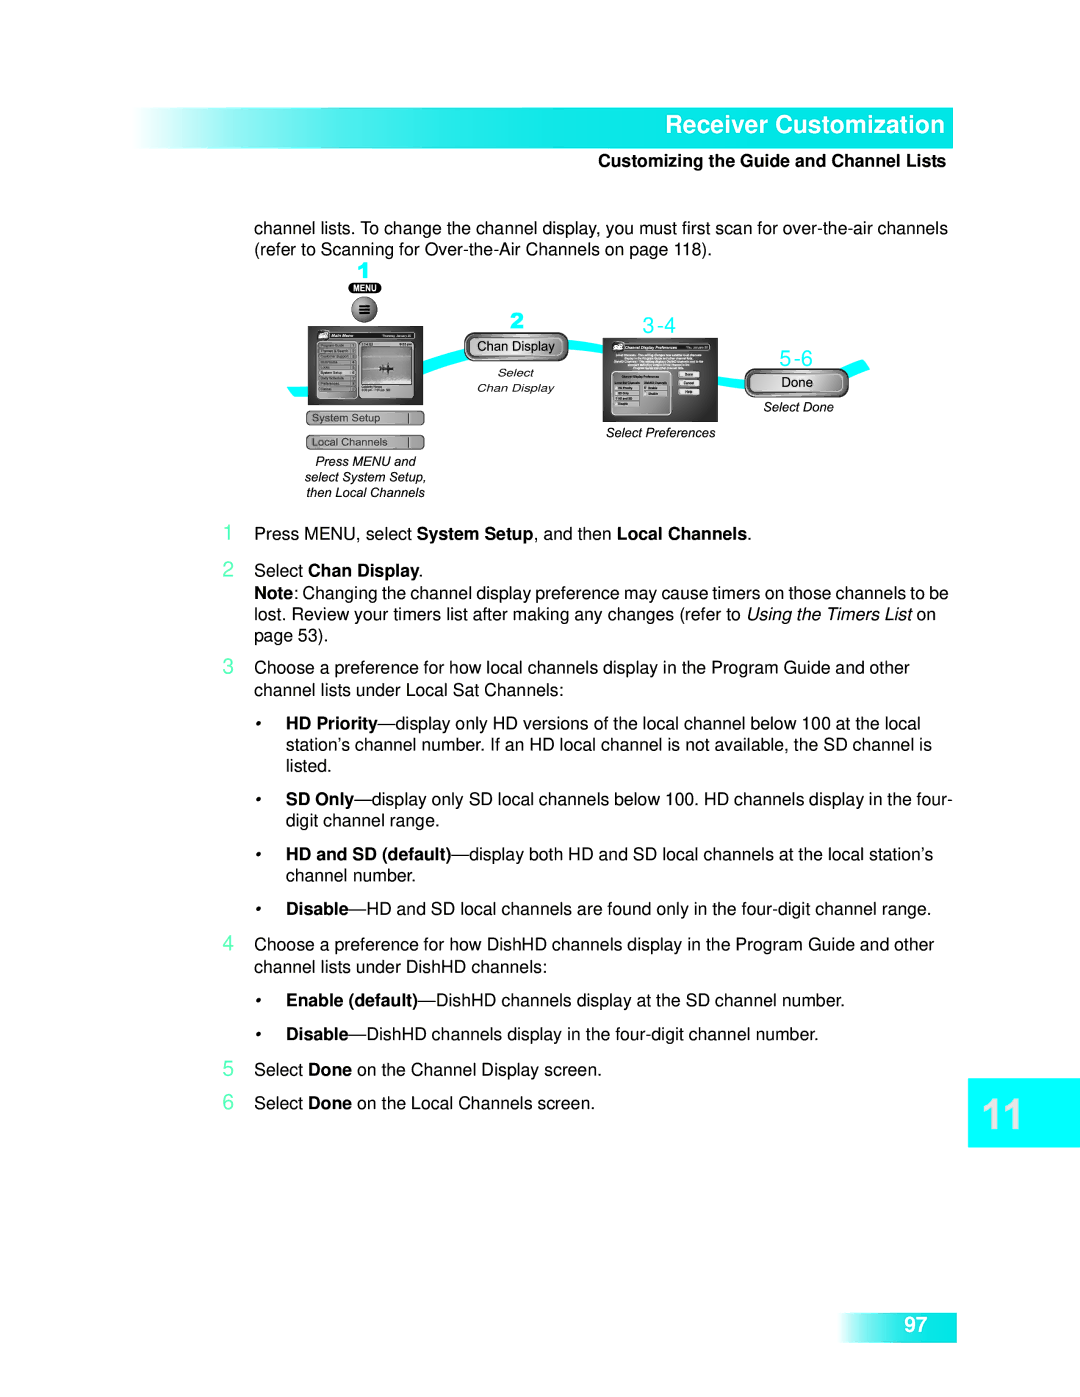
channel lists. To change the channel display, you must first scan for over-the-air channels (refer to Scanning for Over-the-Air Channels on page 118).

3-4

5-6

Select

Chan Display

1Press MENU, select System Setup, and then Local Channels.

2Select Chan Display.

Note: Changing the channel display preference may cause timers on those channels to be lost. Review your timers list after making any changes (refer to Using the Timers List on page 53).

3Choose a preference for how local channels display in the Program Guide and other channel lists under Local Sat Channels:

HD Priority—display only HD versions of the local channel below 100 at the local station’s channel number. If an HD local channel is not available, the SD channel is listed.

SD Only—display only SD local channels below 100. HD channels display in the four- digit channel range.

HD and SD (default)—display both HD and SD local channels at the local station’s channel number.

Disable—HD and SD local channels are found only in the four-digit channel range.

4Choose a preference for how DishHD channels display in the Program Guide and other channel lists under DishHD channels:

Enable (default)—DishHD channels display at the SD channel number.

Disable—DishHD channels display in the four-digit channel number.

5Select Done on the Channel Display screen.

6Select Done on the Local Channels screen.

97

Page 45
Image 45
Dish Network 722k important safety instructions Select Chan Display