105
Repeat steps 4 and 5 until the nearby TV displays video from the receiver.
6
4 Change the HDTV settings as described on page 106.
5 Switch to the nearby TV to display from the HD inputs you selected in the previous sections. If you have a picture from TV1, you are finished.
Make sure the receiver and nearby TV are on.
Connect RCA-type cable connections between the receiver TV1 OUT and the nearby TV.
1
2
3 Make sure the nearby TV is set to use the RCA-type inputs. Look on the back of your HDTV and consult your HDTV user’s guide.
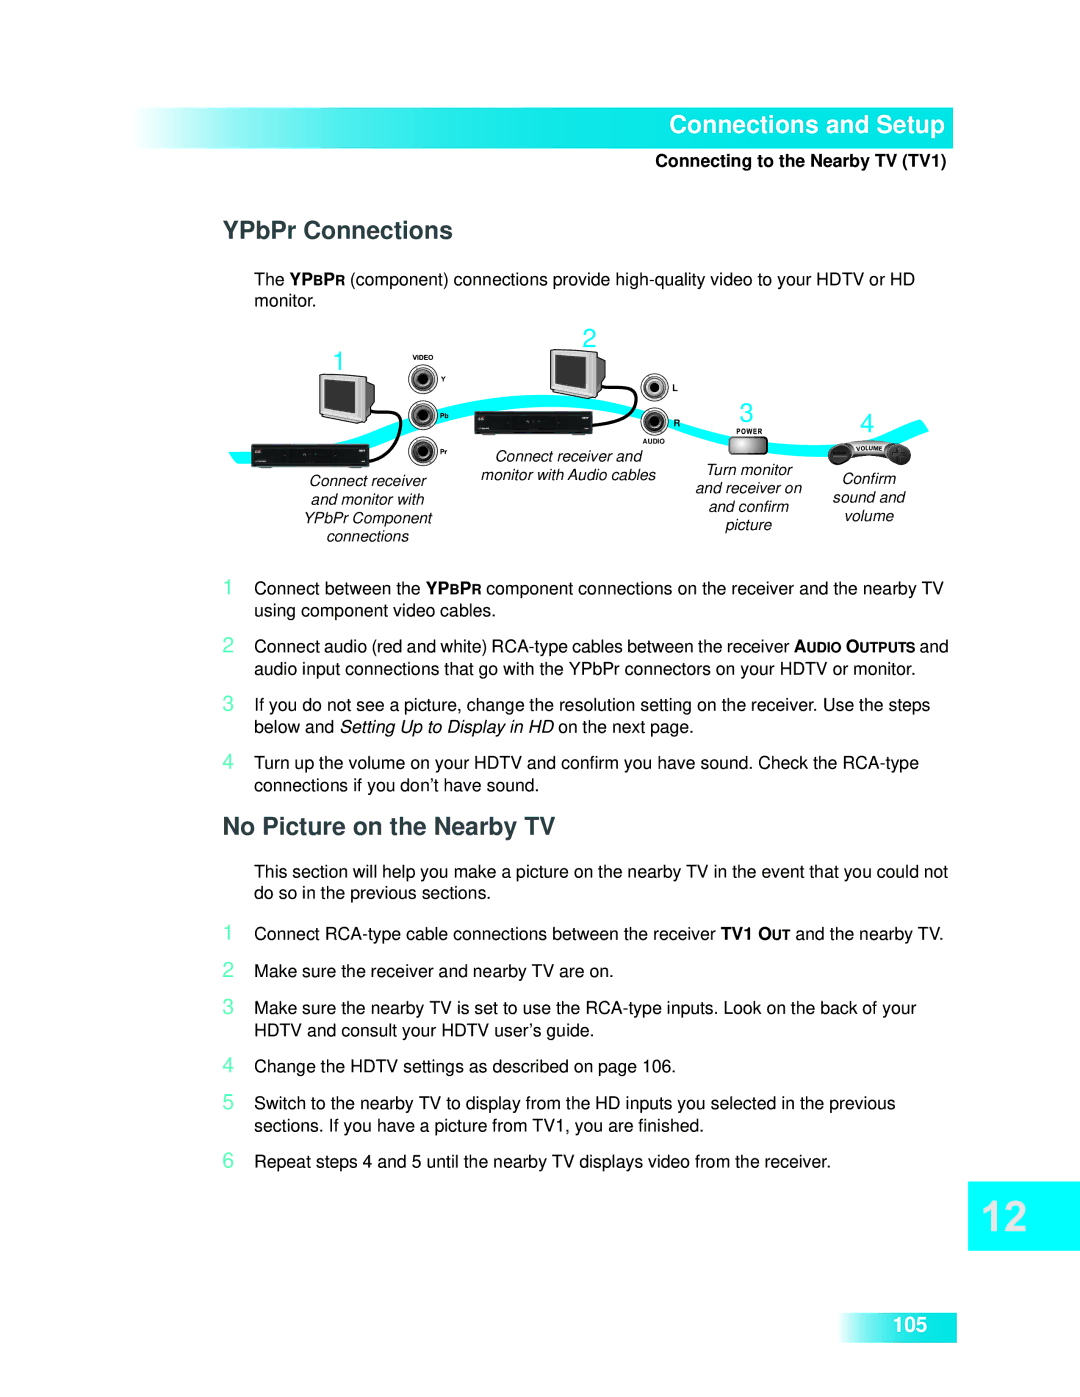
1 Connect between the YPBPR component connections on the receiver and the nearby TV using component video cables.
2 Connect audio (red and white) RCA-type cables between the receiver AUDIO OUTPUTS and
audio input connections that go with the YPbPr connectors on your HDTV or monitor.
3 If you do not see a picture, change the resolution setting on the receiver. Use the steps below and Setting Up to Display in HD on the next page.
4 Turn up the volume on your HDTV and confirm you have sound. Check the RCA-type connections if you don’t have sound.
No Picture on the Nearby TV
This section will help you make a picture on the nearby TV in the event that you could not do so in the previous sections.
Connections and Setup
Connecting to the Nearby TV (TV1)
YPbPr Connections
The YPBPR (component) connections provide
1
2
L
R
AUDIO
3 4
Connect receiver
Connect receiver and
monitor with Audio cables
Turn monitor
Confirm
and receiver on
and monitor with
and confirm
sound and
YPbPr Component
connections
picture
volume