Chapter 12
Connecting a VCR to the Remote TV
CONNECTING A VCR TO THE REMOTE TV
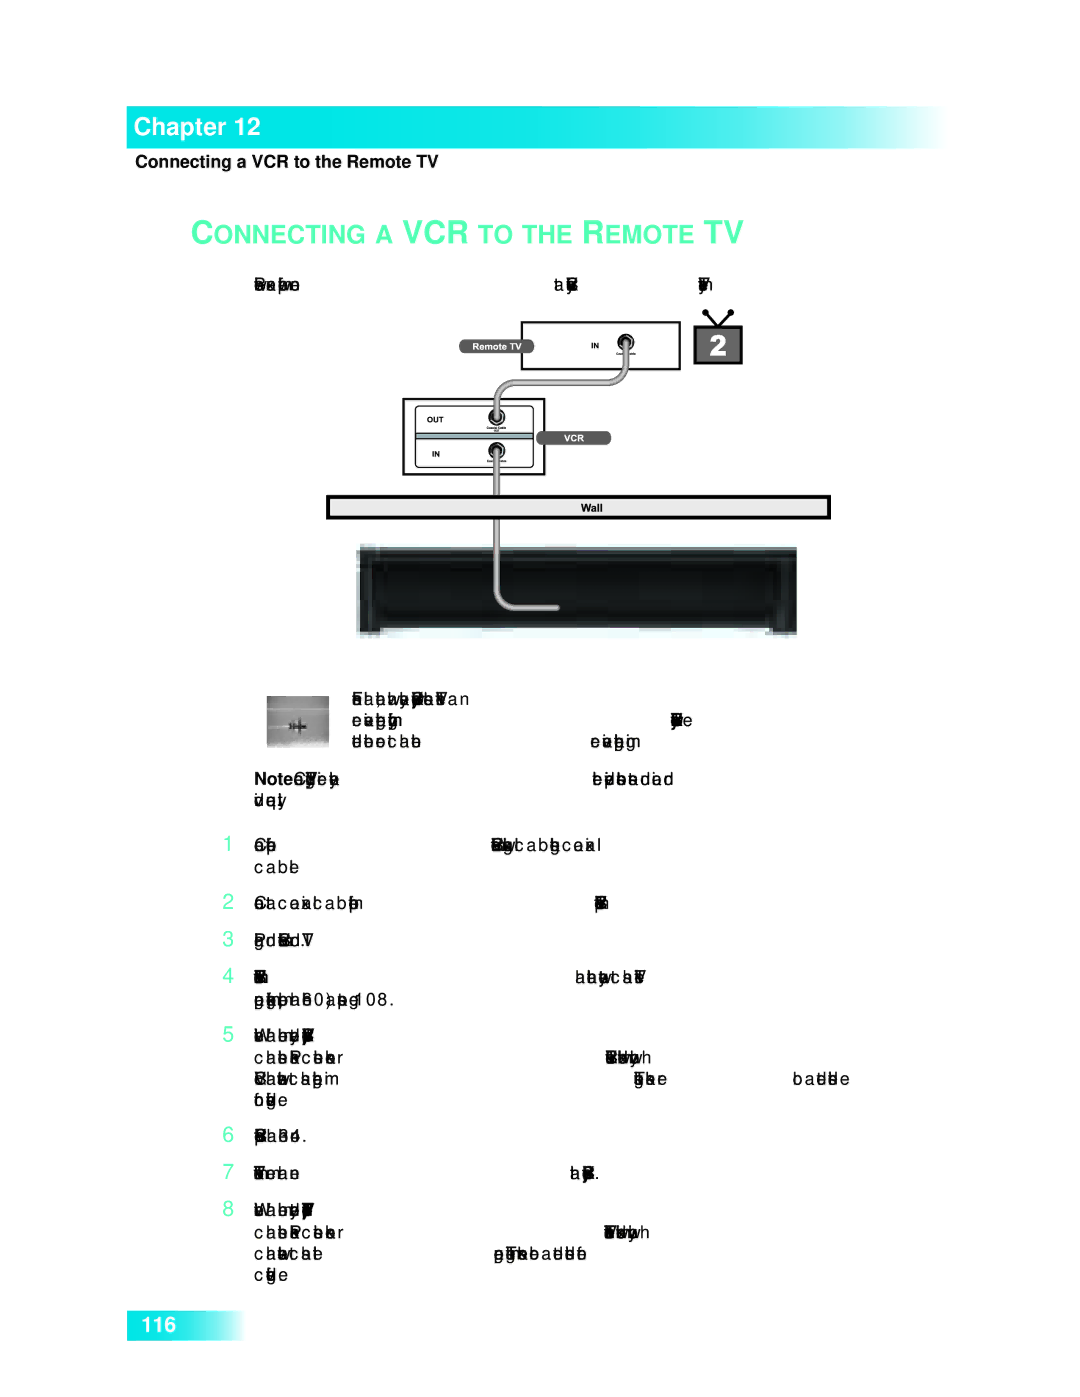
Below is an example of how to connect a VCR to your satellite TV system.
For this installation, always leave your VCR powered on so that the TV can receive satellite programming. If you turn off your VCR, your TV will not be tuned to the correct channel to receive satellite programming.
Note: Connecting your TV directly to the satellite receiver provides the best audio and video quality.
1Connect the tuner input of the remote VCR to an existing wall cable outlet using a coaxial cable.
2Connect a coaxial cable from the output on the VCR to the remote TV’s tuner port.
3Plug in and turn on the remote VCR and TV.
4Tune the remote VCR to the remote TV channel that you use to watch satellite TV programming (for example, channel 60) as set on page 108.
5Write the channel number you tuned your VCR to in the previous step on one of the TV2 channel stickers. Place the sticker on or near the VCR. This sticker will remind you which VCR channel to use to watch satellite programming. The stickers are located in the inside front cover of this guide.
6Set the VCR output to channel 3 or 4.
7Tune the remote TV to the same channel that you set your VCR to in step 6.
8Write the channel number you tuned your TV to in the previous step on one of the TV2 channel stickers. Place the sticker on or near the TV. This sticker will remind you which channel to use to watch satellite programming. The stickers are located in the inside front cover of this guide.
116