HP D3K19UT D3K19UT#ABA, D8C84UT#ABA, D3K21UT#ABA manual Removing an Internal 5.25-inch Drive

Models: D8C84UT#ABA D3K21UT#ABA D3K19UT D3K19UT#ABA Pro 4300 C9H69UT#ABA Pro 4300 B8T87UT B8T87UT#ABA Pro 4300 B5P90UT#ABA Pro 4300 C9H67UT#ABA

1 160
Download 160 pages 41.85 Kb
Page 65
Image 65

Removing an Internal 5.25-inch Drive

CAUTION: All removable media should be taken out of a drive before removing the drive from the computer.
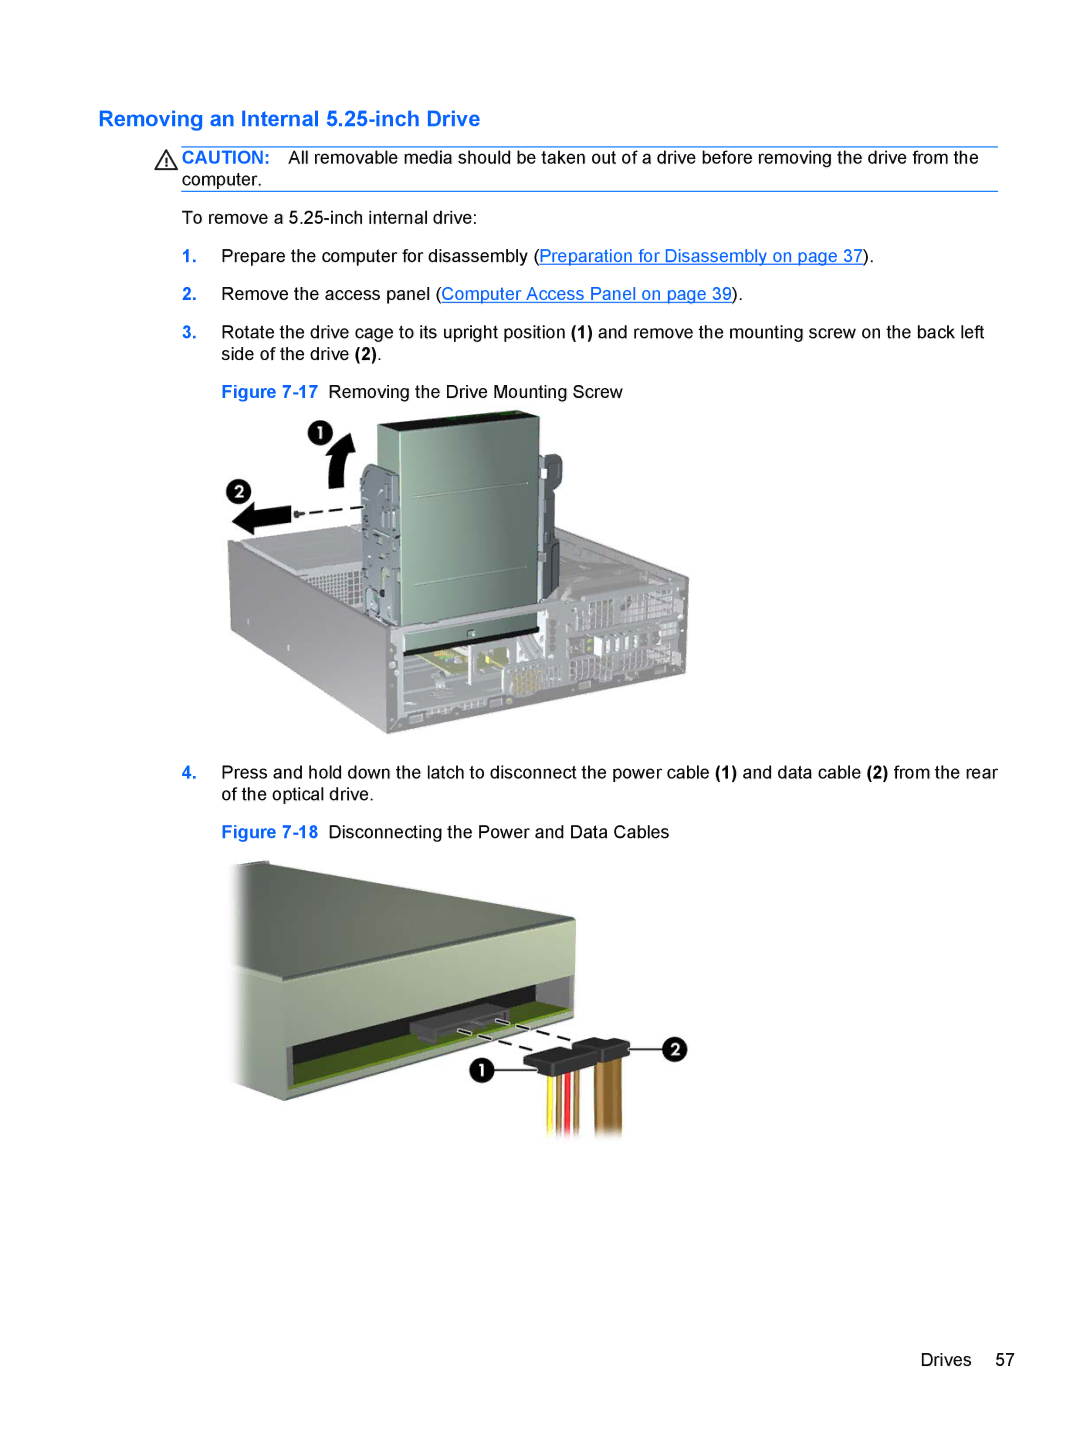
To remove a 5.25-inch internal drive:

1.Prepare the computer for disassembly (Preparation for Disassembly on page 37).

2.Remove the access panel (Computer Access Panel on page 39).

3.Rotate the drive cage to its upright position (1) and remove the mounting screw on the back left side of the drive (2).

Figure 7-17Removing the Drive Mounting Screw

4.Press and hold down the latch to disconnect the power cable (1) and data cable (2) from the rear of the optical drive.

Figure 7-18Disconnecting the Power and Data Cables

Drives 57

Page 65
Image 65
HP D3K19UT D3K19UT#ABA, D8C84UT#ABA, D3K21UT#ABA, Pro 4300 C9H67UT#ABA manual Removing an Internal 5.25-inch Drive