Internal Disk Drives
Removal
1.Remove the disk drive bay cover as described in “Front Covers” on page
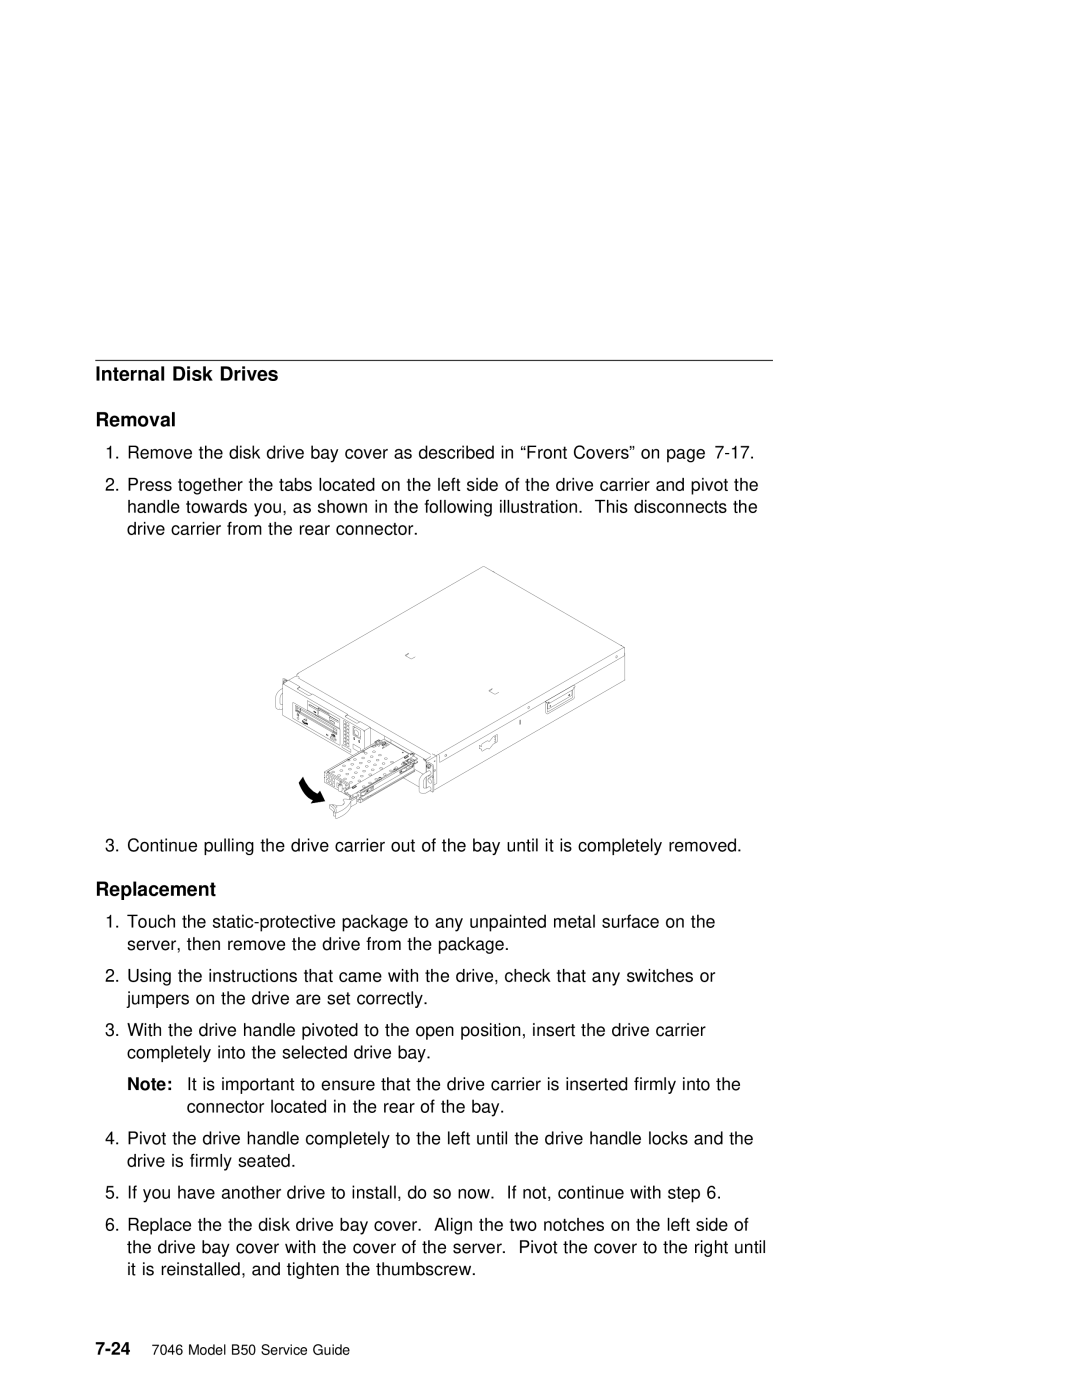
2.Press together the tabs located on the left side of the drive carrier and pivot the handle towards you, as shown in the following illustration. This disconnects the
drive carrier from the rear connector.
3. Continue pulling the drive carrier out of the bay until it is completely removed.
Replacement
1.Touch the
2.Using the instructions that came with the drive, check that any switches or jumpers on the drive are set correctly.
3.With the drive handle pivoted to the open position, insert the drive carrier completely into the selected drive bay.
Note: It is important to ensure that the drive carrier is inserted firmly into the connector located in the rear of the bay.
4.Pivot the drive handle completely to the left until the drive handle locks and the drive is firmly seated.
5.If you have another drive to install, do so now. If not, continue with step 6.
6.Replace the the disk drive bay cover. Align the two notches on the left side of
the drive bay cover with the cover of the server. Pivot the cover to the right until it is reinstalled, and tighten the thumbscrew.