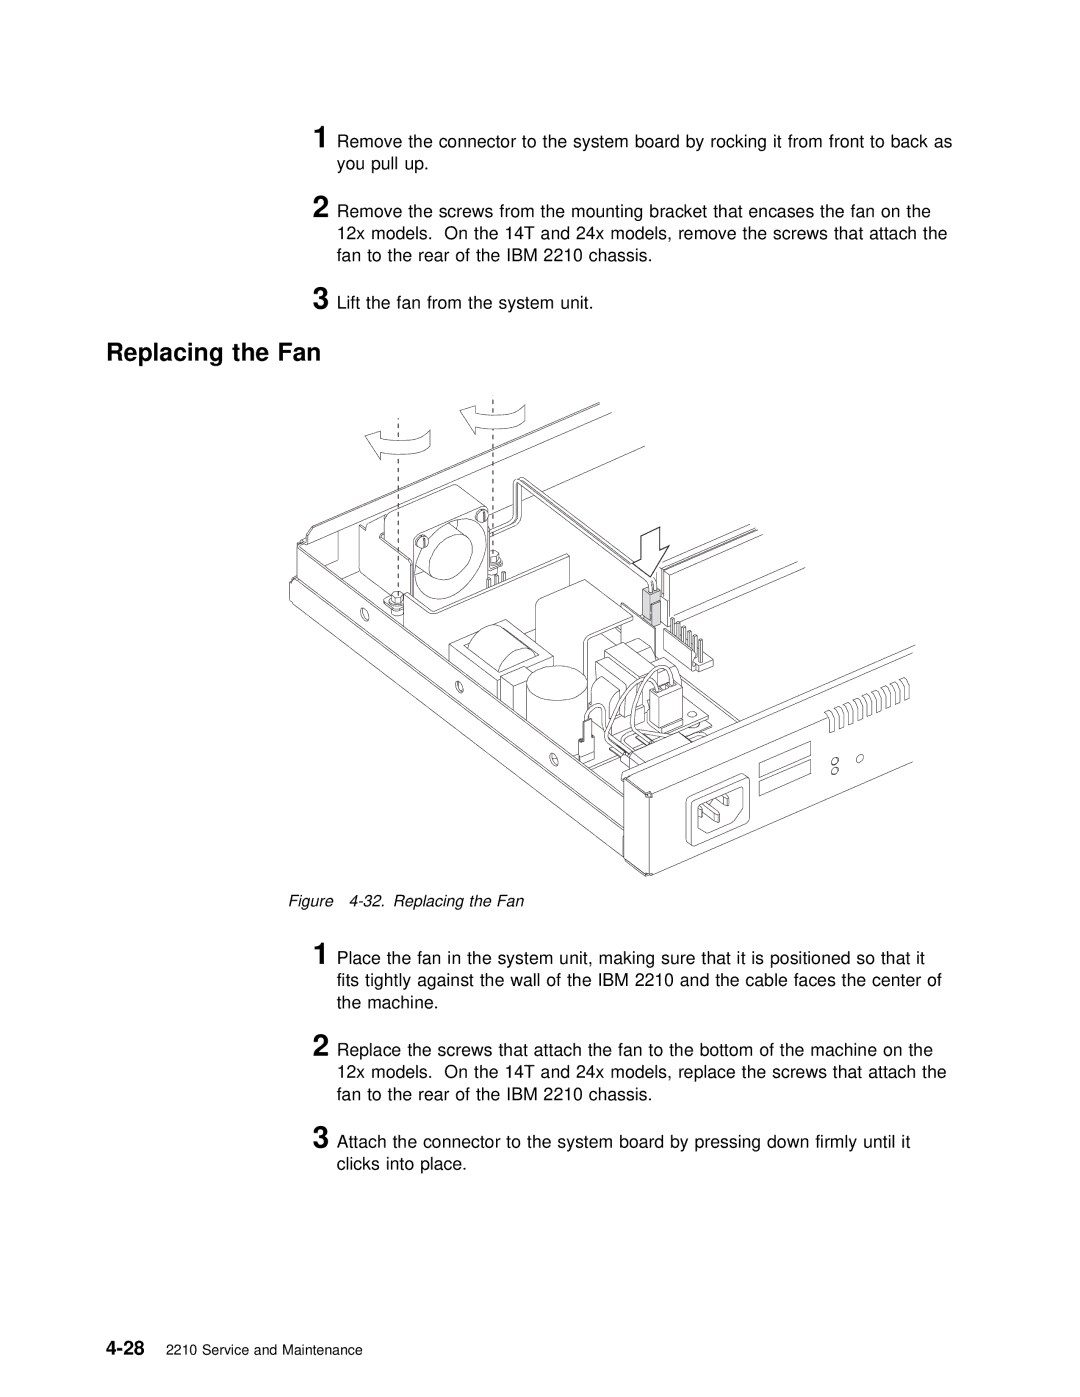
1Remove the connector to | the | system | board | by | rocking | it | from | front | ||||||
| you | pull | up. |
|
|
|
|
|
|
|
|
|
|
|
2 | Remove the screws from | the | mounting | bracket | that encases | the | fan | |||||||
| 12x models. On the 14T | and | 24x models, remove | the | screws that a | |||||||||
| fan | to the | rear | of the IBM | 2210 | chassis. |
|
|
|
| ||||
3 | Lift | the | fan | from | the | system | unit. |
|
|
|
|
|
| |
Replacing the Fan
Figure |
|
|
|
|
|
|
|
| ||||
1Place | the fan in the system unit, | making | sure that | it | is | positione | ||||||
fits | tightly against the wall of | the | IBM 2210 | and | the | cable fa | ||||||
the | machine. |
|
|
|
|
|
|
|
|
|
| |
2 Replace | the | screws | that | attach | the fan to the bottom of the m | |||||||
12x | models. | On the 14T and 24x | models, | replace | the | screws that | ||||||
fan | to | the | rear of | the | IBM 2210 | chassis. |
|
|
|
| ||
3 Attach the connector to the system board by pressing down firmly clicks into place.