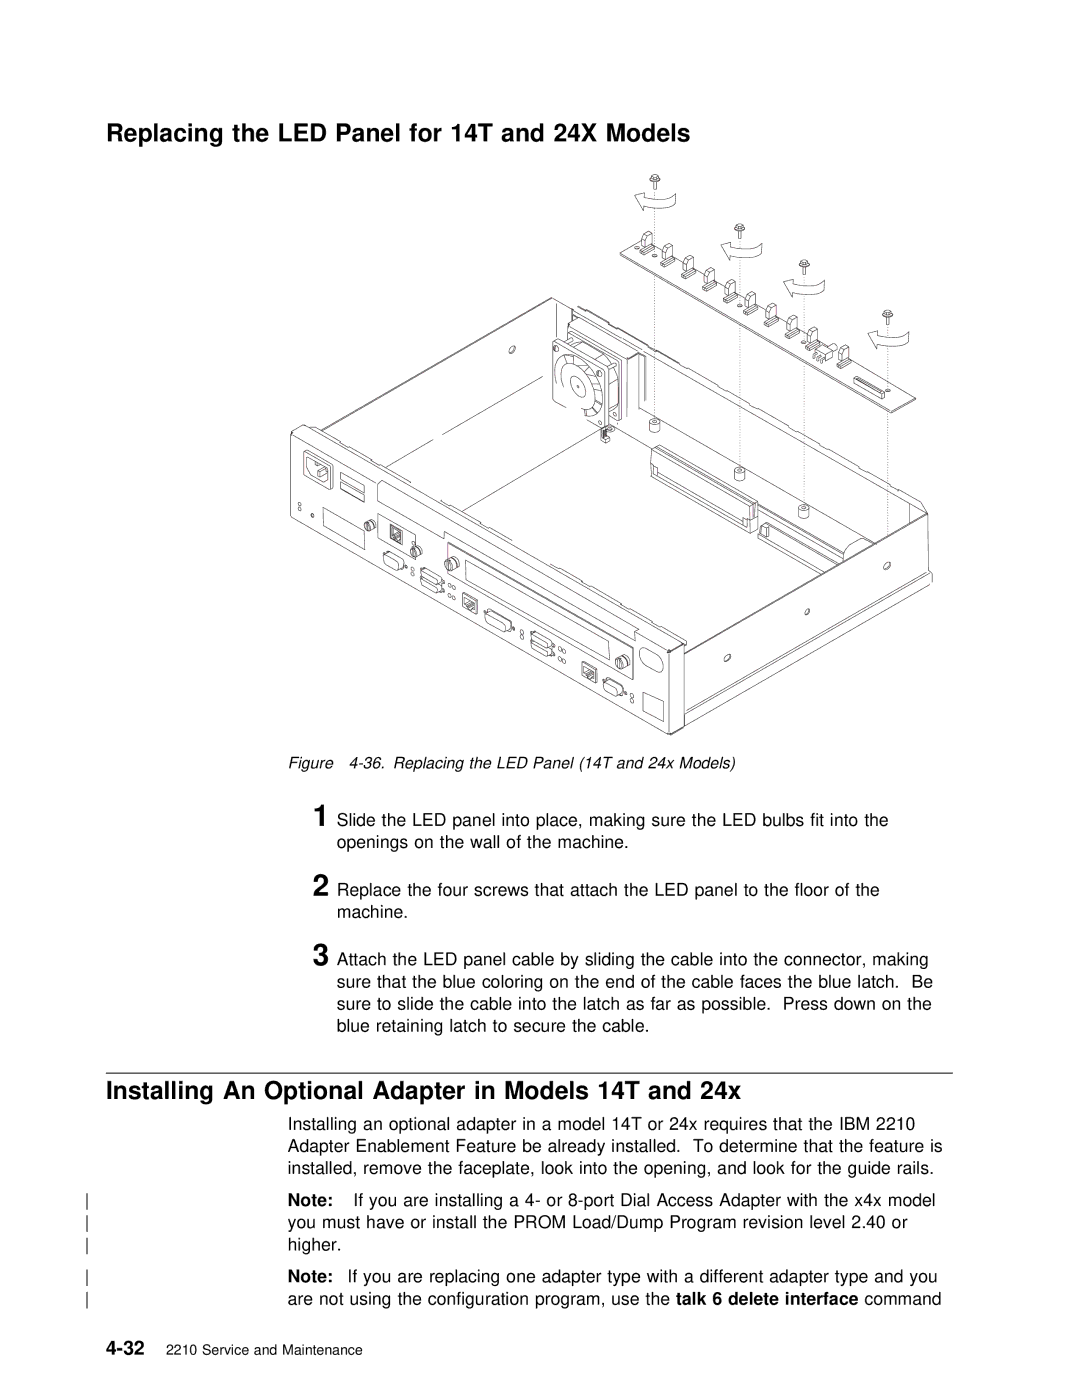
Replacing the LED Panel for 14T and 24X Models
Figure 4-36. Replacing the LED Panel (14T and 24x Models)
1Slide the LED panel into place, making sure the LED bulbs fit into openings on the wall of the machine.
2 | Replace the four screws that | attach | the | LED panel to the floor | |||||||
| machine. |
|
|
|
|
|
|
|
|
| |
3 | Attach | the | LED | panel | cable | by | sliding | the | cable | into | the connector |
| sure | that | the | blue | coloring | on | the end of | the | cable | faces the | |
sure | to slide | the | cable into | the | latch as far as possible. Pres |
blue | retaining | latch | to secure | the | cable. |
Installing | An Optional | Adapter in | Models | 14T | and |
| 24x |
|
|
|
|
| |||
|
| Installing an optional adapter in | a model 14T or 24x requires that th | ||||||||||||
|
| Adapter Enablement Feature be already installed. To determine that the | |||||||||||||
|
| installed, | remove | the | faceplate, | look into | the | opening, and | look for the | ||||||
| Note: | If | you | are | installing | a | 4- or | Dial | Access | Adapter | with | ||||
| you must | have | or | install the | PROM Load/Dump Program | revision | level | 2.40 o | |||||||
| higher. |
|
|
|
|
|
|
|
|
|
|
|
| ||
| Note: | If | you are | replacing | one | adapter type with a different adapt | |||||||||
| are not using the configuration | program,talk 6 | usedelete | theinterface command |
| ||||||||||
2210 | Service and | Maintenance |
|
|
|
|
|
|
|
|
|
|
| ||
