Uploading VR-716 Settings
1. Click  z
z 
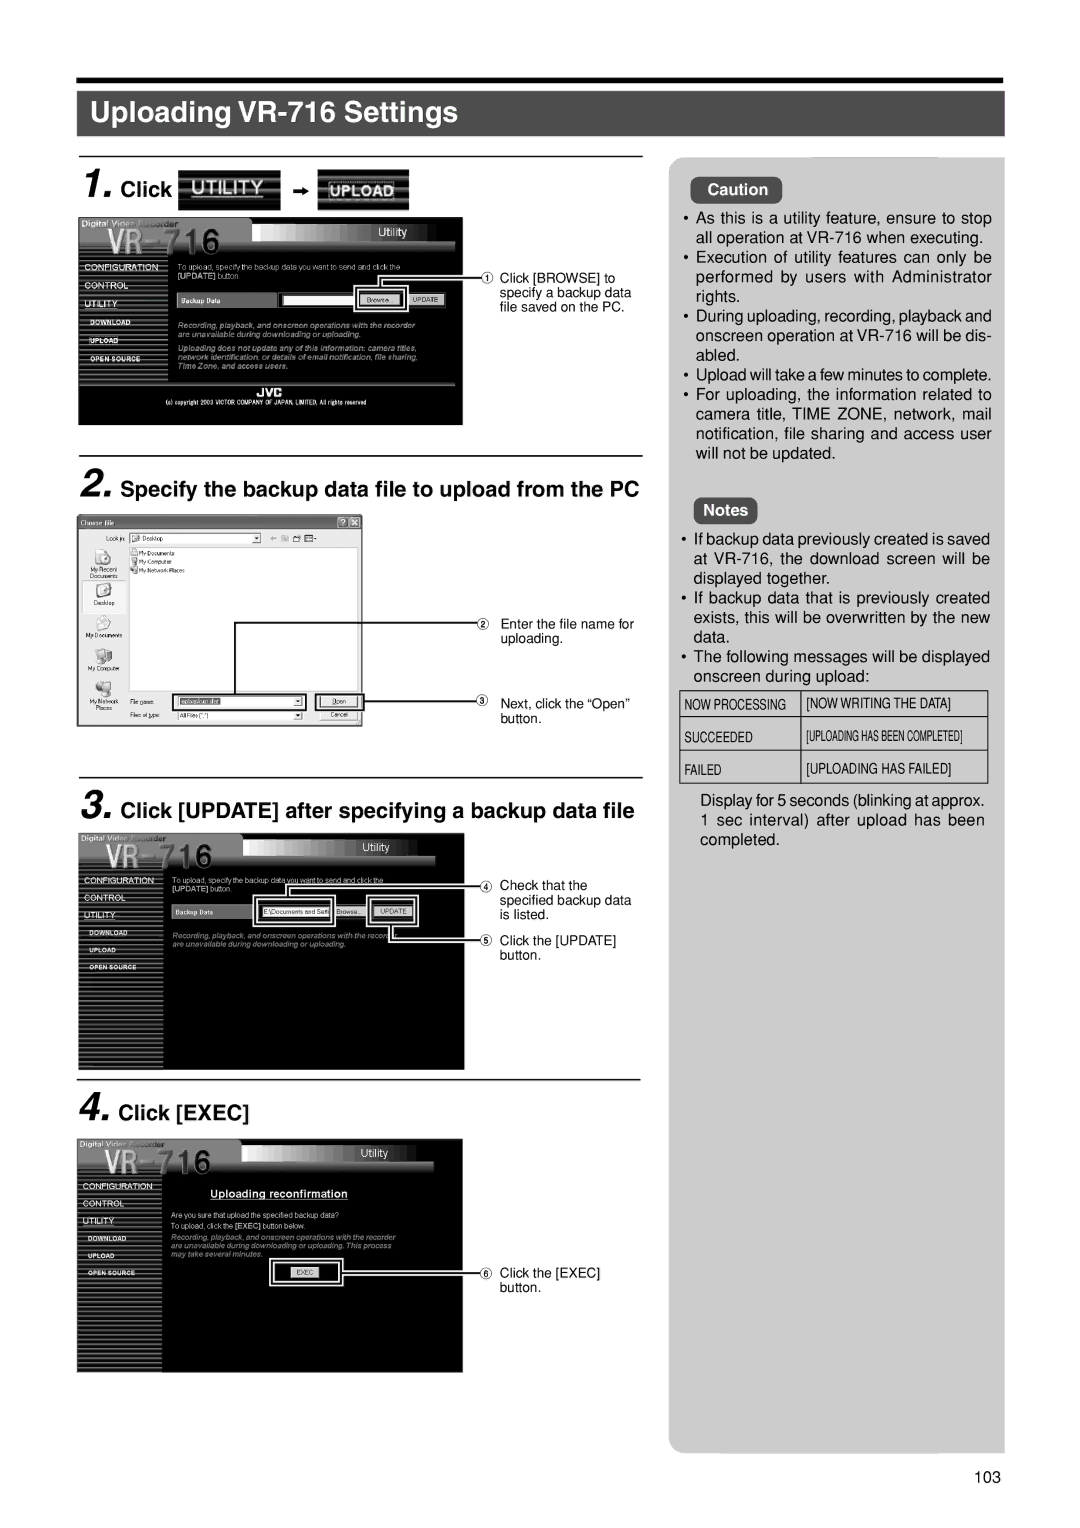
1 Click [BROWSE] to specify a backup data file saved on the PC.
2. Specify the backup data file to upload from the PC
2 Enter the file name for uploading.
![]() 3 Next, click the “Open” button.
3 Next, click the “Open” button.
3. Click [UPDATE] after specifying a backup data file
4 Check that the specified backup data is listed.
![]() 5 Click the [UPDATE] button.
5 Click the [UPDATE] button.
4. Click [EXEC]
6 Click the [EXEC] button.
Caution
•As this is a utility feature, ensure to stop all operation at
•Execution of utility features can only be performed by users with Administrator rights.
•During uploading, recording, playback and onscreen operation at
•Upload will take a few minutes to complete.
•For uploading, the information related to camera title, TIME ZONE, network, mail notification, file sharing and access user will not be updated.
Notes
•If backup data previously created is saved at
•If backup data that is previously created exists, this will be overwritten by the new data.
•The following messages will be displayed onscreen during upload:
NOW PROCESSING | [NOW WRITING THE DATA] |
|
|
SUCCEEDED | [UPLOADING HAS BEEN COMPLETED] |
|
|
FAILED | [UPLOADING HAS FAILED] |
|
|
Display for 5 seconds (blinking at approx. 1 sec interval) after upload has been completed.
103
