Useful Features (continued)
Hard Disk Maintenance
Scanning Hard Disk Data (“MANUAL SCAN DISK”)
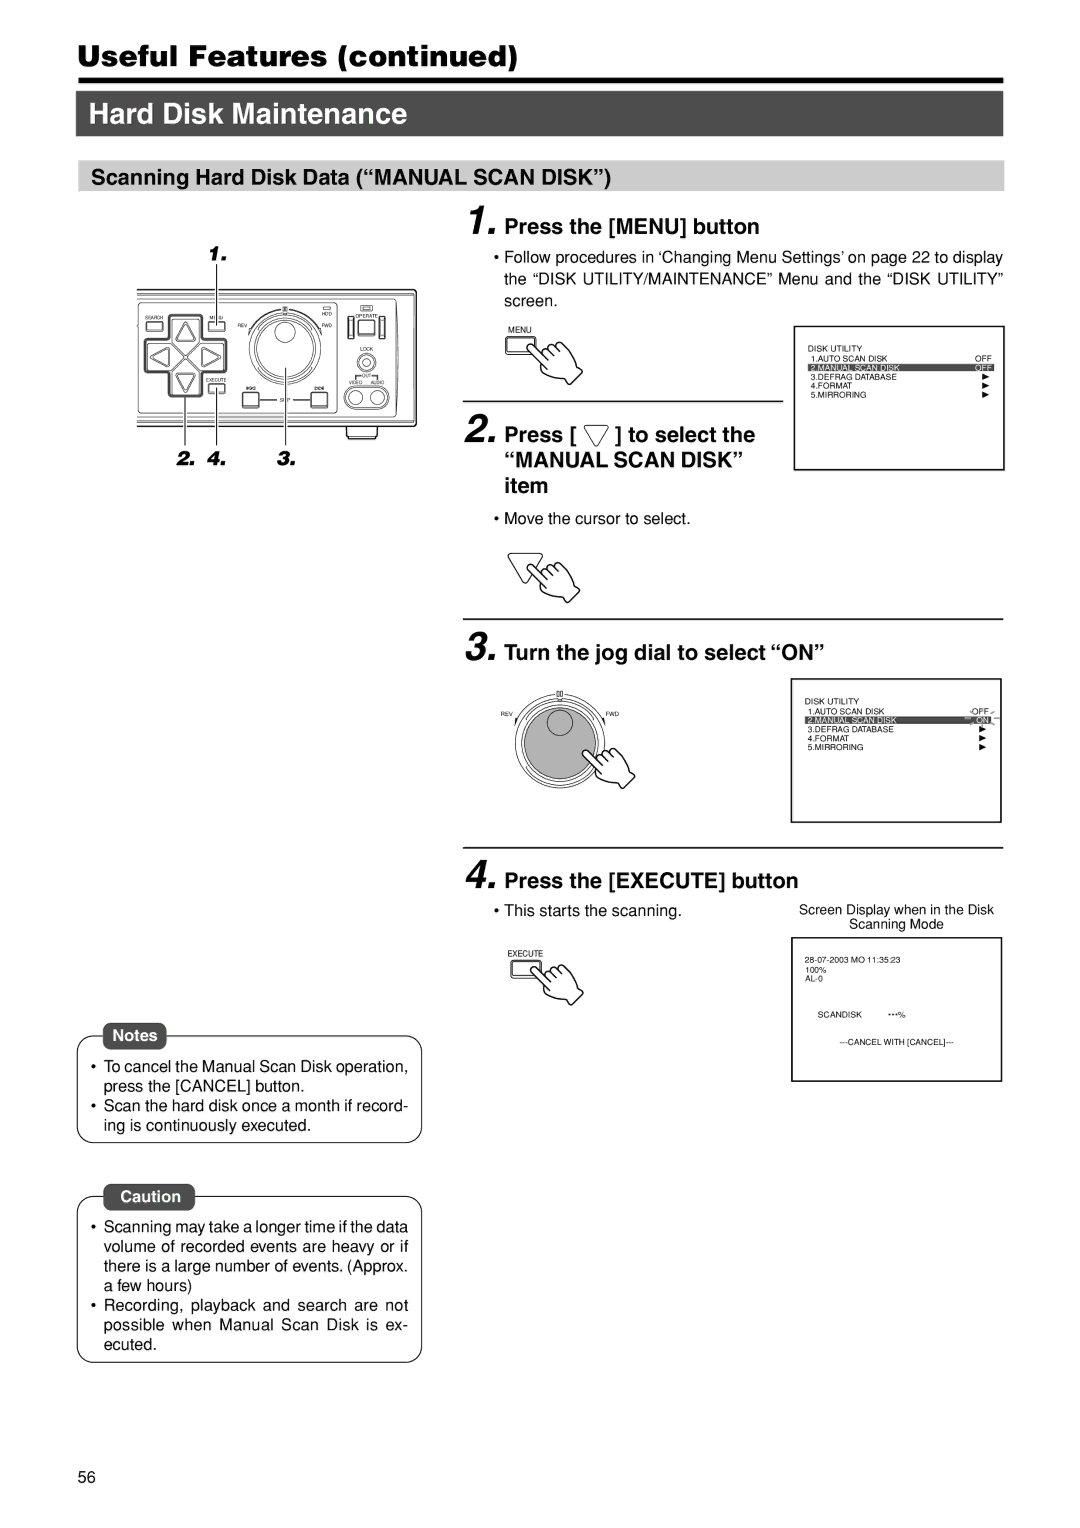
1. Press the [MENU] button
1.
•Follow procedures in ‘Changing Menu Settings’ on page 22 to display the “DISK UTILITY/MAINTENANCE” Menu and the “DISK UTILITY” screen.
SEARCH | MENU | HDD | OPERATE |
|
| ||
| REV | FWD |
|
|
|
| LOCK |
| EXECUTE |
| OUT |
|
| VIDEO AUDIO | |
|
|
| |
|
| SKIP |
|
2. 4. 3.
MENU
2. Press [  ] to select the
“MANUAL SCAN DISK” item
DISK UTILITY |
|
1.AUTO SCAN DISK | OFF |
2.MANUAL SCAN DISK | OFF |
3.DEFRAG DATABASE |
|
4.FORMAT |
|
5.MIRRORING |
|
•Move the cursor to select.
3.Turn the jog dial to select “ON”
REV | FWD |
DISK UTILITY |
|
1.AUTO SCAN DISK | OFF |
2.MANUAL SCAN DISK | ON |
3.DEFRAG DATABASE |
|
4.FORMAT |
|
5.MIRRORING |
|
Notes
•To cancel the Manual Scan Disk operation, press the [CANCEL] button.
•Scan the hard disk once a month if record- ing is continuously executed.
4. Press the [EXECUTE] button
• This starts the scanning. | Screen Display when in the Disk | |
| Scanning Mode | |
EXECUTE | ||
| ||
| 100% |
|
|
| |
| SCANDISK | ***% |
| ||
Caution
•Scanning may take a longer time if the data volume of recorded events are heavy or if there is a large number of events. (Approx. a few hours)
•Recording, playback and search are not possible when Manual Scan Disk is ex- ecuted.
56
