3 Managing applications and information
Using ActiveSyncTM
•Control when synchronisation occurs by selecting a synchronisation mode.
For example, you can synchronise continually while connected to your computer or only when you choose the synchronise command.
•Select which information types are synchronised and control how much data is synchronised.
For example, you can choose how many weeks of past appointments you want synchronised.
Before you begin synchronisation, install ActiveSyncTM on your computer from the ET180 Pocket PC Phone Installation CD.
NOTE: ActiveSyncTM is already installed on your device.
For instructions on installing ActiveSyncTM, go to page x or you could refer to the ET180 Pocket PC Phone Quick Start flyer included in the package contents.
For detailed information about using ActiveSyncTM on your computer, start ActiveSyncTM on your computer, and then see ActiveSyncTM Help.
To open ActiveSyncTM on your device
•Tap  , and then tap ActiveSync
  . TM
. TM
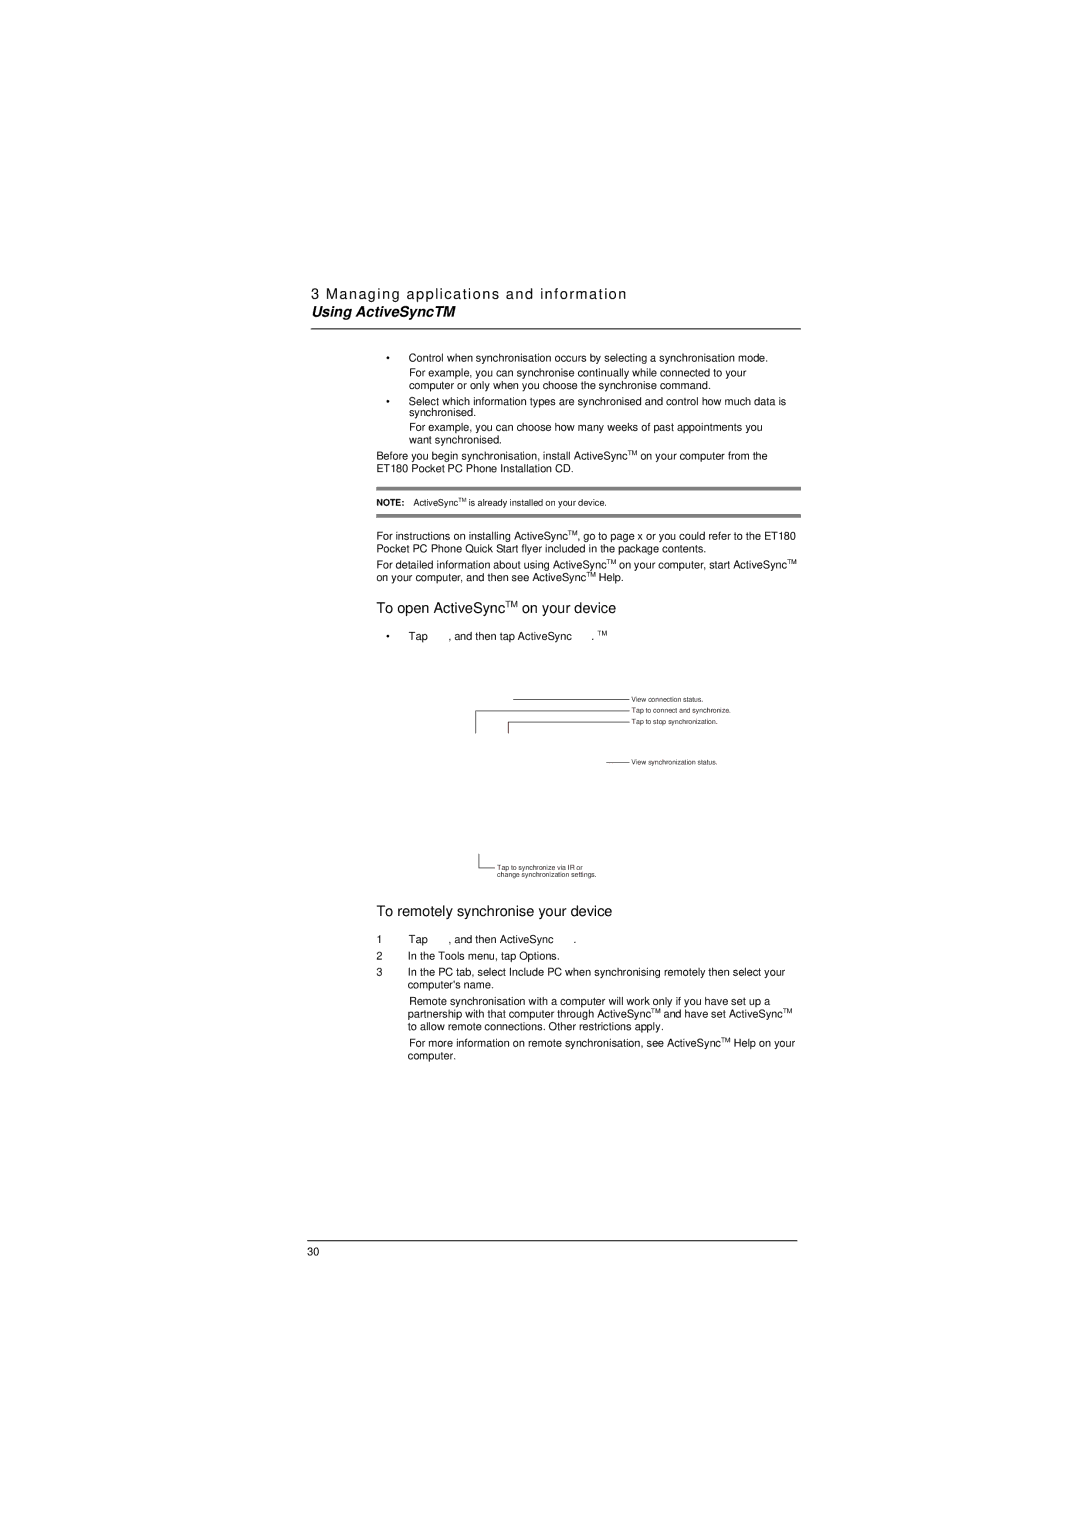
View connection status.
Tap to connect and synchronize.
Tap to stop synchronization.
View synchronization status.
![]() Tap to synchronize via IR or change synchronization settings.
Tap to synchronize via IR or change synchronization settings.
To remotely synchronise your device
1Tap ![]() , and then ActiveSync
, and then ActiveSync ![]() .
.
2In the Tools menu, tap Options.
3In the PC tab, select Include PC when synchronising remotely then select your computer's name.
Remote synchronisation with a computer will work only if you have set up a partnership with that computer through ActiveSyncTM and have set ActiveSyncTM to allow remote connections. Other restrictions apply.
For more information on remote synchronisation, see ActiveSyncTM Help on your computer.
30