Polycom RMX 1500/2000/4000 Getting Started Guide
with an appropriate antioxidant compound before crimp connections are made. Tinned,
6Replace the transparent plastic caps on the terminal block.
7Turn ON the Main that supplies power to the RMX.
8Turn ON the circuit breaker on each of the DC Power Rail Modules.
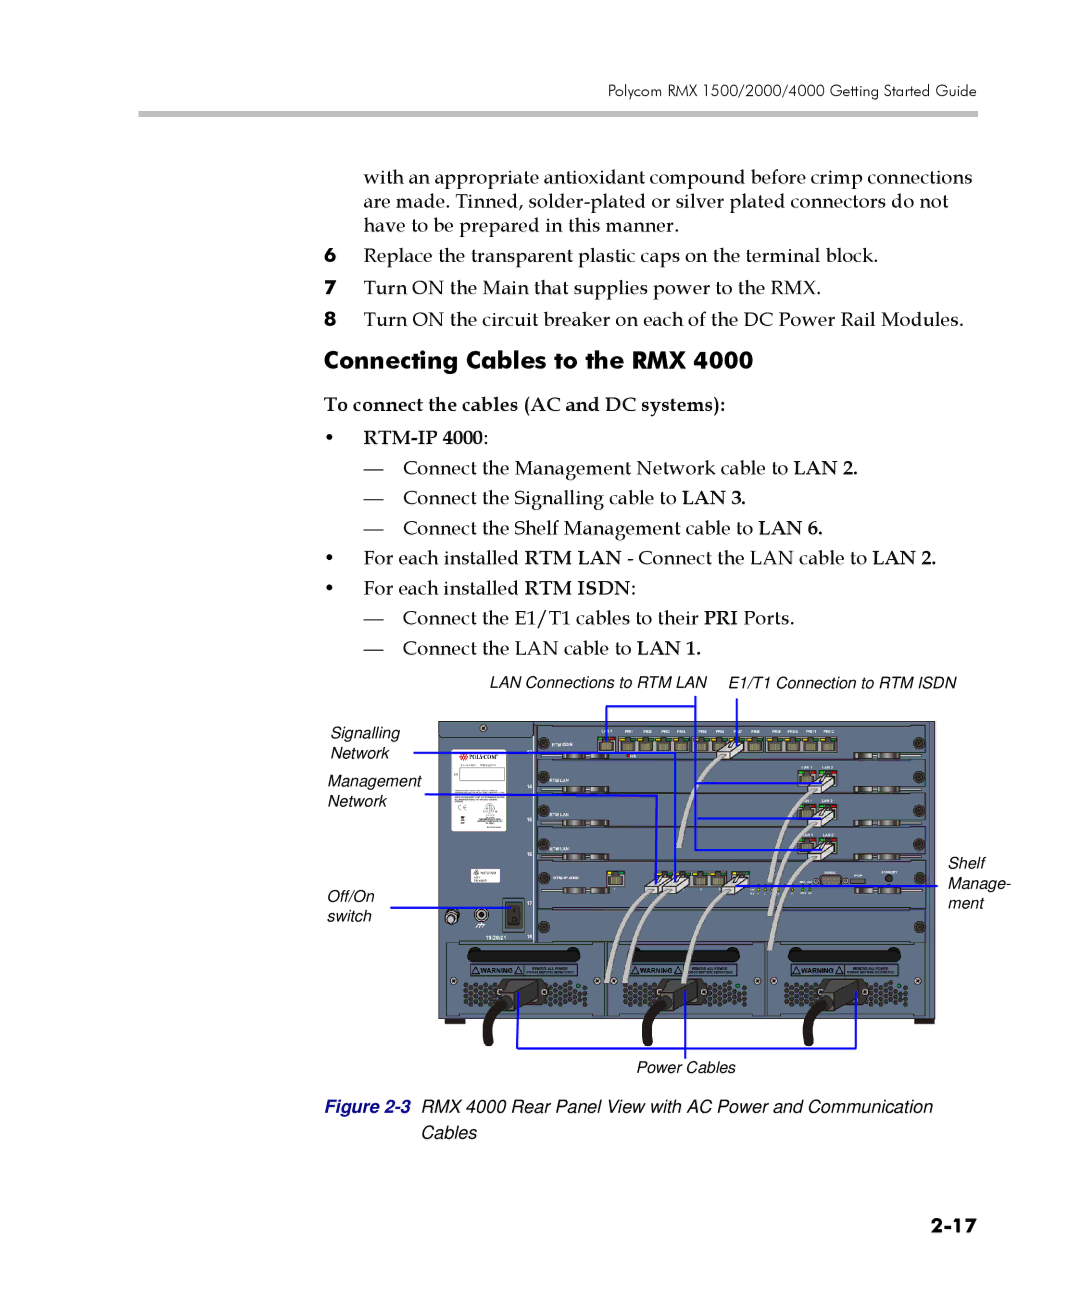
Connecting Cables to the RMX 4000
To connect the cables (AC and DC systems):
•RTM-IP 4000:
—Connect the Management Network cable to LAN 2.
—Connect the Signalling cable to LAN 3.
—Connect the Shelf Management cable to LAN 6.
•For each installed RTM LAN - Connect the LAN cable to LAN 2.
•For each installed RTM ISDN:
—Connect the E1/T1 cables to their PRI Ports.
—Connect the LAN cable to LAN 1.
LAN Connections to RTM LAN E1/T1 Connection to RTM ISDN
Signalling
Network
Management
Network
Off/On switch
Shelf Manage- ment
Power Cables
