Loading Ribbon
The standard ribbon for
To load the ribbon, lift the printer cover and perform the following steps.
NOTE: The power does not need to be on when you load the ribbon. If it is, make sure the RDY light is flashing.
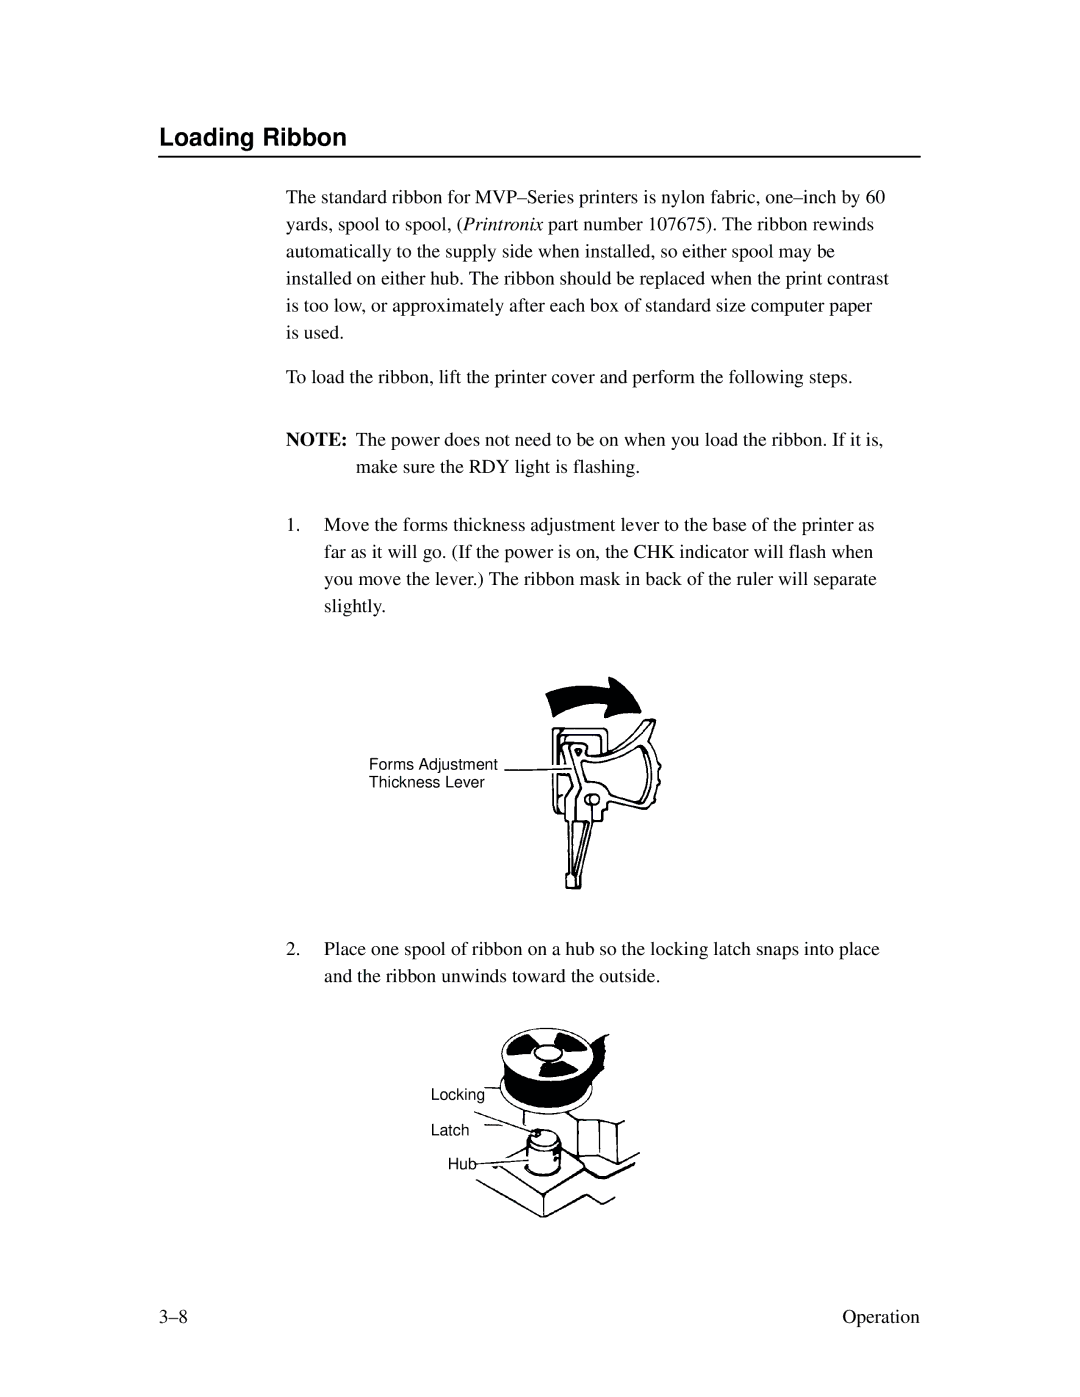
1.Move the forms thickness adjustment lever to the base of the printer as far as it will go. (If the power is on, the CHK indicator will flash when you move the lever.) The ribbon mask in back of the ruler will separate slightly.
Forms Adjustment
Thickness Lever
2.Place one spool of ribbon on a hub so the locking latch snaps into place and the ribbon unwinds toward the outside.
Locking
Latch
Hub
Operation |