Installation and Initialization |
|
Initialization |
|
|
|
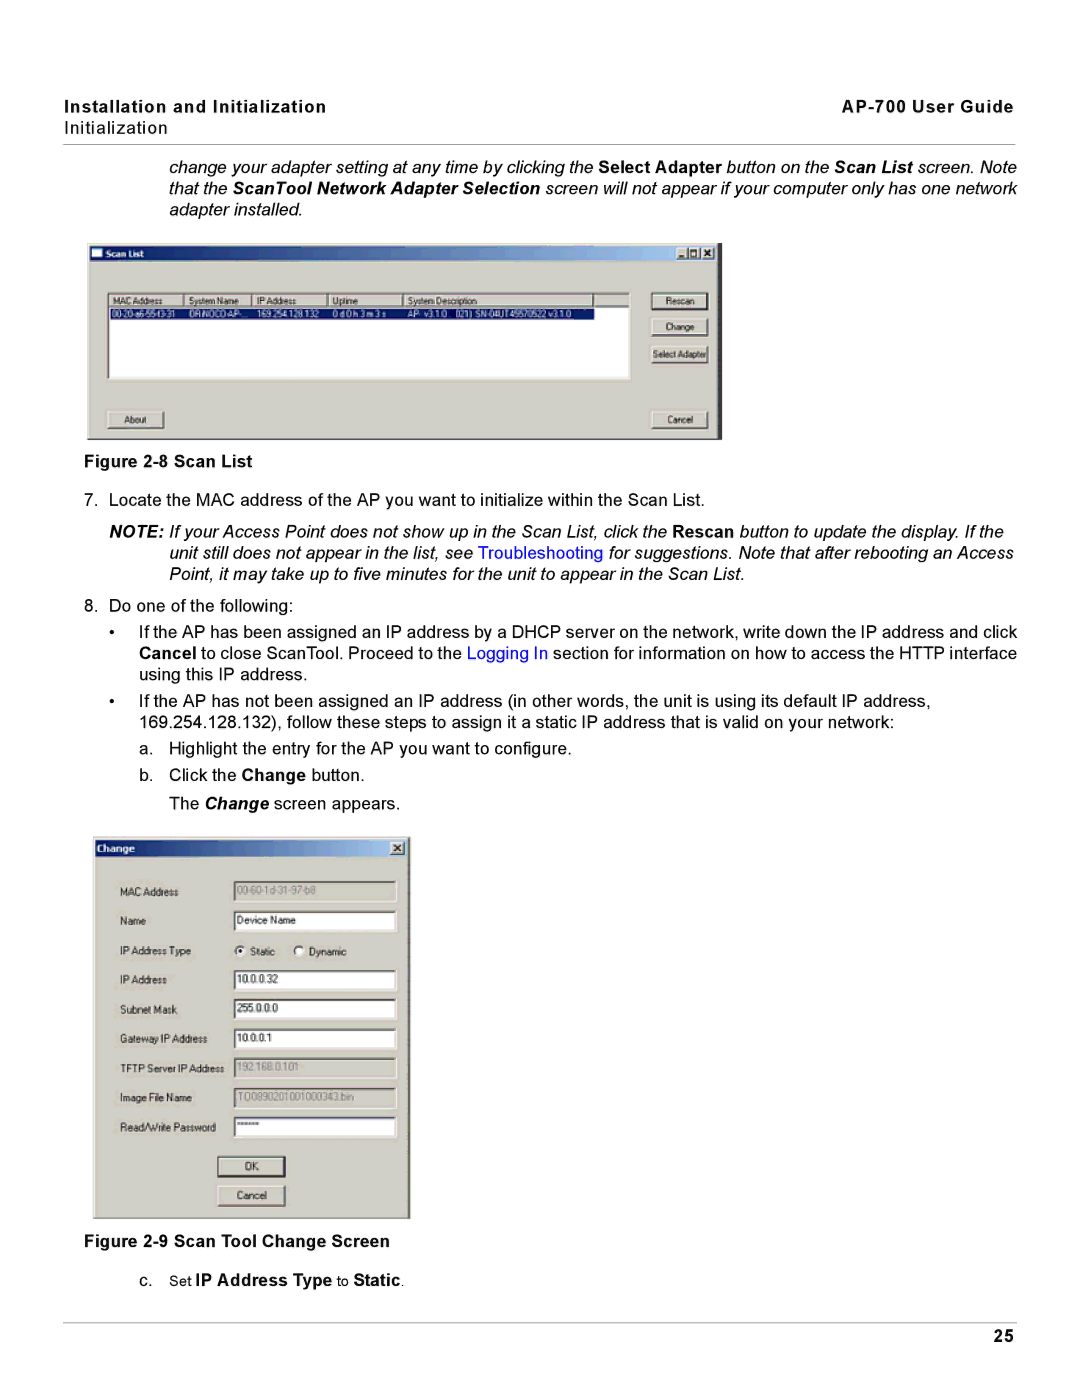
change your adapter setting at any time by clicking the Select Adapter button on the Scan List screen. Note that the ScanTool Network Adapter Selection screen will not appear if your computer only has one network adapter installed.
Figure 2-8 Scan List
7.Locate the MAC address of the AP you want to initialize within the Scan List.
NOTE: If your Access Point does not show up in the Scan List, click the Rescan button to update the display. If the unit still does not appear in the list, see Troubleshooting for suggestions. Note that after rebooting an Access Point, it may take up to five minutes for the unit to appear in the Scan List.
8.Do one of the following:
•If the AP has been assigned an IP address by a DHCP server on the network, write down the IP address and click Cancel to close ScanTool. Proceed to the Logging In section for information on how to access the HTTP interface using this IP address.
•If the AP has not been assigned an IP address (in other words, the unit is using its default IP address, 169.254.128.132), follow these steps to assign it a static IP address that is valid on your network:
a.Highlight the entry for the AP you want to configure.
b.Click the Change button. The Change screen appears.
Figure 2-9 Scan Tool Change Screen
c.Set IP Address Type to Static.
25