SC-D383, SC-D385 specifications
The Samsung SC-D385 and SC-D383 are compact and user-friendly digital camcorders that exemplify the brand's commitment to innovation and quality in video recording. Designed for amateur filmmakers and everyday users alike, these camcorders pack a range of features aimed at delivering high-quality video in a portable format.One of the most notable features of both models is their advanced image sensor, which allows for clear and vibrant video capture even in low-light conditions. This is essential for capturing those important moments that may occur in varying lighting situations. The SC-D385 and SC-D383 are equipped with a powerful optical zoom, enabling users to get closer to their subjects without sacrificing image quality. The optical zoom range allows for versatile shooting, making them ideal for both wide-angle shots and detailed close-ups.
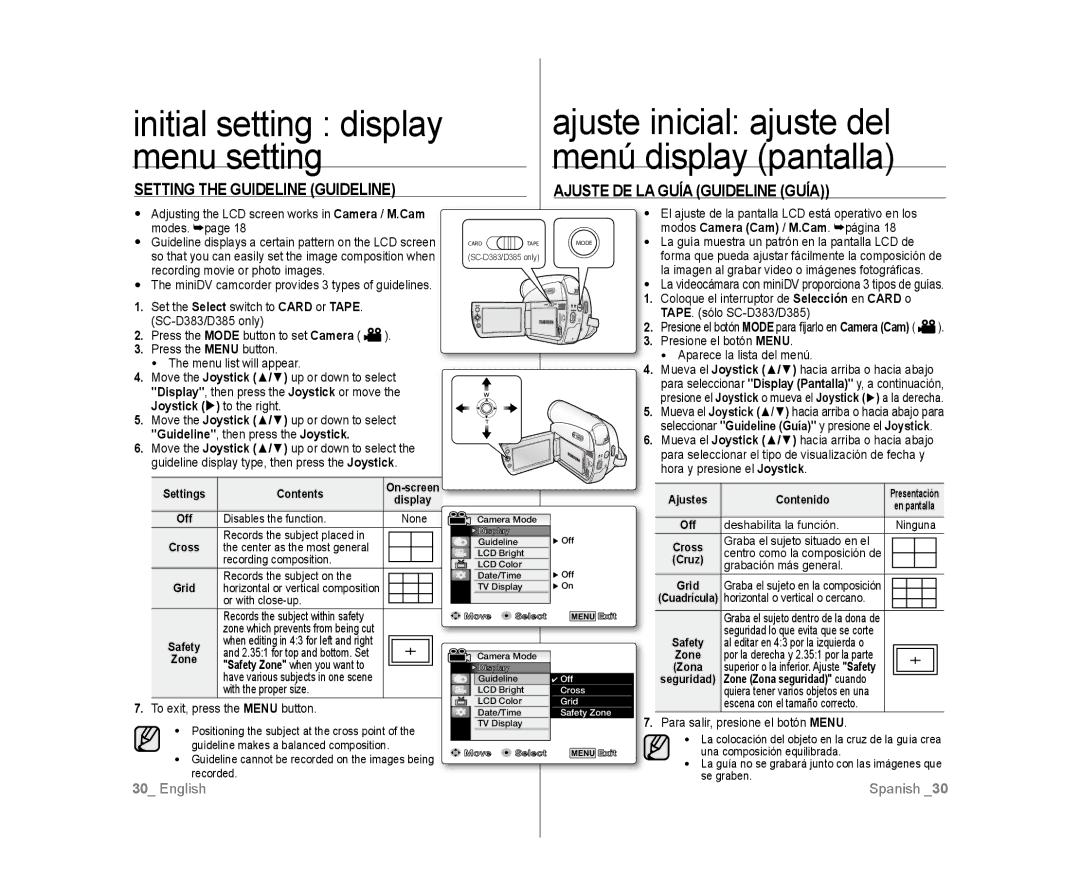
An intuitive user interface is a hallmark of these camcorders. The LCD screen is easy to navigate, allowing for quick adjustments to settings. Additionally, the user-friendly design includes simple buttons that facilitate smooth operation, ensuring that both novice and experienced videographers can easily capture their desired shots.
Both models support various recording formats, providing flexibility for editing and sharing. The inclusion of digital image stabilization technology greatly enhances the quality of the footage by reducing motion blur caused by hand movement during recording. This feature is particularly valuable for users who enjoy recording on the go.
The SC-D385 and SC-D383 also come with a variety of creative features, such as multiple scene modes, which allow users to tailor their shooting experience to specific environments or subjects, enhancing the overall quality of the video. These scene modes offer automatic adjustments that optimize settings for different scenarios, from vibrant outdoor settings to subdued indoor lighting.
Connectivity options are abundant as well, with USB ports facilitating easy file transfer to computers and other devices. This allows for hassle-free editing and sharing of content on social media platforms or through personal networks.
Battery life is another critical aspect, with both models providing substantial recording time, ensuring that users can capture continuous footage without the worry of running out of power at pivotal moments.
In summary, the Samsung SC-D385 and SC-D383 are standout choices for anyone looking to shoot high-quality video with ease. With their impressive features, user-friendly design, and versatile capabilities, these camcorders represent an excellent option for both casual users and budding filmmakers.

