CHAPTER 10 TROUBLESHOOTING
8)Enter ‘208’ using the keypad, and press the start button.
•The display indicates ‘208’.
9)Press the Start key.
•The display indicates
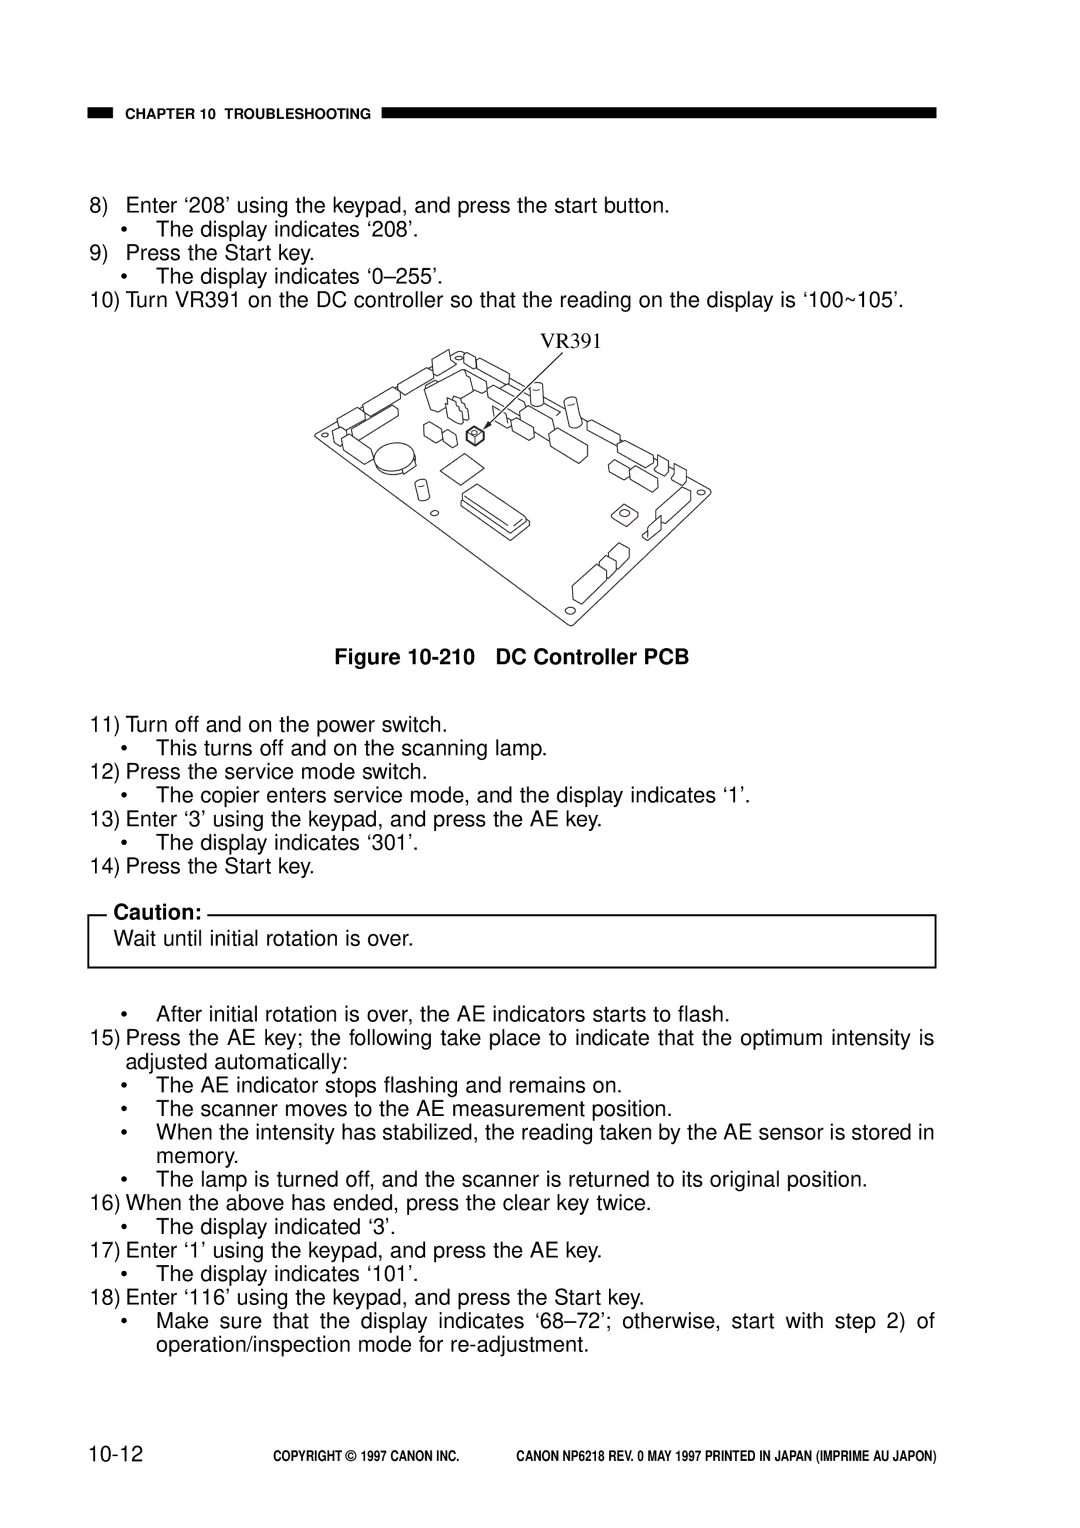
10)Turn VR391 on the DC controller so that the reading on the display is ‘100~105’.
VR391
Figure 10-210 DC Controller PCB
11)Turn off and on the power switch.
•This turns off and on the scanning lamp.
12)Press the service mode switch.
•The copier enters service mode, and the display indicates ‘1’.
13)Enter ‘3’ using the keypad, and press the AE key.
•The display indicates ‘301’.
14)Press the Start key.
Caution:
Wait until initial rotation is over.
•After initial rotation is over, the AE indicators starts to flash.
15)Press the AE key; the following take place to indicate that the optimum intensity is adjusted automatically:
•The AE indicator stops flashing and remains on.
•The scanner moves to the AE measurement position.
•When the intensity has stabilized, the reading taken by the AE sensor is stored in memory.
•The lamp is turned off, and the scanner is returned to its original position.
16)When the above has ended, press the clear key twice.
•The display indicated ‘3’.
17)Enter ‘1’ using the keypad, and press the AE key.
•The display indicates ‘101’.
18)Enter ‘116’ using the keypad, and press the Start key.
•Make sure that the display indicates
| COPYRIGHT © 1997 CANON INC. | CANON NP6218 REV. 0 MAY 1997 PRINTED IN JAPAN (IMPRIME AU JAPON) |
