CHAPTER 2: Installation

The XAP 400 is designed for easy installation and setup. All connections are made through rear-panel connectors. This chapter provides instructions on installing the units and making initial connections, creating an expansion bus (E-bus) network, assigning device ID numbers, selecting the mixer mode, and using the LCD menu.

Hardware Setup

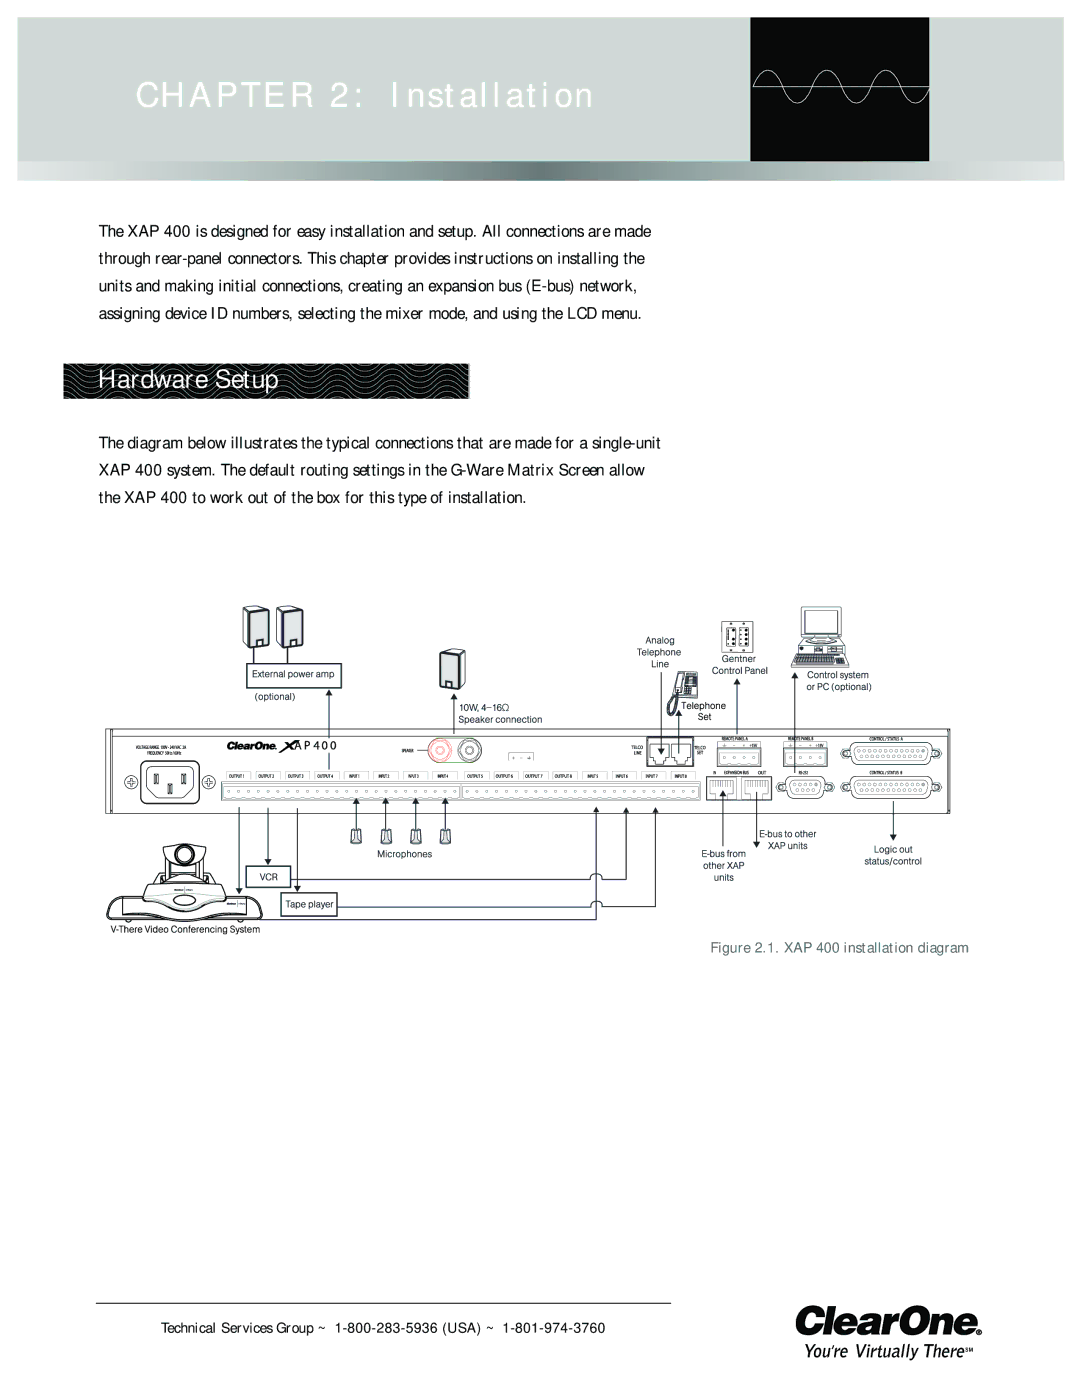
The diagram below illustrates the typical connections that are made for a single-unit XAP 400 system. The default routing settings in the G-Ware Matrix Screen allow the XAP 400 to work out of the box for this type of installation.

Figure 2.1. XAP 400 installation diagram

Technical Services Group ~ 1-800-283-5936 (USA) ~ 1-801-974-3760
Page 16
Image 16
ClearOne comm XAP 400 operation manual Installation, Hardware Setup