74
Figure 5.2. Signal Generator Button
The | Signal | Generator |
✍ window can also be opened | ||
by | selecting | Signal |
Generator from the Tools menu.
Operation~ Utilities
Utilities
Signal Generator
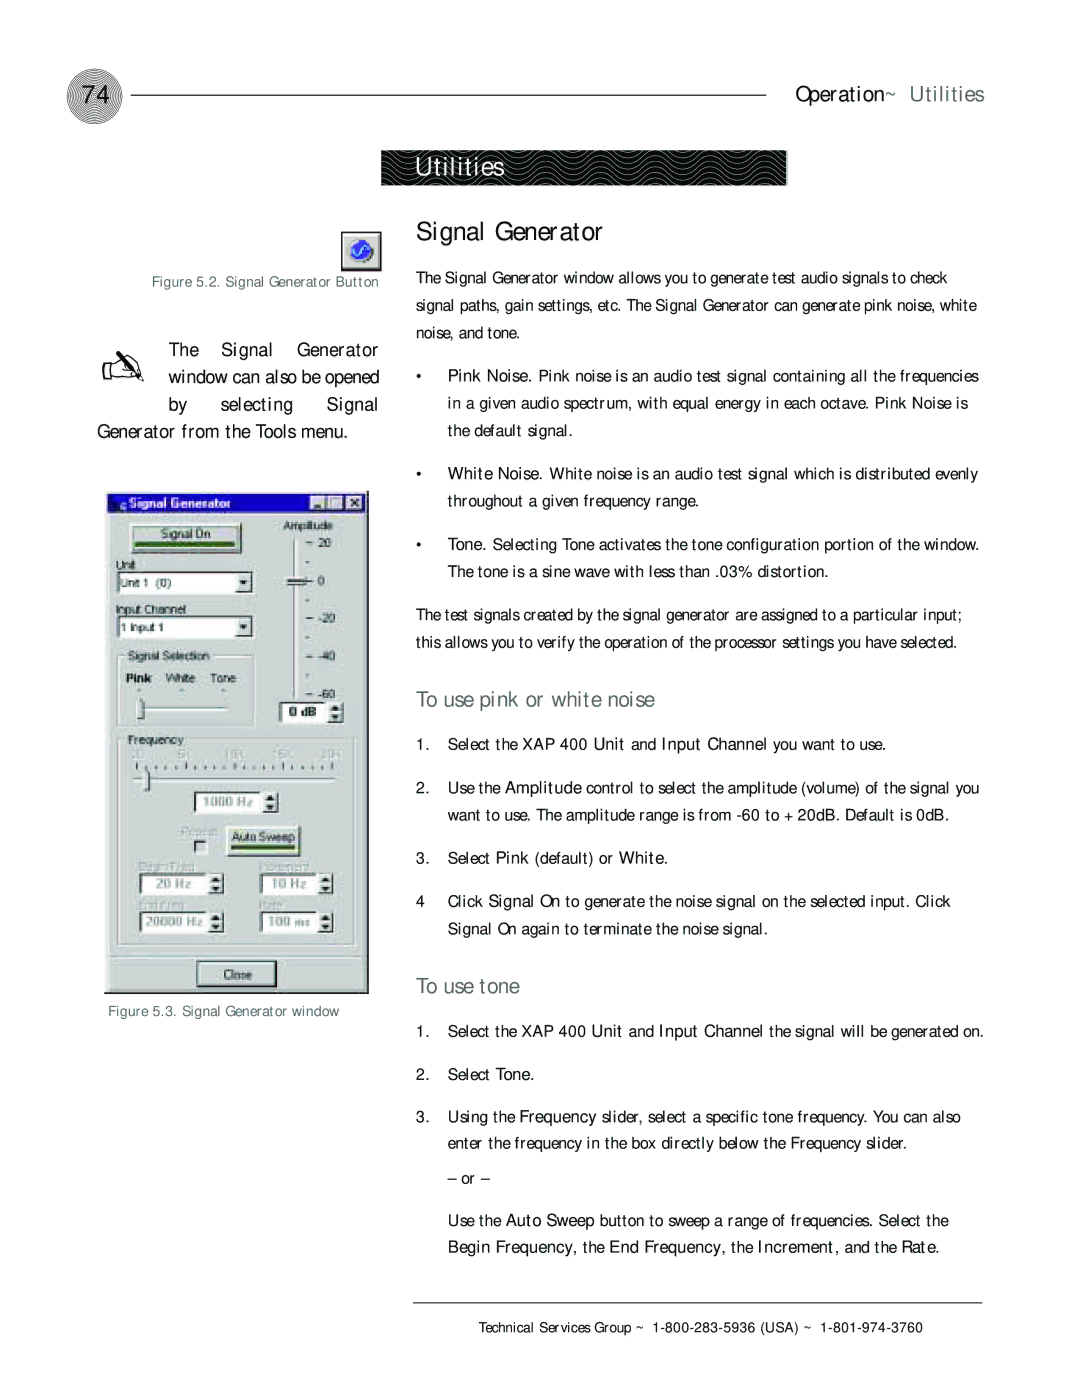
The Signal Generator window allows you to generate test audio signals to check signal paths, gain settings, etc. The Signal Generator can generate pink noise, white noise, and tone.
•Pink Noise. Pink noise is an audio test signal containing all the frequencies in a given audio spectrum, with equal energy in each octave. Pink Noise is the default signal.
•White Noise. White noise is an audio test signal which is distributed evenly throughout a given frequency range.
•Tone. Selecting Tone activates the tone configuration portion of the window. The tone is a sine wave with less than .03% distortion.
The test signals created by the signal generator are assigned to a particular input; this allows you to verify the operation of the processor settings you have selected.
To use pink or white noise
1.Select the XAP 400 Unit and Input Channel you want to use.
2.Use the Amplitude control to select the amplitude (volume) of the signal you want to use. The amplitude range is from
3.Select Pink (default) or White.
4Click Signal On to generate the noise signal on the selected input. Click Signal On again to terminate the noise signal.
To use tone
Figure 5.3. Signal Generator window
1.Select the XAP 400 Unit and Input Channel the signal will be generated on.
2.Select Tone.
3.Using the Frequency slider, select a specific tone frequency. You can also enter the frequency in the box directly below the Frequency slider.
– or –
Use the Auto Sweep button to sweep a range of frequencies. Select the
Begin Frequency, the End Frequency, the Increment, and the Rate.
