Manuals
/
HP
/
Computer Equipment
/
All in One Printer
HP
C410e, C410c, C410a, C410d, C410b
manual
Japan safety statement 257
Models:
C410c
C410d
C410b
C410a
C410e
1
259
264
264
Download
264 pages
51.2 Kb
256
257
258
259
260
261
262
263
Troubleshooting
Specs
Install
Error codes
Material safety data sheets
Set the default print settings
Symbols/Numerics
Wired Ethernet network
Warranty
Solve a problem
Page 259
Image 259
Technical information
Japan safety statement
257
Page 258
Page 260
Page 259
Image 259
Page 258
Page 260
Contents
HP Photosmart Premium Fax C410 series
Page
Contents
Technical information
HP Photosmart Premium Fax C410 series Help
HP Photosmart Premium Fax C410 series Help
Chapter
How do I?
How do I?
WiFi Protected Setup WPS
Finish setting up the HP Photosmart
Add the HP Photosmart to a network
Use the PIN method
Wireless with a router infrastructure network
To connect the HP Photosmart with the Wireless Setup Wizard
Highlight Wireless Setup Wizard and press OK
Wireless without a router ad hoc connection
Finish setting up the HP Photosmart
Finish setting up the HP Photosmart
Finish setting up the HP Photosmart
To connect the product to the network
Wired Ethernet network
Install the software for a network connection
Tips for setting up and using a networked printer
Countries/regions with a parallel-type phone system
Set up the HP Photosmart for faxing
Choose the correct fax setup for your home or office
Select your fax setup case
Not applicable
Case a Separate fax line no voice calls received
To set up the HP Photosmart with a separate fax line
To set up the HP Photosmart with DSL
Case B Set up the HP Photosmart with DSL
Finish setting up the HP Photosmart
To set up the HP Photosmart with a distinctive ring service
Case D Fax with a distinctive ring service on the same line
Case E Shared voice/fax line
To set up the HP Photosmart with a shared voice/fax line
Case F Shared voice/fax line with voice mail
To set up the HP Photosmart with voice mail
Case H Shared voice/fax line with computer dial-up modem
To set up the HP Photosmart with a computer dial-up modem
Back view of the HP Photosmart
Finish setting up the HP Photosmart
Case I Shared voice/fax line with answering machine
Finish setting up the HP Photosmart
10 Example of a parallel splitter
Finish setting up the HP Photosmart
12 Example of a parallel splitter
13 Back view of the HP Photosmart
Additional fax setup information
Printer parts
Get to know the HP Photosmart
Front view of the printer
Top and rear views of the printer
Printer parts
Control panel features
Control panel features
Icon Purpose
Display icons
Manage HP Apps
HP Apps Manager
HP Everyday Photo Paper
Paper basics
Recommended papers for photo printing
HP Advanced Photo Paper
Recommended papers for printing
ColorLok
Load media
HP Iron-On Transfers
HP Premium Inkjet Transparency Film
Paper basics
Load A4 or 8.5 x 11 inch paper a. Raise output tray
Load envelopes
Information on paper
Paper basics
Print documents
Print
To print from a software application
Print photos saved on your computer
Print photos
To print a photo on photo paper
Off applies no HP Real Life Technologies to the image
Print photos from a memory card or USB storage device
Print single photo on small-size paper a. Load paper
Insert memory
Load full-size paper in the main input tray Insert memory
Press Print Photos
Print multiple photos on full-size paper
Print album pages a. Load paper
Print a creative project
Print panoramic photos a. Load paper
Insert memory
Press Print Photos Print wallet photos a. Load paper
Print passport photos a. Load paper
Highlight Scan and Reprint and press Print Photos
Reprint photos a. Load original
To print forms from the control panel
Print a Web
Print forms and templates Quick Forms
To print a Web
To view the print resolution
Print using the maximum dpi
View the print resolution
To print in Maximum dpi mode
To create a printing shortcut
Use printing shortcuts
Click the Printing Shortcuts tab
To delete a printing shortcut
Set the default print settings
To change the default print settings
Edit photos before printing
Add frame
Adjust brightness
Crop photo
Photo fix
To connect to the Internet
Get started using HP ePrint
Print from anywhere
Color effect
Print a document from anywhere
Learn more about using HP ePrint
To print a document from anywhere
To print using HP Apps
Get started using HP Apps
Print a Web page using HP Apps
Learn more about using HP Apps
Print
Scan to a computer
Scan
Single page scan a. Load original
Press Start Scan
Scan to a memory card or USB storage device
Multiple page scan a. Load original
Scan to a memory card or USB storage device
Multiple page scan
Scan
Related topics
Copy text or mixed documents
Copy
Sided original to 1-sided copy a. Load paper
Copy
Highlight 2-Sided Original 2-Sided Copy and press OK
Highlight 1-Sided Original 2-Sided Copy and press OK
Press Start Copy
Highlight 2-Sided Original 1-Sided Copy and press OK
To set the number of copies from the control panel
Change the copy settings
To set the paper type for copies
To change the copy quality from the control panel
To adjust the copy contrast from the control panel
To preview your copy from the control panel
Preview a copy before printing
Copy
Send a fax
Fax
Fax photo
Fax 2-sided document a. Load original
Fax 1-sided document a. Load original
Alternate methods of faxing
Initiate a fax from your phone
To send a fax manually from a connected phone
Press Start Fax
Send a fax to multiple recipients
To schedule a fax from the control panel
Set up and use speed dial
To cancel a scheduled fax
Schedule a fax to send later
Receive a fax
To send a fax using speed dials from the control panel
To create speed dial entries from the control panel
To receive a fax manually
94 Fax
Save photos to your computer
Save photos
To save photos
To back up photos
Back up photos from a memory card to a USB storage device
Remove memory View the animation for this topic
Save photos
Check the estimated ink levels
Work with cartridges
To check the ink levels from the control panel
To replace the cartridges
Order ink supplies
Replace the cartridges
To check the ink levels from the HP Photosmart Software
Replace the cartridges 101
Cartridge warranty information
To print a print quality report
Print and evaluate a print quality report
To evaluate the print quality report
Color bars expected result
Sample text area expected result
Sample text area streaks or smears
Support process
Solve a problem
If you have a problem, follow these steps
HP support
Support phone numbers
Phone support period Placing a call
HP support
Product will not turn on
Setup troubleshooting
Additional warranty options
Troubleshooting common setup issues
Solution 2 Reset the product
Solution
Solution 4 Contact HP to replace the power supply
Solution 3 Press the On button more slowly
Solution 5 Contact HP support for service
Solution 1 Press the On button to turn on the product
After setting up the product, it does not print
Solution 2 Set your product as the default printer
Wrong measurements are showing in menus on the display
Solution 5 Load paper in the input tray
To set your language and country/region
Red X appears on the USB connect prompt
Minimum System Checks screen appears
To retry the USB connection
To uninstall the software and reset the product
Received a message that an Unknown Error has occurred
To uninstall the software completely
Click Selective Startup
To run the Disk Cleanup utility
Click the check box next to Do not show this message again
Registration screen does not appear
Uninstall and reinstall the software
More information about the Disk Cleanup utility
To install the software
Improve print quality
To uninstall and reinstall the software
To improve print quality
Settings you can check include
Improve print quality 121
Color bars irregularly streaked or faded bar top bar
Improve print quality 123
To align the printer
To clean the cartridges from the software
Some additional things you can check include
11 Sample text area uneven ink distribution
Solution 1 Load the stack of envelopes correctly
Print troubleshooting
Envelopes print incorrectly
Solution 2 Print a previously saved version of the document
Solution 2 Check the envelope type
Solution 3 Tuck the flaps to avoid paper jams
Solution 1 Reset the product
To print a multiple-page document in reverse order
Solution 1 Check the printer margins
Margins are not printing as expected
Pages in my document came out in the wrong order
Blank page came out while printing
To check your margin settings
Solution 2 Verify the paper size setting
Solution 3 Load the stack of paper correctly
To select a print speed or quality
Solution 2 Load paper in the input tray
Solution 1 Use a lower print quality setting
Product prints slowly
Product does not read the memory card
Memory card troubleshooting
Solution 2 Check the ink levels
Solution 3 Contact HP support
Solution 3 Remove the additional memory card
Solution 1 Insert the memory card properly
Solution 4 Reformat the memory card in your digital camera
Solution 3 Turn on the computer
Solution 1 Install the product software
To install the product software
Solution 2 Turn on the product
Scanned image is blank
Scan troubleshooting
Scanned image has incorrect page layout
Scanned image is incorrectly cropped
Text is incorrect or missing
Solution 2 Make sure that the original is placed correctly
Copy troubleshooting
Nothing happens when I try to copy
Solution 1 Turn on the product
Solve a problem
Parts of the original do not appear or are cut off
Solution 5 Check for a paper jam
Fit to Page is not working as expected
Solution 1 Scan, enlarge, and then print a copy
Printout is blank
Solution 3 Wipe the glass and the back of the document lid
Product is having problems sending and receiving faxes
Fax troubleshooting
To test your fax setup from the control panel
Solution 2 Turn on the product
Fax troubleshooting 145
Solution 5 Try removing the splitter
Advanced Fax Setup menu appears
Solution 6 Make sure the telephone wall jack works properly
Solution 7 Check the phone line for noise
To change the ECM setting from the control panel
Solve a problem
Solution 13 Check for and resolve any error messages
Product cannot send faxes, but can receive faxes
Solution 14 Lower the fax speed
To set the fax speed from the control panel
Solution 2 Check the fax number
Solution 3 Dial the fax number more slowly
Product is having problems sending a manual fax
Solution 4 Check the receiving fax machine for problems
Solution 2 Connect the telephone to the correct port
Solution 1 Check the receiving fax machine for problems
Solution 4 Lower the fax speed
Pages of a fax I sent are missing
To print a Last Transaction report
Solution 2 Check the phone line for noise
Solution 2 Increase the fax resolution
Solution 1 Check the phone line for noise
Quality of the fax I sent is poor
Fax I sent was blank when it was received
Solution 3 Make sure the glass is clean
Parts of a fax I sent are cut off
Fax transmission is slow
Solution 1 Send the fax in black and white
Solution 2 Lower the fax resolution
Solution 3 Check the phone line for noise
Solution 5 Increase the fax speed
Fax tones are recorded on my answering machine
Solution 2 Set up the product to answer faxes automatically
Product cannot receive faxes, but can send faxes
Solution 3 Set the product to answer faxes manually
Solution 2 Check the Auto Answer setting
Solution
Fax troubleshooting 165
Solution 10 Clear the memory of the product
Solution 11 Check for error messages on the display
Solution 1 Lower the fax speed
Product is having problems receiving a manual fax
Solution 2 Check for error messages on the display
Product is not answering incoming fax calls
Solution 5 Clear the memory of the product
Solution 6 Check for error messages on the display
Faxes are received but do not print
Solution 1 Load paper in the input tray
Solution 2 Check the sending fax machine for problems
Pages of a fax I received are missing
Solution 2 Check for error messages on the display
Parts of a fax I received are cut off
Solution 1 Check the sending fax machine for problems
Solution 2 Make sure paper is loaded in the input tray
Computer to which I am connecting has only one phone port
12 Example of a parallel splitter
13 Back view of the product
Solve a problem
14 Back view of the product
Solve a problem
15 Back view of the product
Solution 3 Try another power outlet
Solution 2 Try removing the splitter
What to check
Fax test failed
Fax Hardware Test failed
Fax Connected to Active Telephone Wall Jack test failed
Phone Cord Connected to Correct Port on Fax test failed
Using Correct Type of Phone Cord with Fax test failed
To plug the phone cord into the correct port
Fax Line Condition test failed
Dial Tone Detection test failed
Am having problems faxing over the Internet using IP phone
Solution 1 Change the fax speed
Error code
Fax log report shows an error
Errors
Firmware revision mismatch
Photo tray problem
Solution 1 Load more paper in the photo tray
Product messages
Solution 5 Make sure the photo paper is not curled
Solution 3 Remove excess paper from the photo tray
Solution 6 Load one sheet of paper at a time
Photo tray cannot disengage
Solution 1 Install the HP Photosmart Software
To install the HP Photosmart Software
Photo tray cannot engage
File messages
Error reading or writing the file
Photos not found
Solution 1 Reinsert the memory card
Solution 2 Print photos from the computer
Unreadable files. NN files could not be read
Supported file types for the product
Solution 1 Reinsert the memory card in the product
Solution 2 Reformat the memory card in your digital camera
General user messages
Solution 3 Push the memory card all the way forward
Memory card error
Solution 1 Remove all but one memory card
Solution 2 Remove the memory card and reinsert it correctly
Card access error
Solution 2 Empty the Recycle Bin on your desktop
Out of disk space
Card is not fully inserted
Use only one card at a time
Card is inserted incorrectly
Card is damaged
Ink is drying
Power and connection messages
Paper messages
Ink cartridge and printhead messages
Cartridges in wrong slot
General printer error
Incompatible ink cartridges
Solution 2 Contact HP support
Incompatible printhead
Ink cartridge problem
Ink alert
To make sure the ink cartridges are properly installed
Solution 1 Install the ink cartridges correctly
Solve a problem
Solution 3 Clean the electrical contacts
Solution 2 Close the print carriage latch
To clean the electrical contacts
Ink window Electrical contacts
Cartridge warranty information Replace the cartridges
Ink system failure
Solution 4 Replace the ink cartridge
Solution 5 Contact HP support
Ink service capacity warning
Check ink cartridges
Solution 1 Install all five ink cartridges
Solve a problem
Install printhead and then cartridges
To reinstall the printhead
Solution 1 Install the printhead and then cartridges
Solve a problem
Non-HP cartridge
Original HP ink depleted
Printhead appears to be missing or damaged
To clean the printhead from the control panel
Solution 1 Reinstall the printhead and cartridges
Previously used genuine HP cartridge
Solve a problem
To clean the printhead
To clean the electrical contacts in the product
Chapter
Solution 1 Reinstall the printhead
Printhead problem
Solve a problem
To clean the printhead
To clean the electrical contacts in the product
Solve a problem
Problem with printer preparation
Solution 1 Insert all ink cartridges
Solve a problem
Solution 3 Clean the ink cartridge contacts
Ink window Electrical contacts
Cartridge warranty information Replace the cartridges
Solution 4 Contact HP support
To stop a print job from the product
Stop the current job
Stop the current job
Hewlett-Packard Company notices
Technical information
Specifications
Type Size Weight
Environmental product stewardship program
Plastics
Material safety data sheets
Eco-Tips
Paper use
HP inkjet supplies recycling program
Power consumption
Italiano
Chemical Substances
Battery disposal in Taiwan
European Union Battery Directive
EU battery directive
Regulatory model identification number
Regulatory notices
Vcci Class B compliance statement for users in Japan
FCC statement
Noise emission statement for Germany
Sehanzeige-Arbeitsplätze
Regulatory wireless statements
Exposure to radio frequency radiation
European Union Regulatory Notice
European Union regulatory notice
Regulatory telecommunication notices
Regulatory telecommunication notices 253
Technical information
Hinweis für Benutzer des deutschen Telefonnetzwerks
Australia wired fax statement
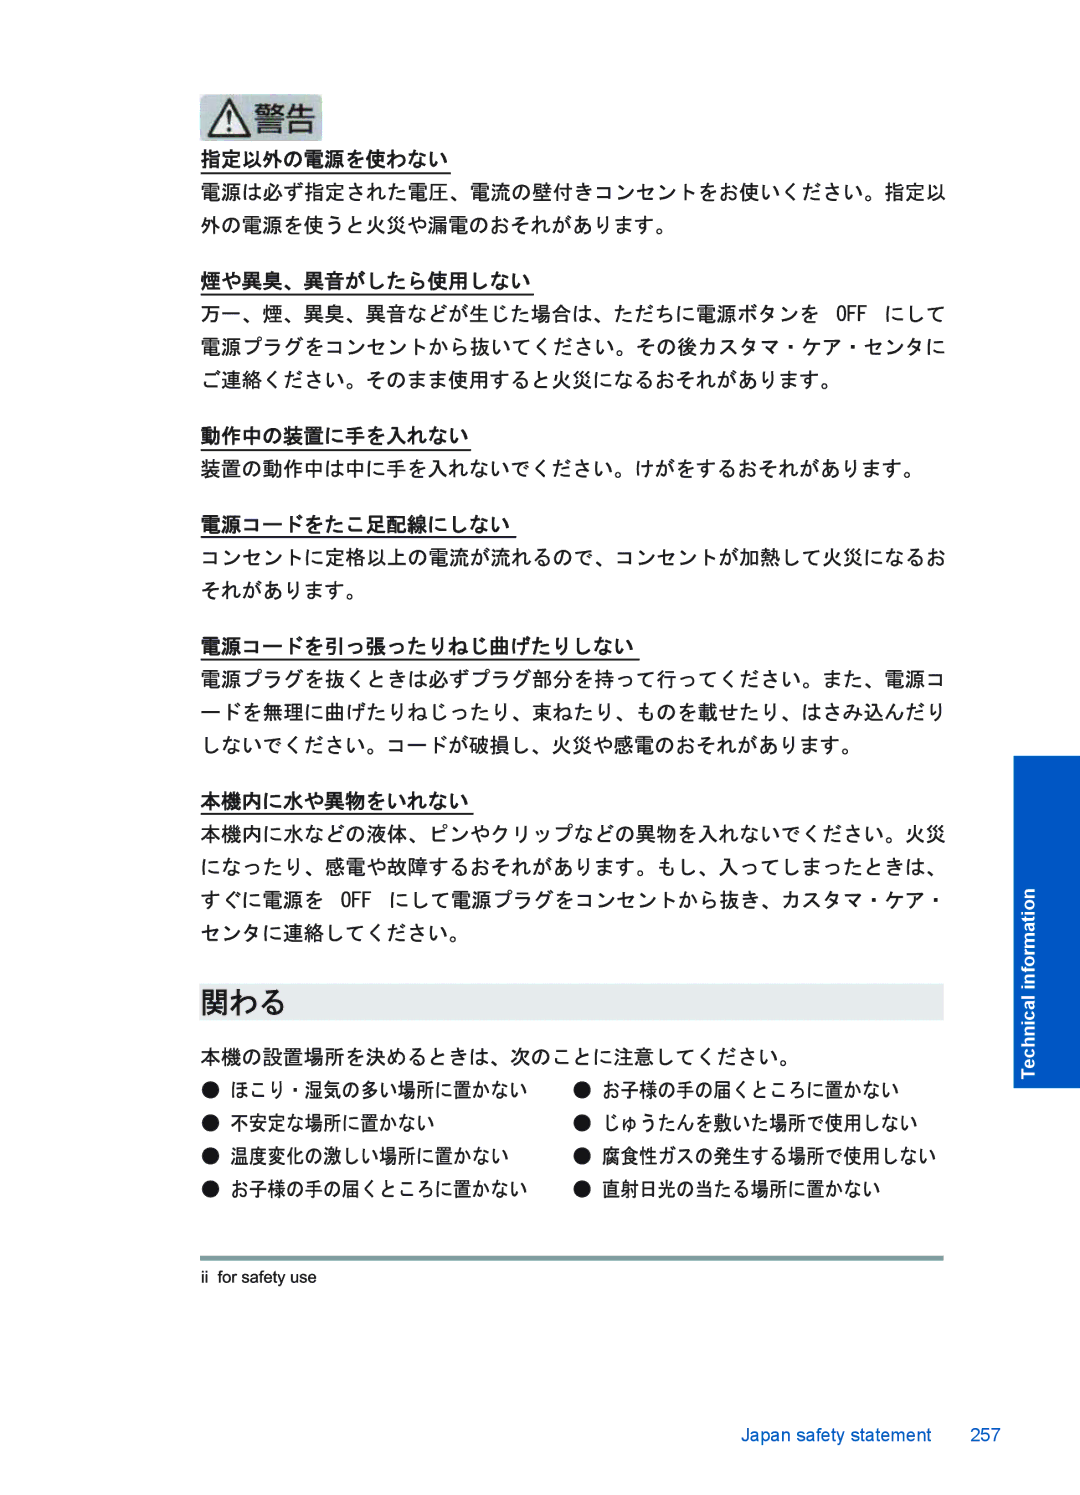
Japan safety statement
Japan safety statement 257
Technical information
Index
Symbols/Numerics
260
261
262
Top
Page
Image
Contents