Return to Section TOC
Return to Section TOC
Return to Master TOC
Return to Master TOC
|
| TROUBLESHOOTING & REPAIR |
GATEWAY PC BOARD REMOVAL AND REPLACEMENT (CONTINUED)
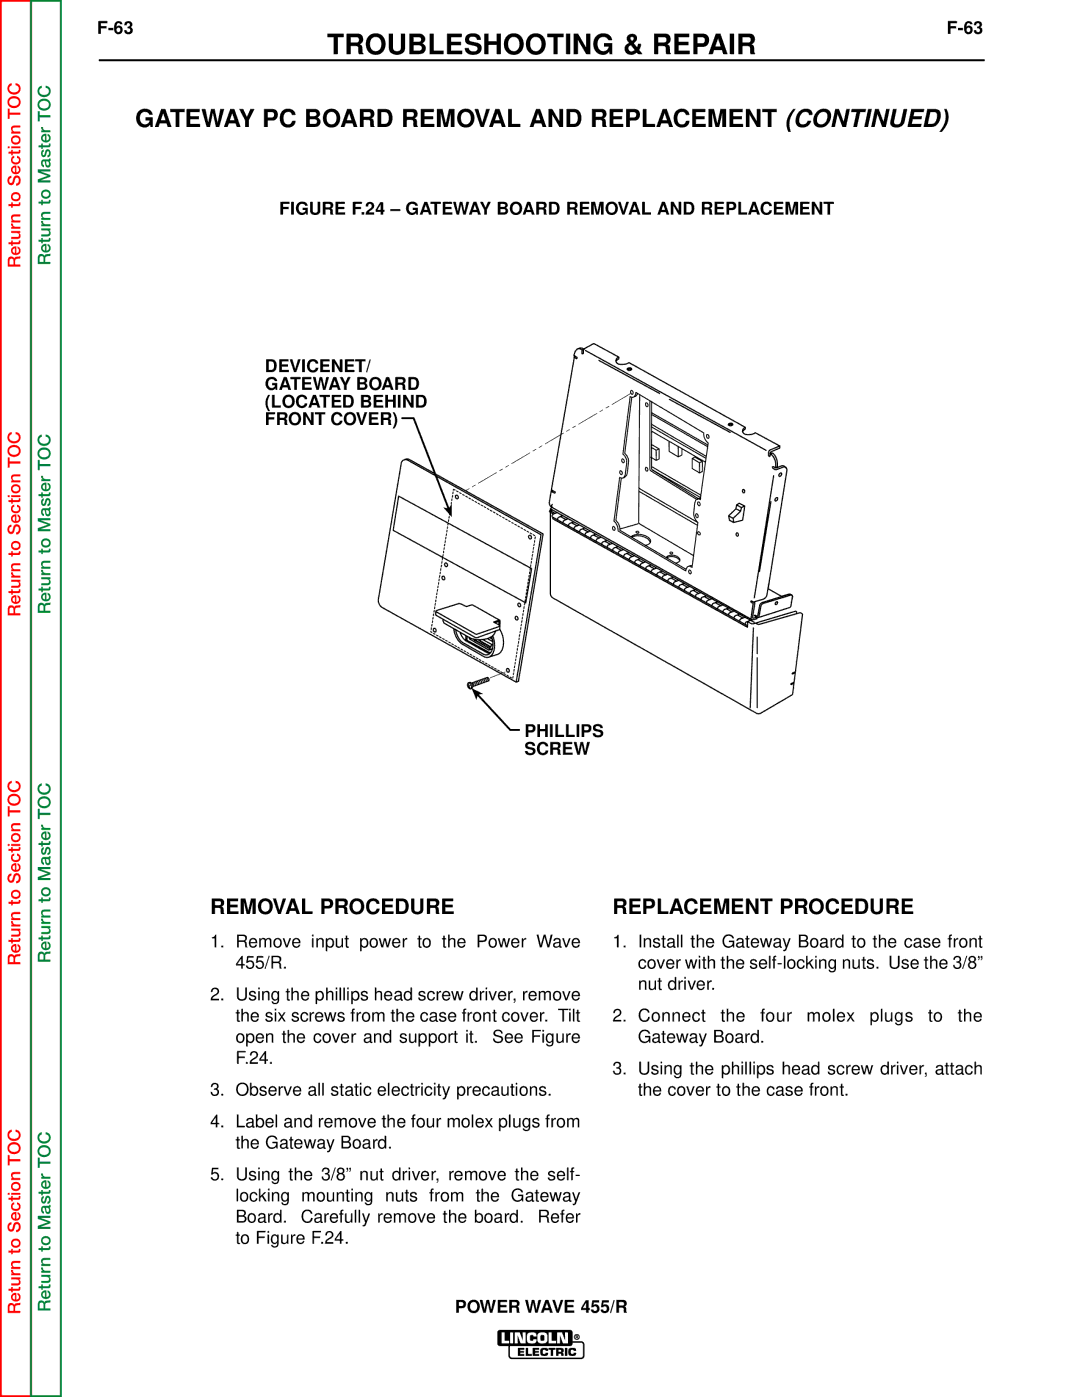
FIGURE F.24 – GATEWAY BOARD REMOVAL AND REPLACEMENT
DEVICENET/ GATEWAY BOARD (LOCATED BEHIND FRONT COVER)
PHILLIPS
SCREW
Return to Section TOC
Return to Section TOC
Return to Master TOC
Return to Master TOC
REMOVAL PROCEDURE
1.Remove input power to the Power Wave 455/R.
2.Using the phillips head screw driver, remove the six screws from the case front cover. Tilt open the cover and support it. See Figure F.24.
3.Observe all static electricity precautions.
4.Label and remove the four molex plugs from the Gateway Board.
5.Using the 3/8” nut driver, remove the self- locking mounting nuts from the Gateway Board. Carefully remove the board. Refer to Figure F.24.
REPLACEMENT PROCEDURE
1.Install the Gateway Board to the case front cover with the
2.Connect the four molex plugs to the Gateway Board.
3.Using the phillips head screw driver, attach the cover to the case front.