•Low Power Mode to Sleep Mode: Turns off all the fans even for the fuser unit after certain time.
7Press OK.
Setting the default tray and paper
You can select the tray and paper you would like to keep using for printing job. (Page 9.2)
1Press Machine Setup on the control panel.
2Press Admin Setting.
3When the login message appears, enter password with number keypad and press OK. (Page 3.3)
4Press the General tab.
5Press the down arrow to switch the screen and press Tray Management.
6Select tray and its options such as paper size and type.
7Press OK.
Note
If the optional tray is not installed, the tray options on the screen is grayed out.
Changing the default settings
You can set the default values for copy, fax, email, scan and paper all at once.
1Press Machine Setup on the control panel.
2Press Admin Setting.
3When the login message appears, enter password with number keypad and press OK. (Page 3.3)
4Press the General tab > Default Settings > Default Option.
5Press the function you want to change, and change its settings.
For example, if you want to change the default setting of the brightness & darkness for a copy job, press Copy > Darkness and adjust the brightness & darkness.
6Press OK.
Understanding the keyboard
You can enter alphabet characters, numbers, or special symbols using the keyboard on the touch screen. This keyboard is specially arranged like a normal keyboard for better usability for the user.
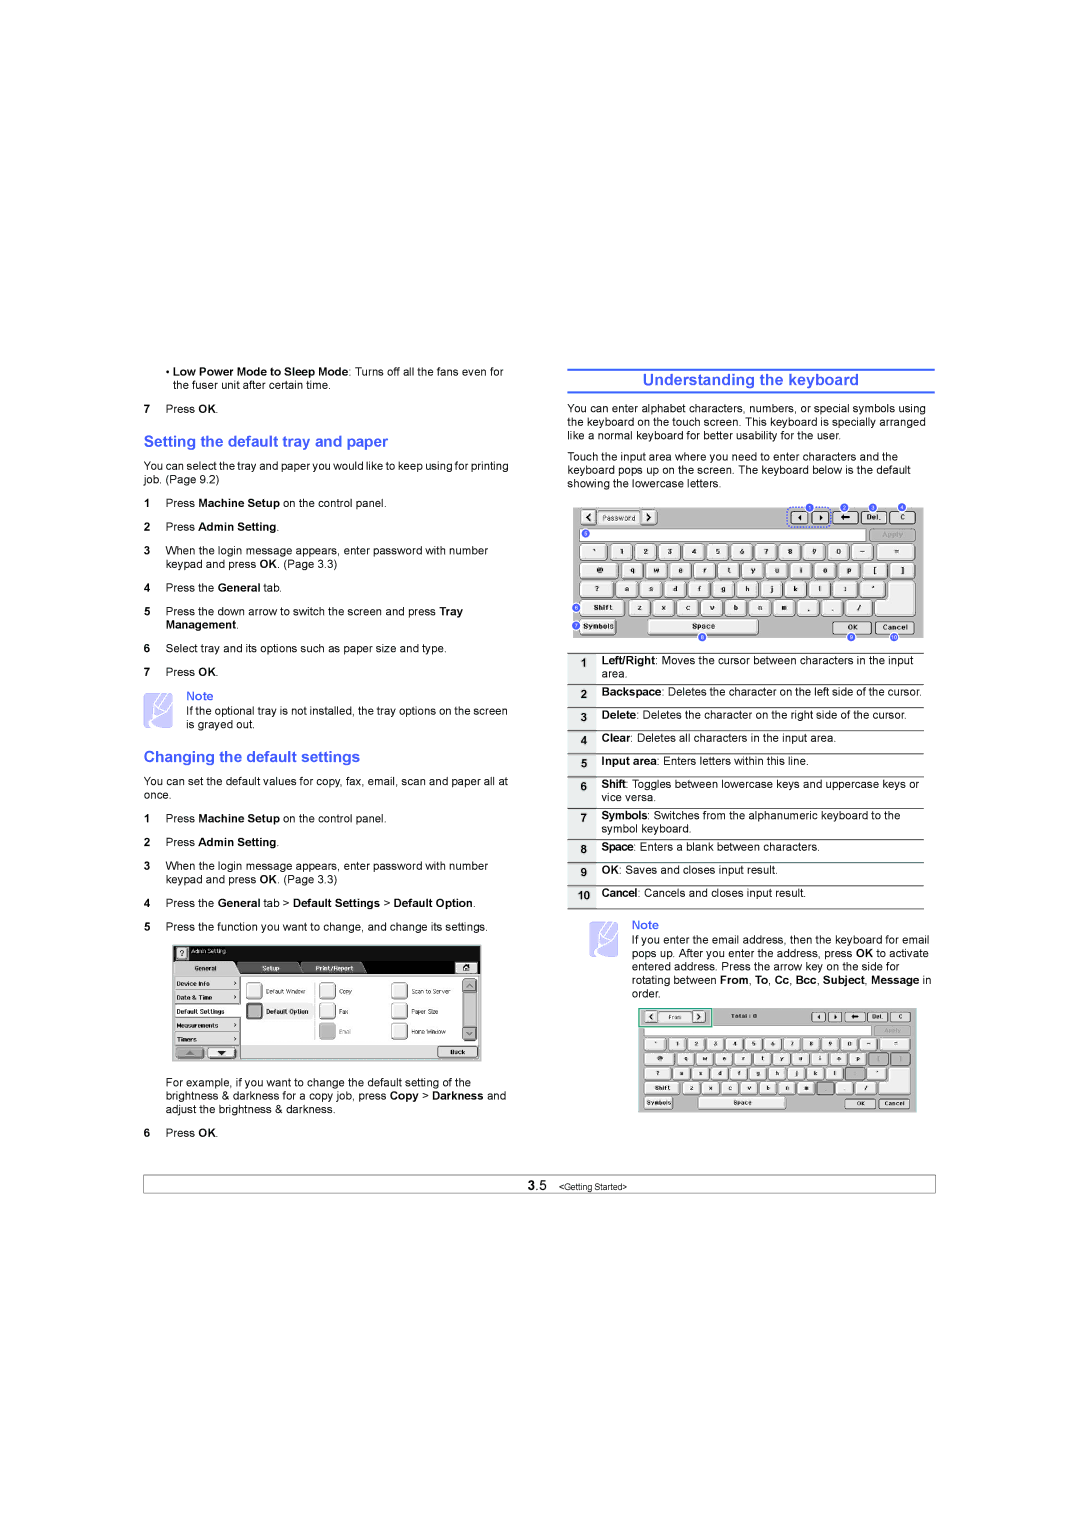
Touch the input area where you need to enter characters and the keyboard pops up on the screen. The keyboard below is the default showing the lowercase letters.
1Left/Right: Moves the cursor between characters in the input area.
2Backspace: Deletes the character on the left side of the cursor.
3Delete: Deletes the character on the right side of the cursor.
4Clear: Deletes all characters in the input area.
5Input area: Enters letters within this line.
6Shift: Toggles between lowercase keys and uppercase keys or vice versa.
7Symbols: Switches from the alphanumeric keyboard to the symbol keyboard.
8Space: Enters a blank between characters.
9OK: Saves and closes input result.
10Cancel: Cancels and closes input result.
Note
If you enter the email address, then the keyboard for email pops up. After you enter the address, press OK to activate entered address. Press the arrow key on the side for rotating between From, To, Cc, Bcc, Subject, Message in order.
3.5 <Getting Started>