Preparations for Use as a Network Scanner
Setting procedure
A Press the {User Tools/Counter} key. B Press [Scanner Features].
C Press the [Scanner Settings] tab.
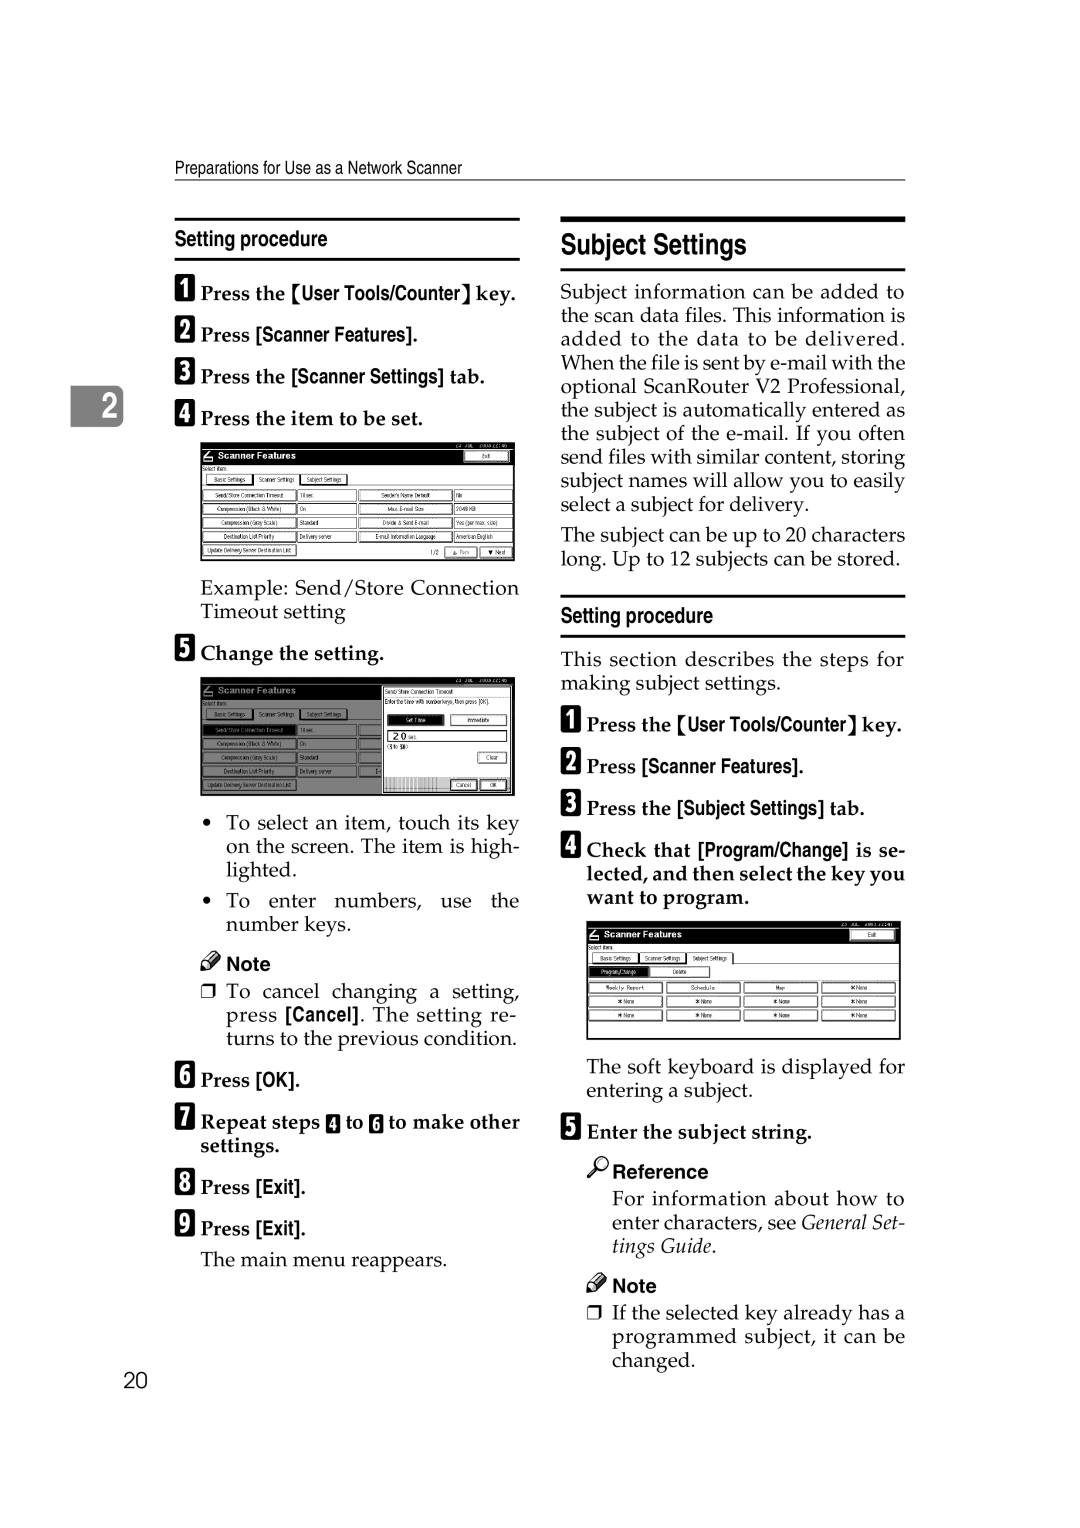
2D Press the item to be set.
Example: Send/Store Connection Timeout setting
E Change the setting.
•To select an item, touch its key on the screen. The item is high- lighted.
•To enter numbers, use the number keys.
![]()
![]() Note
Note
❒To cancel changing a setting, press [Cancel]. The setting re- turns to the previous condition.
F Press [OK].
G Repeat steps D to F to make other settings.
H Press [Exit].
I Press [Exit].
The main menu reappears.
Subject Settings
Subject information can be added to the scan data files. This information is added to the data to be delivered. When the file is sent by
The subject can be up to 20 characters long. Up to 12 subjects can be stored.
Setting procedure
This section describes the steps for making subject settings.
A Press the {User Tools/Counter} key. B Press [Scanner Features].
C Press the [Subject Settings] tab.
D Check that [Program/Change] is se- lected, and then select the key you want to program.
The soft keyboard is displayed for entering a subject.
E Enter the subject string.

 Reference
For information about how to enter characters, see General Set- tings Guide.
![]()
![]() Note
Note
❒If the selected key already has a programmed subject, it can be changed.
20