Initial Scanner Setup
Selecting a custom size
When selecting [Custom size] as the scan size, follow the procedure be- low.
A Press [Custom size] on the Scan Size Setting screen.
B Enter the original size with the number keys.
Select and enter values for [X1] and [Y1].
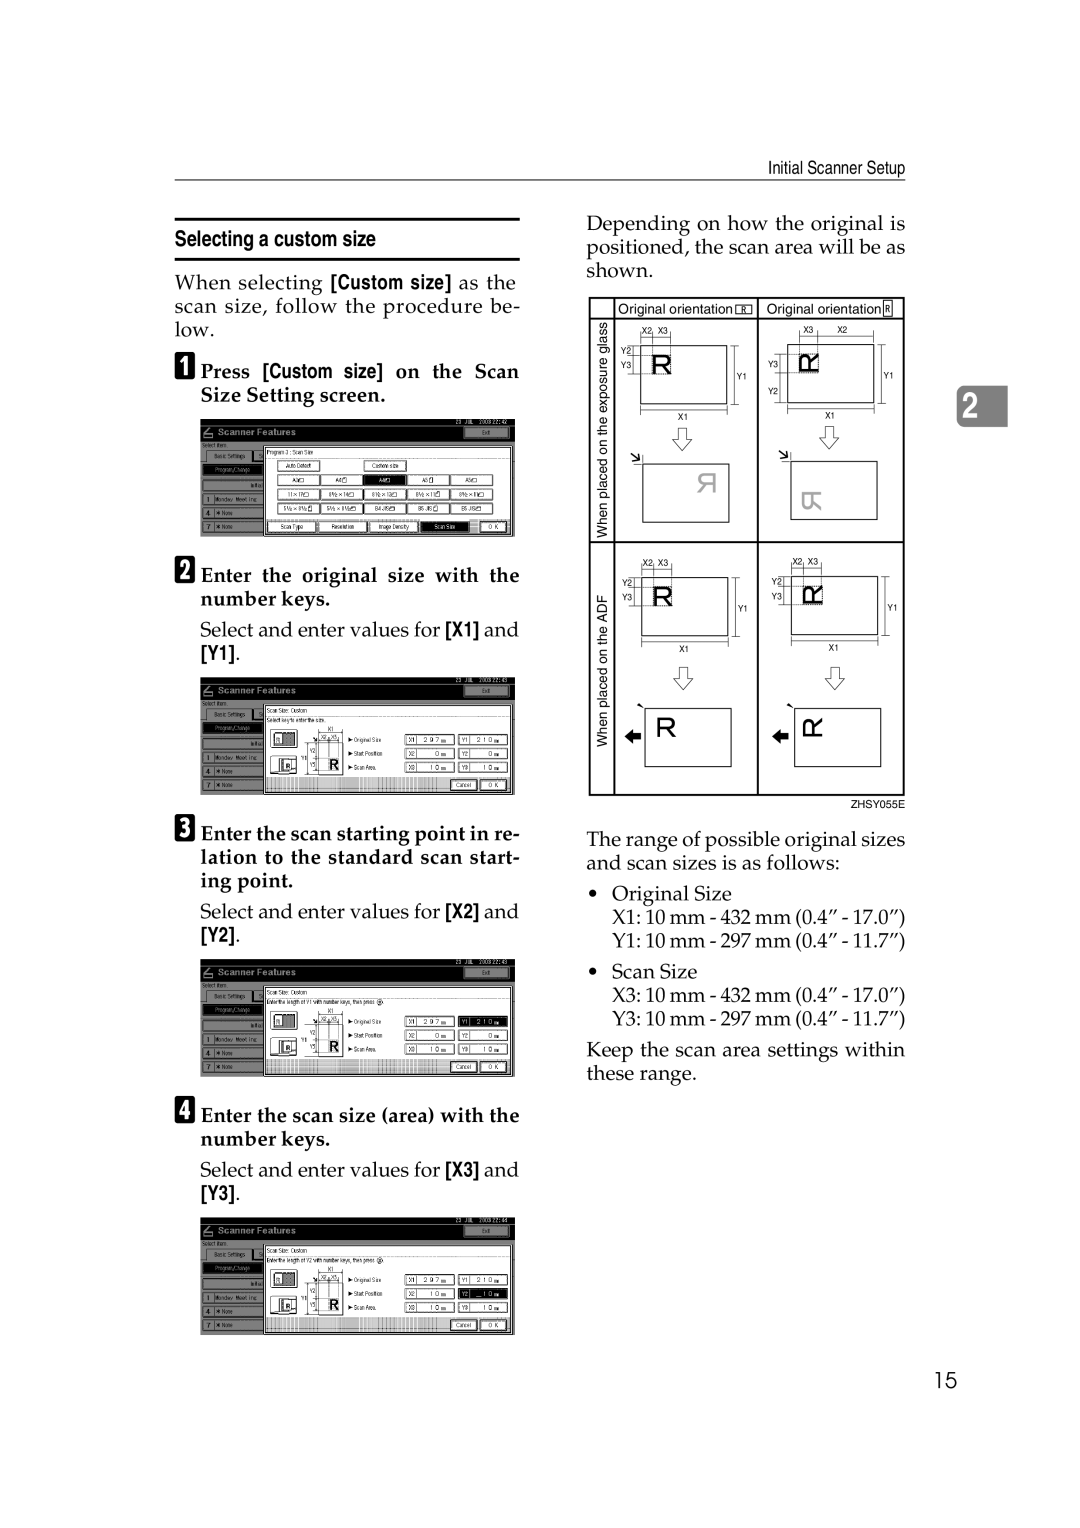
Depending on how the original is positioned, the scan area will be as shown.
| Original orientation | Original orientation | |||
glass | X2 | X3 |
| X3 | X2 |
Y2 |
|
|
|
| |
exposure | Y3 |
| Y3 |
| Y1 |
| Y1 |
|
| ||
|
| Y2 |
| 2 | |
| X1 |
| X1 | ||
When placed on the |
|
| |||
|
|
|
|
| |
| X2 | X3 | X2 | X3 |
|
| Y2 |
| Y2 |
|
|
the ADF | Y3 |
| Y3 |
| Y1 |
| Y1 |
|
| ||
| X1 |
| X1 | ||
When placed on |
|
| |||
|
|
|
|
| |
|
|
|
|
| ZHSY055E |
C Enter the scan starting point in re- lation to the standard scan start- ing point.
Select and enter values for [X2] and [Y2].
D Enter the scan size (area) with the number keys.
Select and enter values for [X3] and [Y3].
The range of possible original sizes and scan sizes is as follows:
•Original Size
X1: 10 mm - 432 mm (0.4” - 17.0”)
Y1: 10 mm - 297 mm (0.4” - 11.7”)
•Scan Size
X3: 10 mm - 432 mm (0.4” - 17.0”)
Y3: 10 mm - 297 mm (0.4” - 11.7”)
Keep the scan area settings within these range.
15