Schedule & Calendar 59
Entering the time
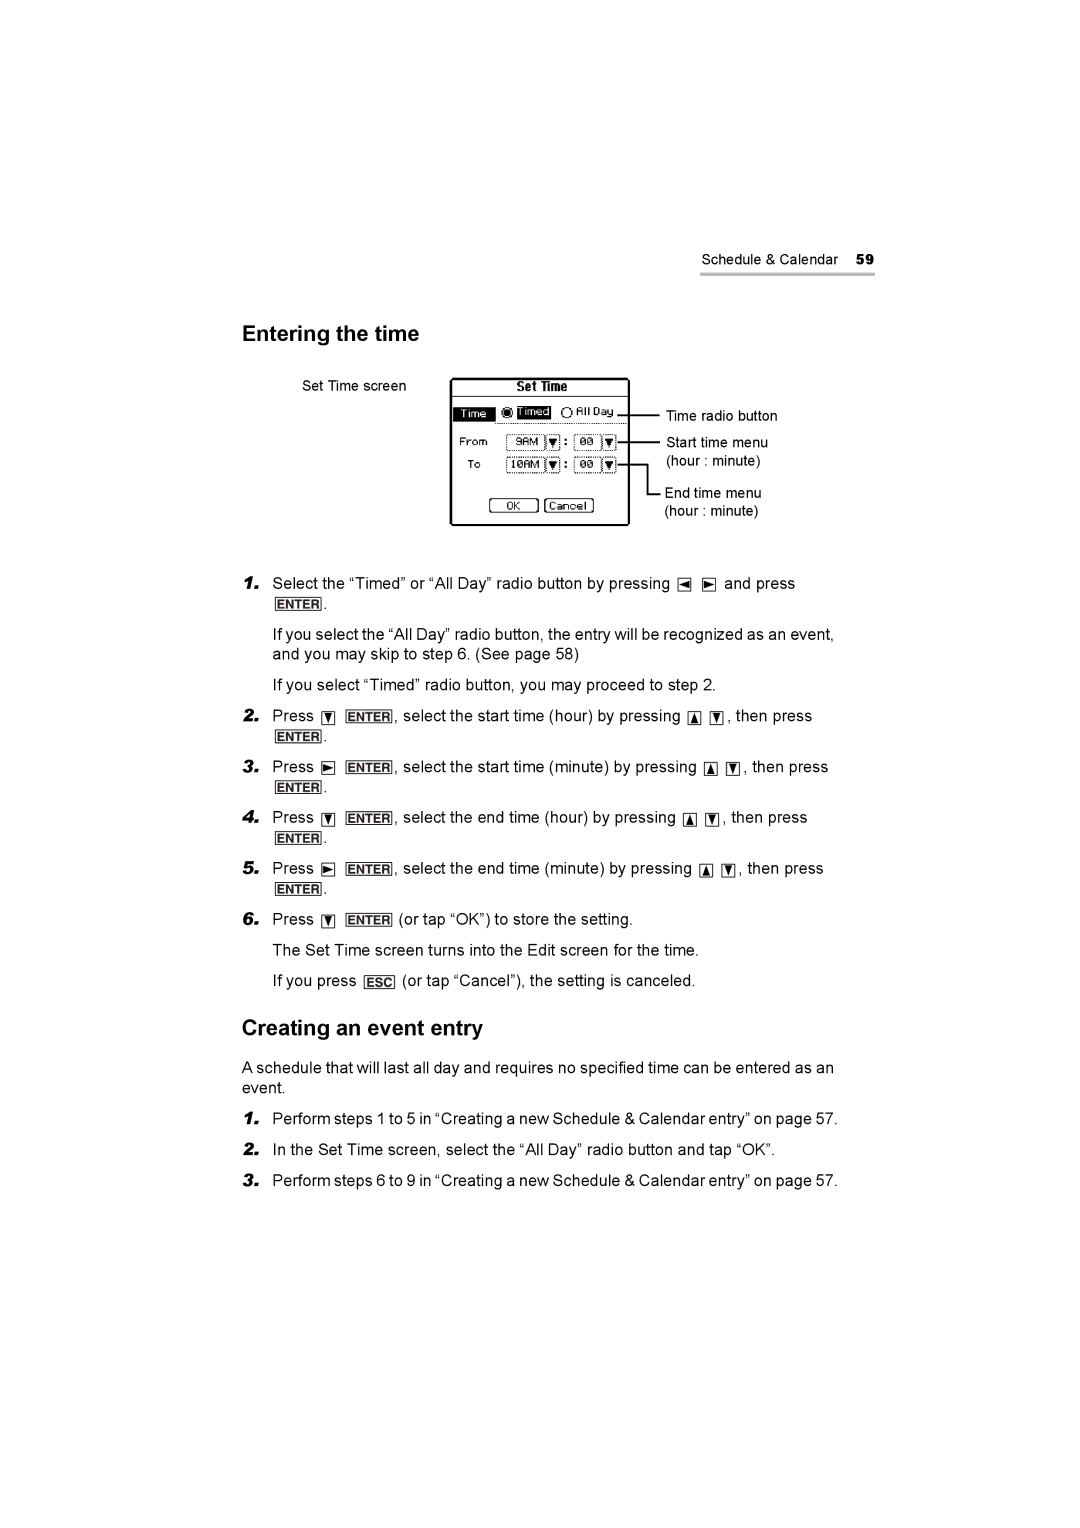
Set Time screen
Time radio button
Start time menu (hour : minute)
End time menu (hour : minute)
1.Select the “Timed” or “All Day” radio button by pressing ![]()
![]()
![]()
![]()
![]()
![]() and press
and press
![]() .
.
If you select the “All Day” radio button, the entry will be recognized as an event, and you may skip to step 6. (See page 58)
If you select “Timed” radio button, you may proceed to step 2.
2.Press ![]()
![]()
![]()
![]()
![]()
![]()
![]()
![]()
![]()
![]() , select the start time (hour) by pressing
, select the start time (hour) by pressing ![]()
![]()
![]()
![]()
![]()
![]() , then press
, then press
![]() .
.
3. | Press |
| . |
![]()
![]()
![]()
![]()
![]()
![]()
![]() , select the start time (minute) by pressing
, select the start time (minute) by pressing ![]()
![]() , then press
, then press
4.Press ![]()
![]()
![]()
![]()
![]()
![]()
![]()
![]()
![]()
![]() .
.
![]()
![]()
![]()
![]()
![]()
![]()
![]() , select the end time (hour) by pressing
, select the end time (hour) by pressing ![]()
![]() , then press
, then press
5. | Press |
| . |
![]()
![]()
![]()
![]()
![]()
![]()
![]() , select the end time (minute) by pressing
, select the end time (minute) by pressing
![]()
![]()
![]()
![]()
![]()
![]() , then press
, then press
6.Press ![]()
![]() (or tap “OK”) to store the setting.
(or tap “OK”) to store the setting.
The Set Time screen turns into the Edit screen for the time.
If you press ![]() (or tap “Cancel”), the setting is canceled.
(or tap “Cancel”), the setting is canceled.
Creating an event entry
A schedule that will last all day and requires no specified time can be entered as an event.
1.Perform steps 1 to 5 in “Creating a new Schedule & Calendar entry” on page 57.
2.In the Set Time screen, select the “All Day” radio button and tap “OK”.
3.Perform steps 6 to 9 in “Creating a new Schedule & Calendar entry” on page 57.