Using the Scanner Control Panel
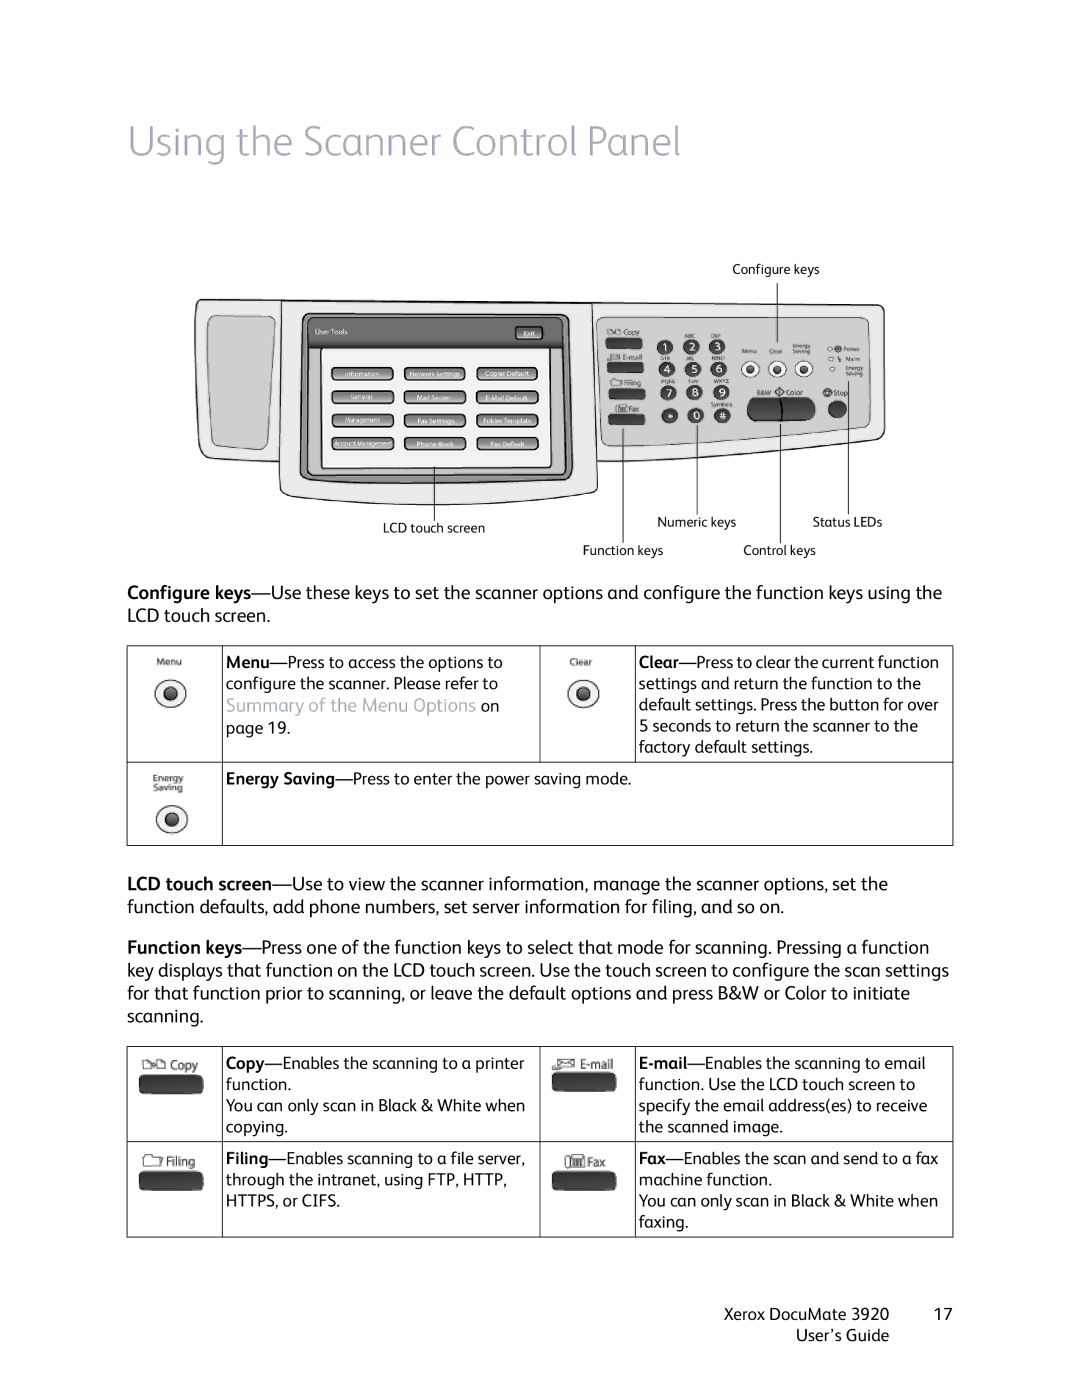
Configure keys
| | | | | | | | |
| | | | | | | | |
| | | | | | | | |
| | | | Numeric keys | | Status LEDs |
| LCD touch screen |
| | | | | | |
| | | Function | keys | Control | keys |
Configure keys—Use these keys to set the scanner options and configure the function keys using the LCD touch screen.
Menu—Press to access the options to | | Clear—Press to clear the current function |
configure the scanner. Please refer to | | settings and return the function to the |
Summary of the Menu Options on | | default settings. Press the button for over |
page 19. | | 5 seconds to return the scanner to the |
| | factory default settings. |
| | |
Energy Saving—Press to enter the power saving mode.
LCD touch screen—Use to view the scanner information, manage the scanner options, set the function defaults, add phone numbers, set server information for filing, and so on.
Function keys—Press one of the function keys to select that mode for scanning. Pressing a function key displays that function on the LCD touch screen. Use the touch screen to configure the scan settings for that function prior to scanning, or leave the default options and press B&W or Color to initiate scanning.
| Copy—Enables the scanning to a printer | | E-mail—Enables the scanning to email |
| function. | | function. Use the LCD touch screen to |
| You can only scan in Black & White when | | specify the email address(es) to receive |
| copying. | | the scanned image. |
| | | |
| Filing—Enables scanning to a file server, | | Fax—Enables the scan and send to a fax |
| through the intranet, using FTP, HTTP, | | machine function. |
| HTTPS, or CIFS. | | You can only scan in Black & White when |
| | | faxing. |
| | | |
Xerox DocuMate 3920 | 17 |
User’s Guide | |