MFL 251 523 984_ FAXCENTRE F116_F116 L US.book Page 22 Mercredi, 11. août 2004 4:48 16
Installation
Make sure the On/Off switch is set to 0 (Off).
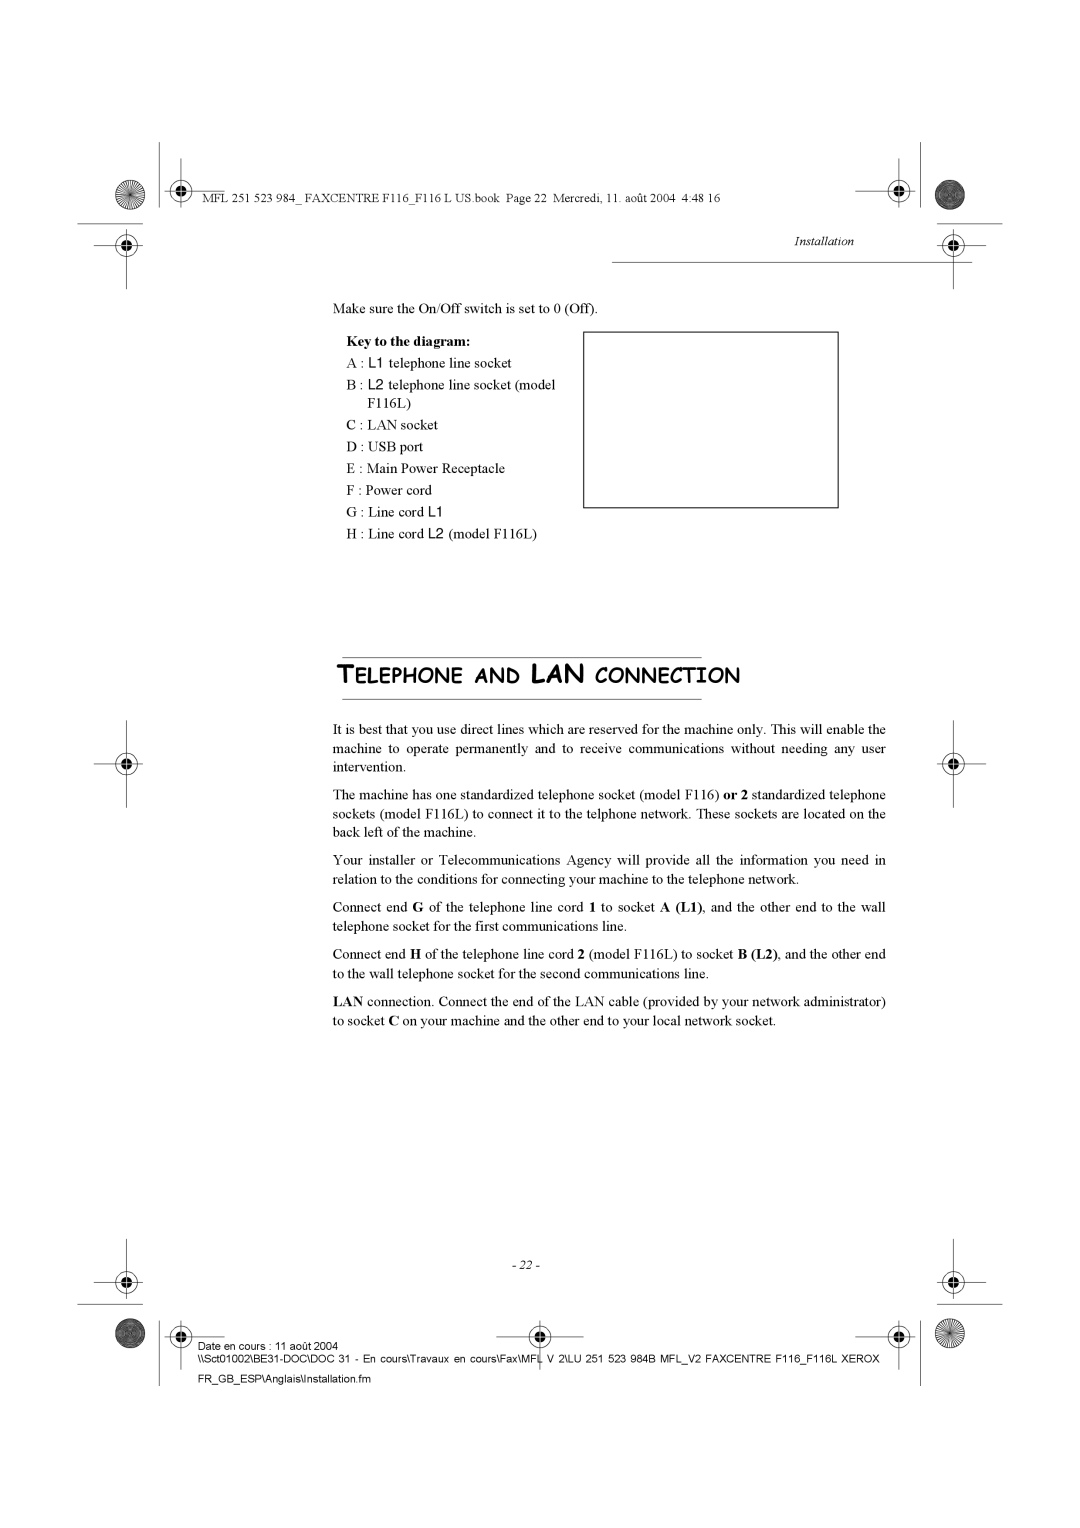
Key to the diagram:
A : L1 telephone line socket
B : L2 telephone line socket (model
F116L)
C : LAN socket
D : USB port
E : Main Power Receptacle
F : Power cord
G : Line cord L1
H : Line cord L2 (model F116L)
TELEPHONE AND LAN CONNECTION
It is best that you use direct lines which are reserved for the machine only. This will enable the machine to operate permanently and to receive communications without needing any user intervention.
The machine has one standardized telephone socket (model F116) or 2 standardized telephone sockets (model F116L) to connect it to the telphone network. These sockets are located on the back left of the machine.
Your installer or Telecommunications Agency will provide all the information you need in relation to the conditions for connecting your machine to the telephone network.
Connect end G of the telephone line cord 1 to socket A (L1), and the other end to the wall telephone socket for the first communications line.
Connect end H of the telephone line cord 2 (model F116L) to socket B (L2), and the other end to the wall telephone socket for the second communications line.
LAN connection. Connect the end of the LAN cable (provided by your network administrator) to socket C on your machine and the other end to your local network socket.
- 22 -
Date en cours : 11 août 2004 |
FR_GB_ESP\Anglais\Installation.fm