About Pooled Systems
In a pooled configuration, you group several outside lines together into a pool that people can access with a single button on their voice terminals. When they place a call, they either touch the button assigned to a particular line pool (Button Access to Line Pools) or touch a Pool Access button and dial the code of the pool best suited for this type of call (Dial Access to Line Pools). The system then selects a free line from that pool, and the user dials the number he or she is trying to reach. If your system has Automatic Route Selection, users simply touch a Pool Access button and dial the number. The system routes the call automatically to the most appropriate pool available for that type of call, following the order of preference setup by you, the administrator.
Your system can have as many as 11 different line pools. Each type of
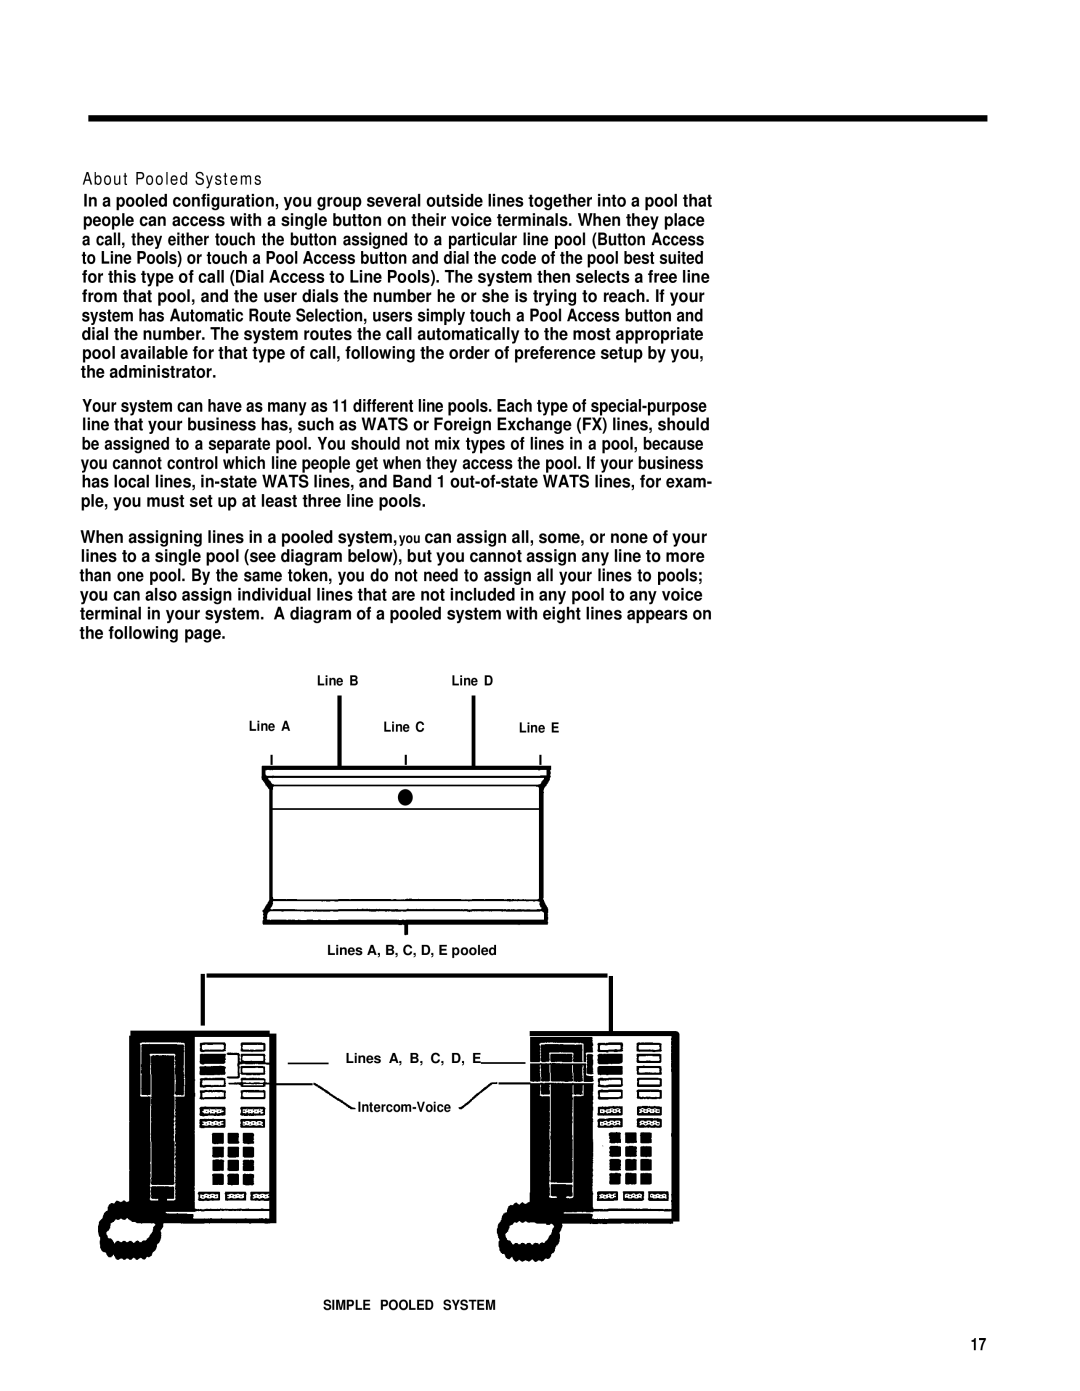
When assigning lines in a pooled system, you can assign all, some, or none of your lines to a single pool (see diagram below), but you cannot assign any line to more than one pool. By the same token, you do not need to assign all your lines to pools; you can also assign individual lines that are not included in any pool to any voice terminal in your system. A diagram of a pooled system with eight lines appears on the following page.
Line B | Line D |
Line A
Line C
Line E
I
I
I
●
Lines A, B, C, D, E pooled
Lines A, B, C, D, E
SIMPLE POOLED SYSTEM
17
