6Align the slot in the cartridge with the yellow post in the fax, and with the label facing outwards, insert the BJ cartridge into the cartridge holder. Lower the cartridge lock lever until you hear a click to lock the cartridge in place.
The yellow post (BJ cartridge guide) should be visible through the slot. The BJ cartridge tilts slightly to the left before lowering the cartridge lock lever.
7Close the printer cover.
If the AUTO TEST PRINT setting is set to ON: The fax automatically prints a test page.
The fax prints a test page every time you insert a BJ cartridge.
You can turn off automatic test printing by changing the AUTO TEST PRINT setting. See SYSTEM SETTINGS, p.
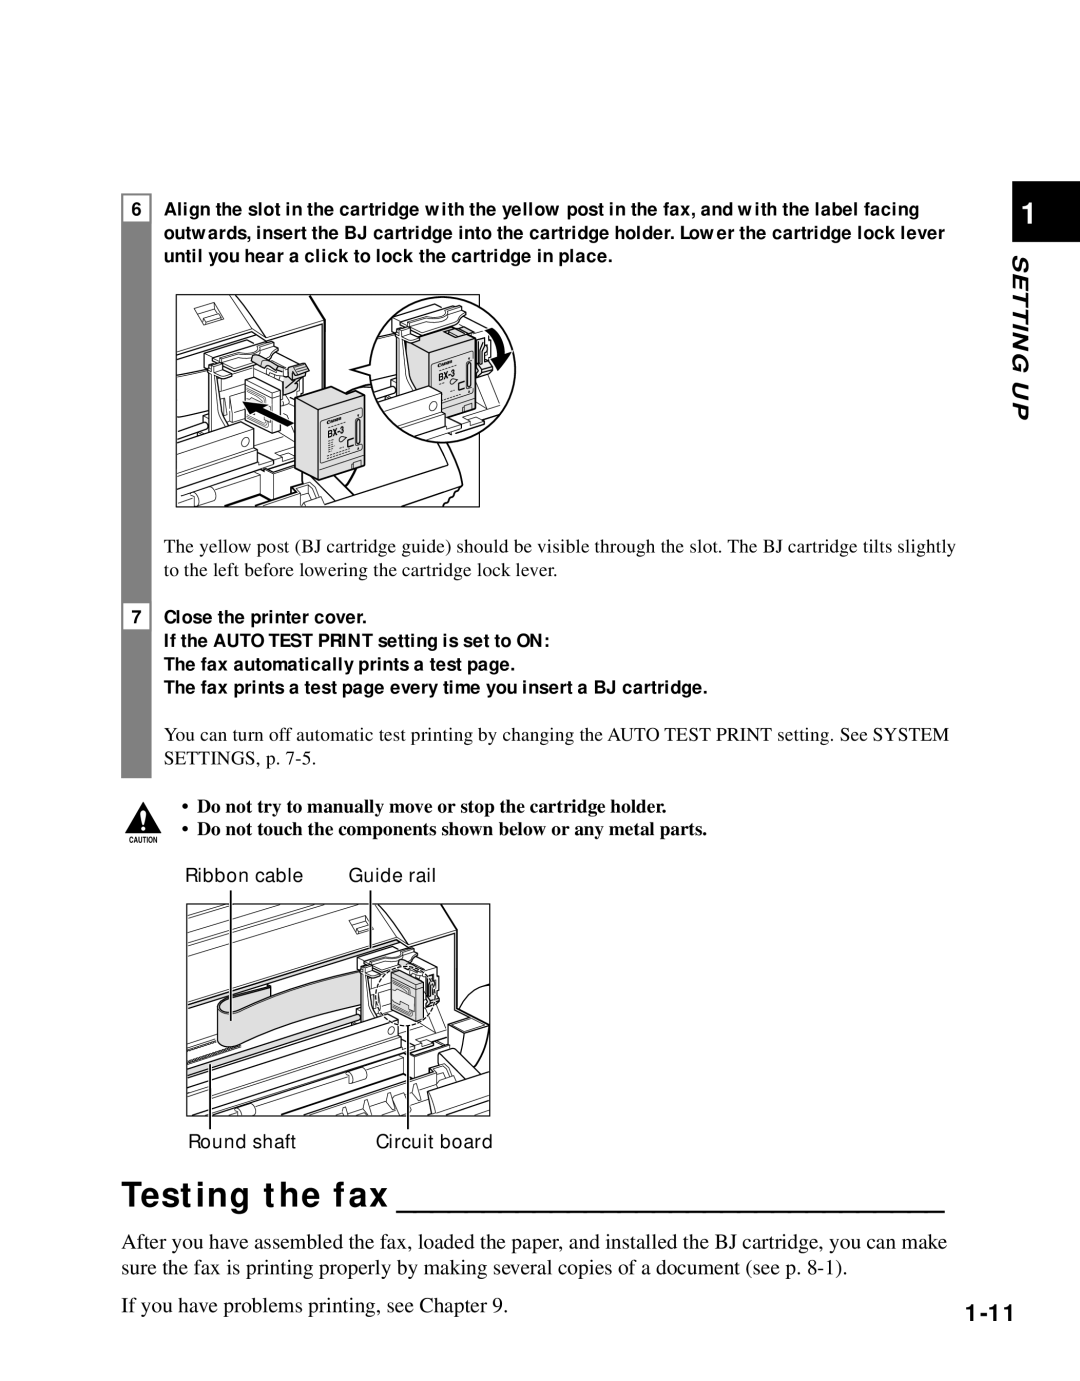
•Do not try to manually move or stop the cartridge holder. c • Do not touch the components shown below or any metal parts.
Ribbon cable | Guide rail |
1
SETTING UP
Round shaft Circuit board
Testing the fax ________________________________
After you have assembled the fax, loaded the paper, and installed the BJ cartridge, you can make sure the fax is printing properly by making several copies of a document (see p.
If you have problems printing, see Chapter 9. |