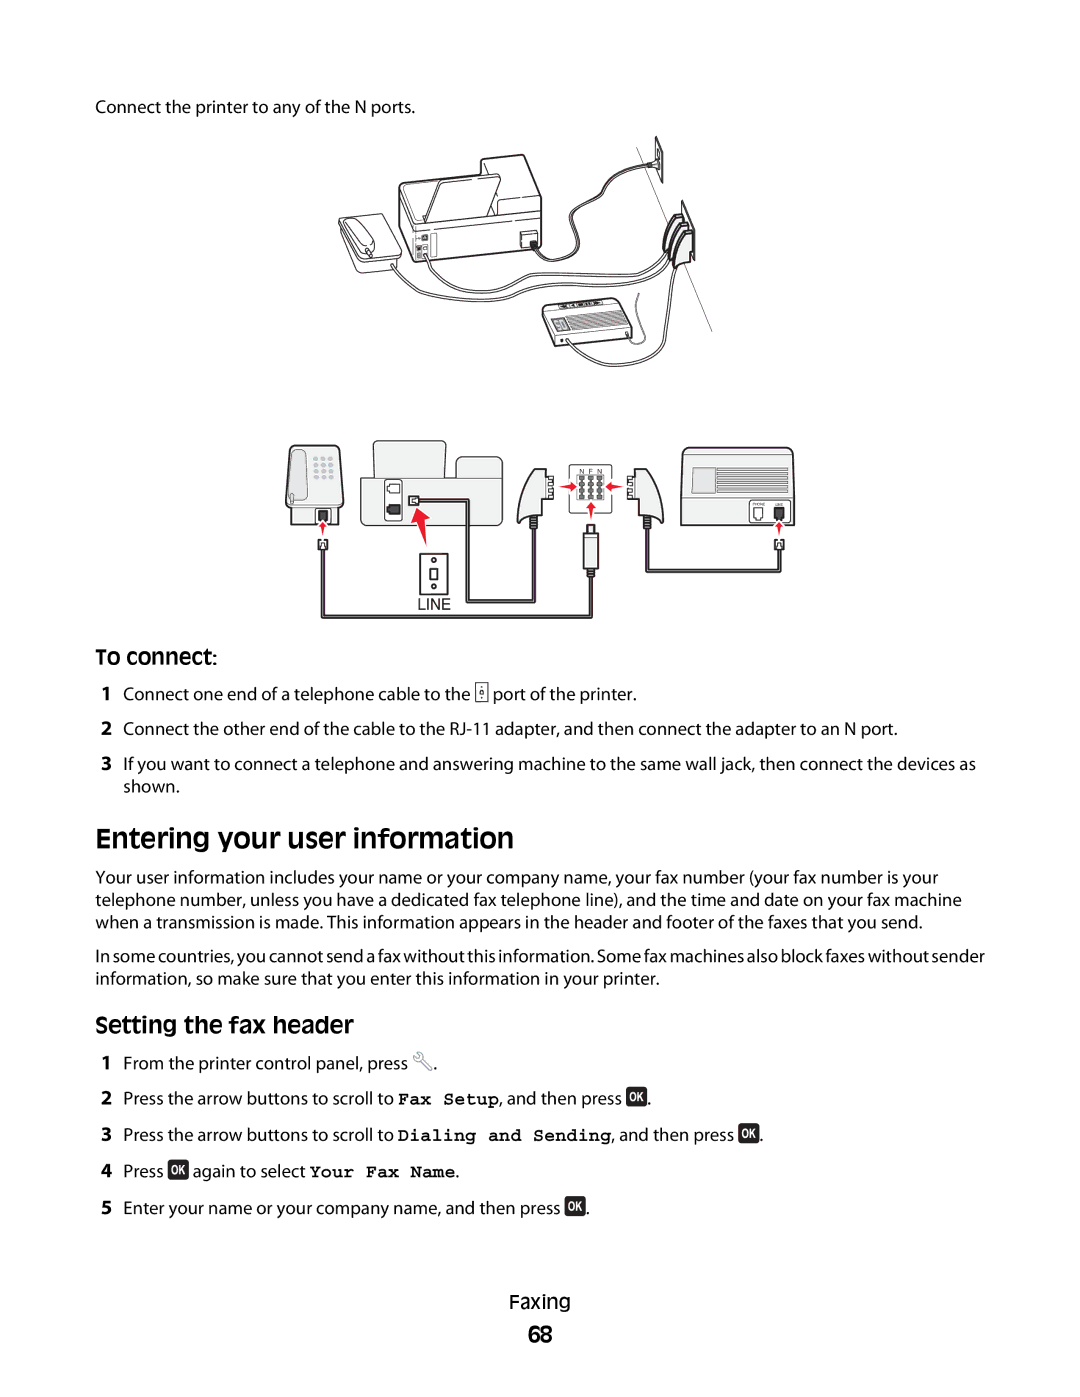
Connect the printer to any of the N ports.
EXT
LINE
N F N
PHONE | LINE |
|
|
To connect:
1 Connect one end of a telephone cable to the ![]() port of the printer.
port of the printer.
2Connect the other end of the cable to the
3If you want to connect a telephone and answering machine to the same wall jack, then connect the devices as shown.
Entering your user information
Your user information includes your name or your company name, your fax number (your fax number is your telephone number, unless you have a dedicated fax telephone line), and the time and date on your fax machine when a transmission is made. This information appears in the header and footer of the faxes that you send.
In some countries, you cannot send a fax without this information. Some fax machines also block faxes without sender information, so make sure that you enter this information in your printer.
Setting the fax header
1 From the printer control panel, press ![]() .
.
2 | Press the arrow buttons to scroll to Fax Setup, and then press . |
3 | Press the arrow buttons to scroll to Dialing and Sending, and then press . |
4 Press ![]() again to select Your Fax Name.
again to select Your Fax Name.
5 Enter your name or your company name, and then press ![]() .
.
Faxing
68