3To continue using a computer for Internet access, connect the computer to the DSL HPN port on the DSL filter.
4To connect a telephone to the printer, remove the protective plug from the ![]() port of the printer and then connect the telephone to the port.
port of the printer and then connect the telephone to the port.
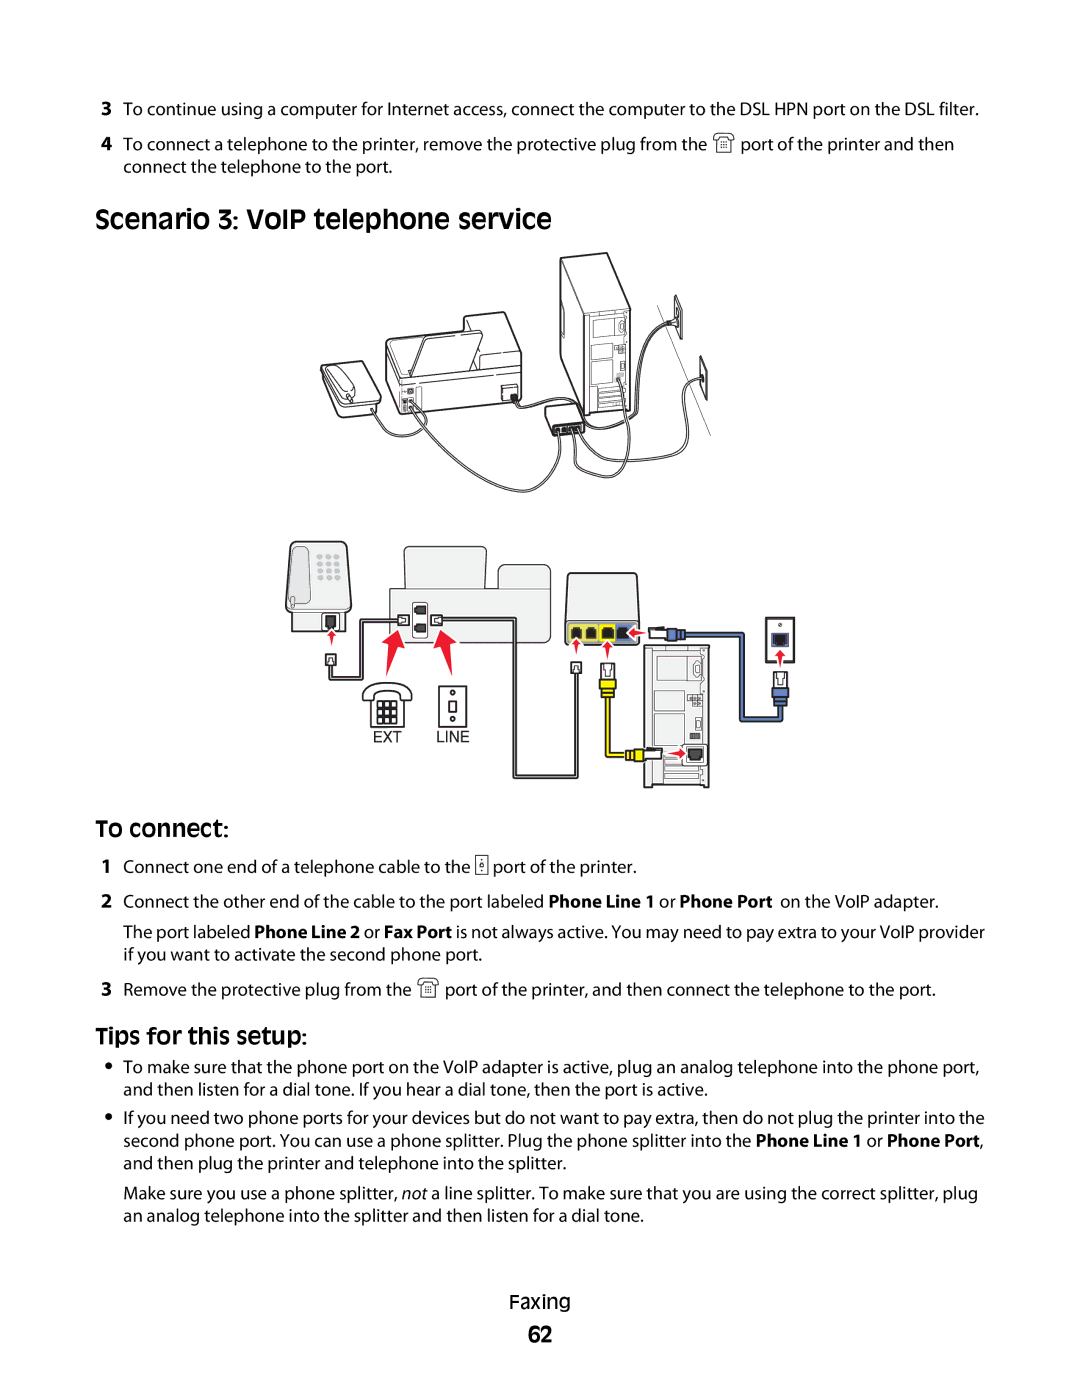
Scenario 3: VoIP telephone service
To connect:
1Connect one end of a telephone cable to the ![]() port of the printer.
port of the printer.
2Connect the other end of the cable to the port labeled Phone Line 1 or Phone Port on the VoIP adapter.
The port labeled Phone Line 2 or Fax Port is not always active. You may need to pay extra to your VoIP provider if you want to activate the second phone port.
3Remove the protective plug from the ![]() port of the printer, and then connect the telephone to the port.
port of the printer, and then connect the telephone to the port.
Tips for this setup:
•To make sure that the phone port on the VoIP adapter is active, plug an analog telephone into the phone port, and then listen for a dial tone. If you hear a dial tone, then the port is active.
•If you need two phone ports for your devices but do not want to pay extra, then do not plug the printer into the second phone port. You can use a phone splitter. Plug the phone splitter into the Phone Line 1 or Phone Port, and then plug the printer and telephone into the splitter.
Make sure you use a phone splitter, not a line splitter. To make sure that you are using the correct splitter, plug an analog telephone into the splitter and then listen for a dial tone.
Faxing
62