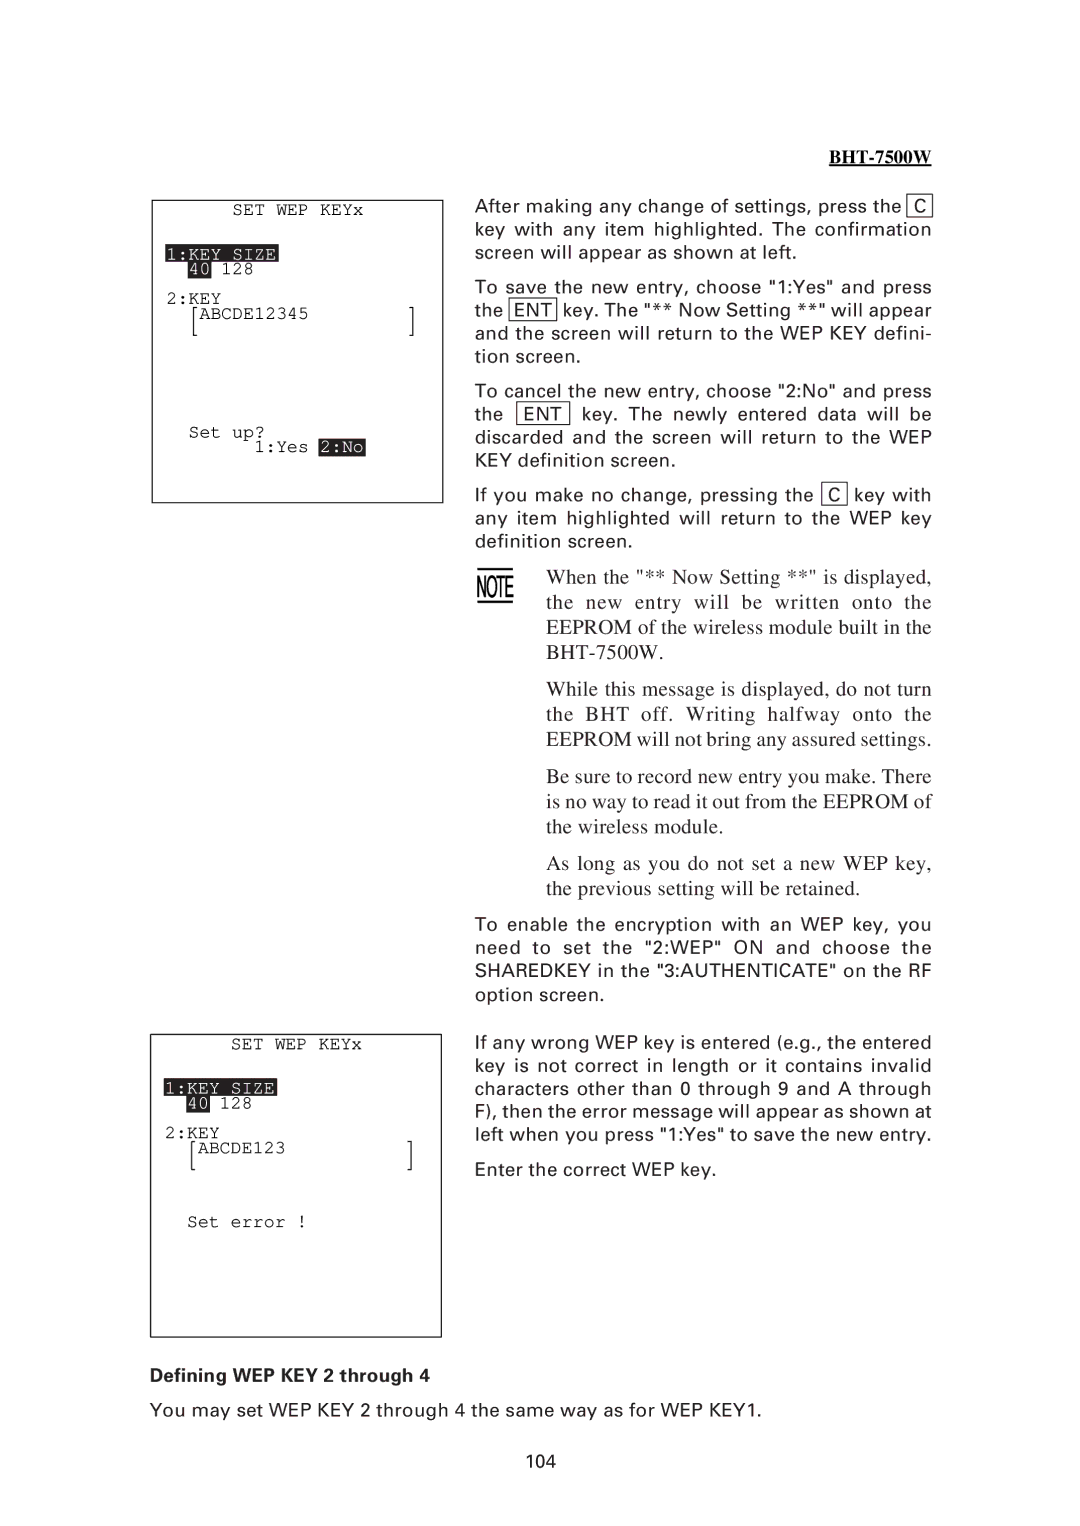
SET WEP KEYx
1:KEY SIZE
40128
2:KEY
![]() ABCDE12345
ABCDE12345
Set up?
1:Yes 2:No
SET WEP KEYx
1:KEY SIZE
40128
2:KEY
![]() ABCDE123
ABCDE123
Set error !
BHT-7500W
After making any change of settings, press the C
key with any item highlighted. The confirmation screen will appear as shown at left.
To save the new entry, choose "1:Yes" and press the ENT key. The "** Now Setting **" will appear
and the screen will return to the WEP KEY defini- tion screen.
To cancel the new entry, choose "2:No" and press the ENT key. The newly entered data will be
discarded and the screen will return to the WEP KEY definition screen.
If you make no change, pressing the C key with any item highlighted will return to the WEP key definition screen.
When the "** Now Setting **" is displayed, the new entry will be written onto the EEPROM of the wireless module built in the
While this message is displayed, do not turn the BHT off. Writing halfway onto the EEPROM will not bring any assured settings.
Be sure to record new entry you make. There is no way to read it out from the EEPROM of the wireless module.
As long as you do not set a new WEP key, the previous setting will be retained.
To enable the encryption with an WEP key, you need to set the "2:WEP" ON and choose the SHAREDKEY in the "3:AUTHENTICATE" on the RF option screen.
If any wrong WEP key is entered (e.g., the entered key is not correct in length or it contains invalid characters other than 0 through 9 and A through F), then the error message will appear as shown at left when you press "1:Yes" to save the new entry.
Enter the correct WEP key.
Defining WEP KEY 2 through 4
You may set WEP KEY 2 through 4 the same way as for WEP KEY1.
104