Stylus Photo R300/R310 | Revision A |
2.3.10 Removing CR Motor
Procedure for Removing |
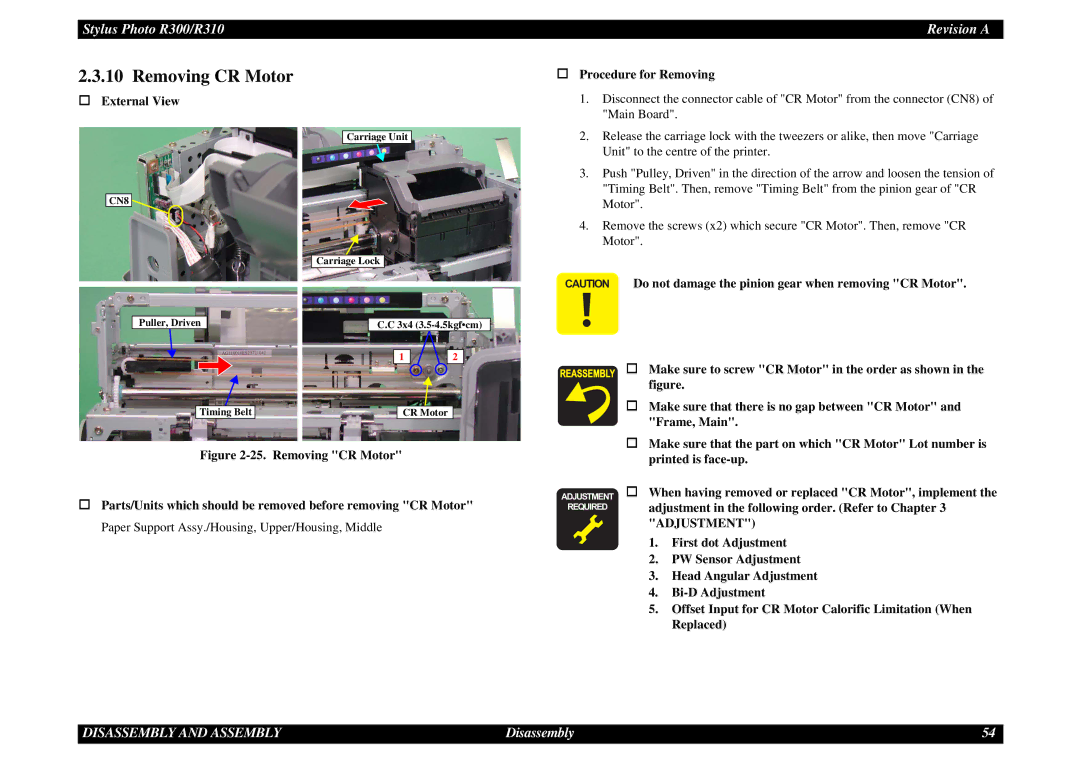
External View
CN8
Puller, Driven
Carriage Unit
Carriage Lock
C.C 3x4
1 |
| 2 |
1. | Disconnect the connector cable of "CR Motor" from the connector (CN8) of |
| "Main Board". |
2. | Release the carriage lock with the tweezers or alike, then move "Carriage |
| Unit" to the centre of the printer. |
3. | Push "Pulley, Driven" in the direction of the arrow and loosen the tension of |
| "Timing Belt". Then, remove "Timing Belt" from the pinion gear of "CR |
| Motor". |
4. | Remove the screws (x2) which secure "CR Motor". Then, remove "CR |
| Motor". |
CAUTION Do not damage the pinion gear when removing "CR Motor".
Make sure to screw "CR Motor" in the order as shown in the figure.
Timing Belt |
| CR Motor |
Figure 2-25. Removing "CR Motor"
Make sure that there is no gap between "CR Motor" and "Frame, Main".
Make sure that the part on which "CR Motor" Lot number is printed is face-up.
Parts/Units which should be removed before removing "CR Motor" Paper Support Assy./Housing, Upper/Housing, Middle
ADJUSTMENT
REQUIRED
When having removed or replaced "CR Motor", implement the adjustment in the following order. (Refer to Chapter 3 "ADJUSTMENT")
1.First dot Adjustment
2.PW Sensor Adjustment
3.Head Angular Adjustment
4.
5.Offset Input for CR Motor Calorific Limitation (When Replaced)
DISASSEMBLY AND ASSEMBLY | Disassembly | 54 |