EPSON Stylus Photo R300/R310 | Revision A |
3.3 Adjustment Except Adjustment Program
Following is adjustment except Adjustment Program.
3.3.1 PG Adjustment
[Adjustment Procedure]
1.Make both sides of the two Thickness Gauge (1.15mm and 1.31mm) clean by wiping with Bemcot with a little alcohol.
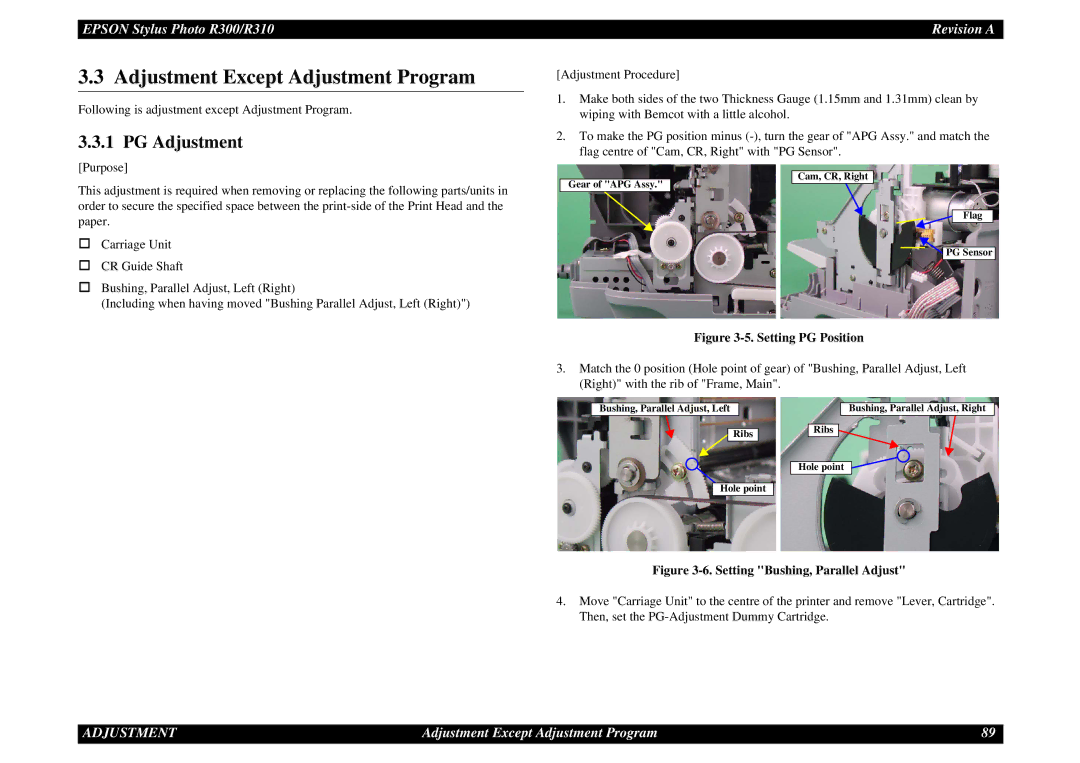
2.To make the PG position minus
[Purpose]
This adjustment is required when removing or replacing the following parts/units in order to secure the specified space between the
Carriage Unit
CR Guide Shaft
Bushing, Parallel Adjust, Left (Right)
(Including when having moved "Bushing Parallel Adjust, Left (Right)")
Gear of "APG Assy."
Cam, CR, Right
Flag
![]()
![]() PG Sensor
PG Sensor
Figure 3-5. Setting PG Position
3.Match the 0 position (Hole point of gear) of "Bushing, Parallel Adjust, Left (Right)" with the rib of "Frame, Main".
Bushing, Parallel Adjust, Left | Bushing, Parallel Adjust, Right |
RibsRibs
Hole point
Hole point
Figure 3-6. Setting "Bushing, Parallel Adjust"
4.Move "Carriage Unit" to the centre of the printer and remove "Lever, Cartridge". Then, set the
ADJUSTMENT | Adjustment Except Adjustment Program | 89 |