Stylus Photo R300/R310 | Revision A |
External View
Holder, Scale Left |
| E Ring |
|
| Flat Washer |
|
| Leaf Spring |
![]() E Ring
E Ring
Flat Washer
Spring Washer
Bushing,
Parallel
Adjust, Right![]()
Cam, CR,
Right
E Ring
Holder, Scale, Right
C.P.S (P4) 3x6
Fixed Spring,
CR Shaft,
Right
Hook
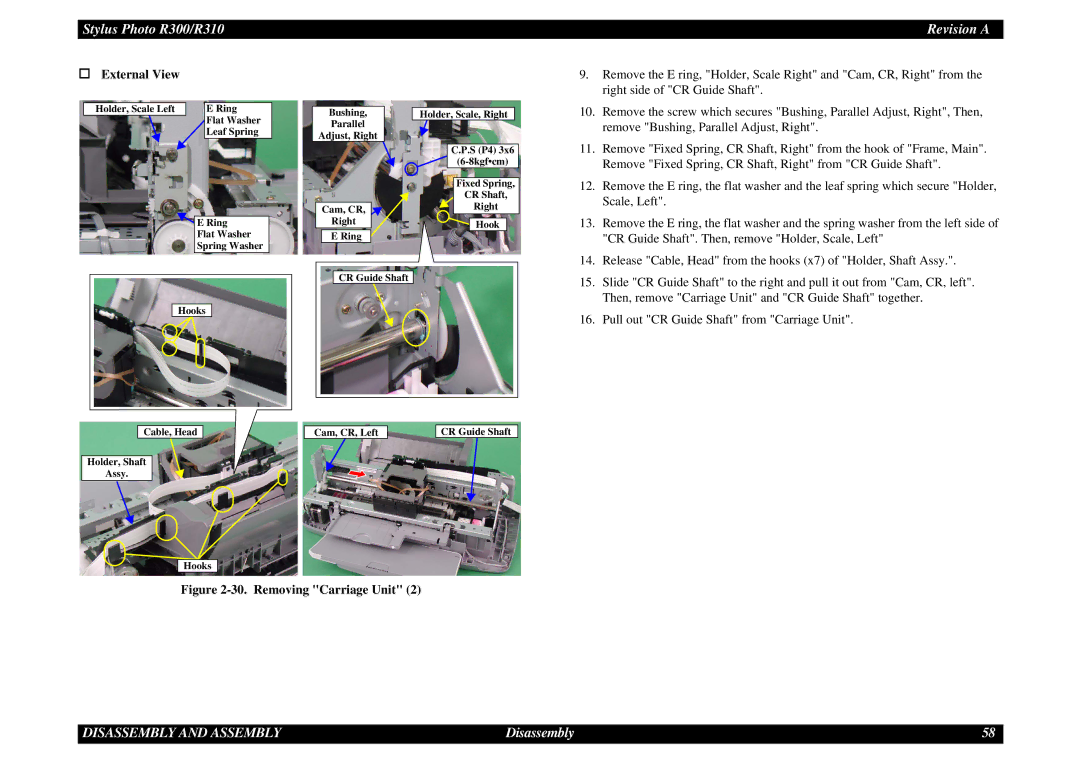
9. | Remove the E ring, "Holder, Scale Right" and "Cam, CR, Right" from the |
| right side of "CR Guide Shaft". |
10. | Remove the screw which secures "Bushing, Parallel Adjust, Right", Then, |
| remove "Bushing, Parallel Adjust, Right". |
11. | Remove "Fixed Spring, CR Shaft, Right" from the hook of "Frame, Main". |
| Remove "Fixed Spring, CR Shaft, Right" from "CR Guide Shaft". |
12. | Remove the E ring, the flat washer and the leaf spring which secure "Holder, |
| Scale, Left". |
13. | Remove the E ring, the flat washer and the spring washer from the left side of |
| "CR Guide Shaft". Then, remove "Holder, Scale, Left" |
14. | Release "Cable, Head" from the hooks (x7) of "Holder, Shaft Assy.". |
Hooks
Cable, Head
Holder, Shaft
Assy.
CR Guide Shaft |
Cam, CR, Left |
| CR Guide Shaft |
15. | Slide "CR Guide Shaft" to the right and pull it out from "Cam, CR, left". |
| Then, remove "Carriage Unit" and "CR Guide Shaft" together. |
16. | Pull out "CR Guide Shaft" from "Carriage Unit". |
Hooks
Figure 2-30. Removing "Carriage Unit" (2)
DISASSEMBLY AND ASSEMBLY | Disassembly | 58 |