Stylus Photo R300/R310 | Revision A |
2.3.2 Removing Housing, Upper
External View
Connector
Damper Shaft | Installing Hole |
Printer Cover
Panel FFC ![]()
![]()
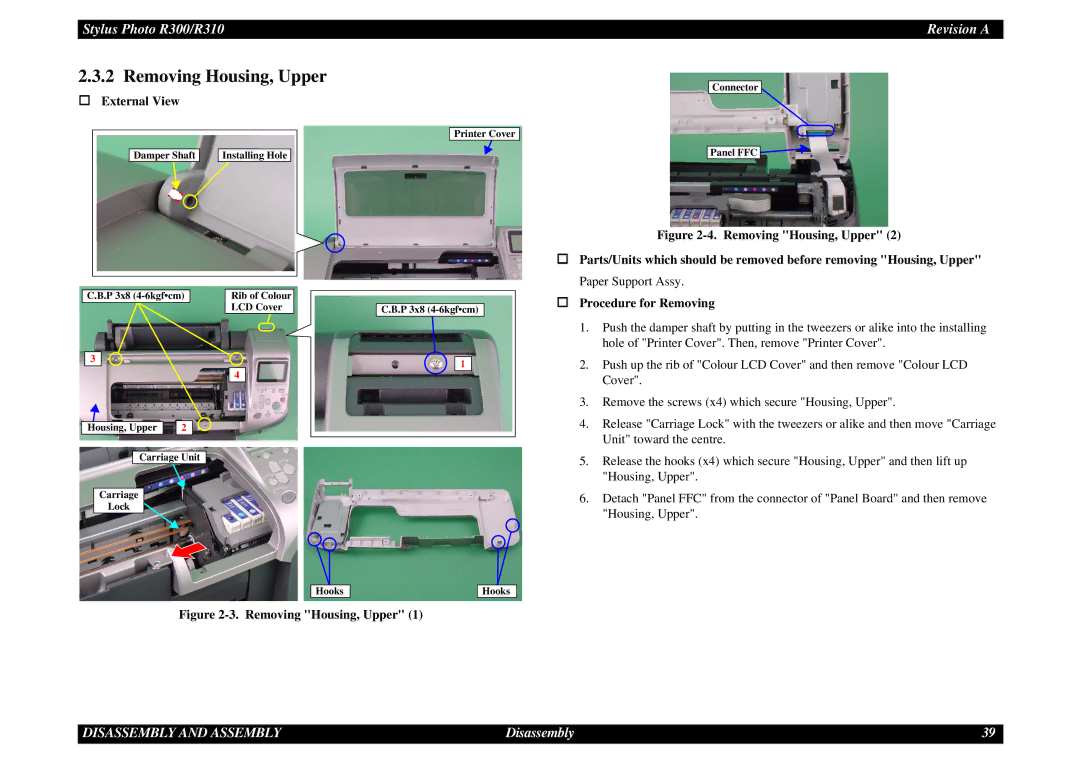
Figure 2-4. Removing "Housing, Upper" (2)
Parts/Units which should be removed before removing "Housing, Upper" |
Paper Support Assy. |
C.B.P 3x8
3
Rib of Colour LCD Cover
4
C.B.P 3x8
1
Procedure for Removing | |
1. | Push the damper shaft by putting in the tweezers or alike into the installing |
| hole of "Printer Cover". Then, remove "Printer Cover". |
2. | Push up the rib of "Colour LCD Cover" and then remove "Colour LCD |
| Cover". |
3. | Remove the screws (x4) which secure "Housing, Upper". |
Housing, Upper |
| 2 |
Carriage Unit
Carriage
Lock
|
|
|
|
Hooks |
| Hooks | |
Figure 2-3. Removing "Housing, Upper" (1)
4. | Release "Carriage Lock" with the tweezers or alike and then move "Carriage |
| Unit" toward the centre. |
5. | Release the hooks (x4) which secure "Housing, Upper" and then lift up |
| "Housing, Upper". |
6. | Detach "Panel FFC" from the connector of "Panel Board" and then remove |
| "Housing, Upper". |
DISASSEMBLY AND ASSEMBLY | Disassembly | 39 |