Stylus Photo R300/R310 | Revision A |
External View
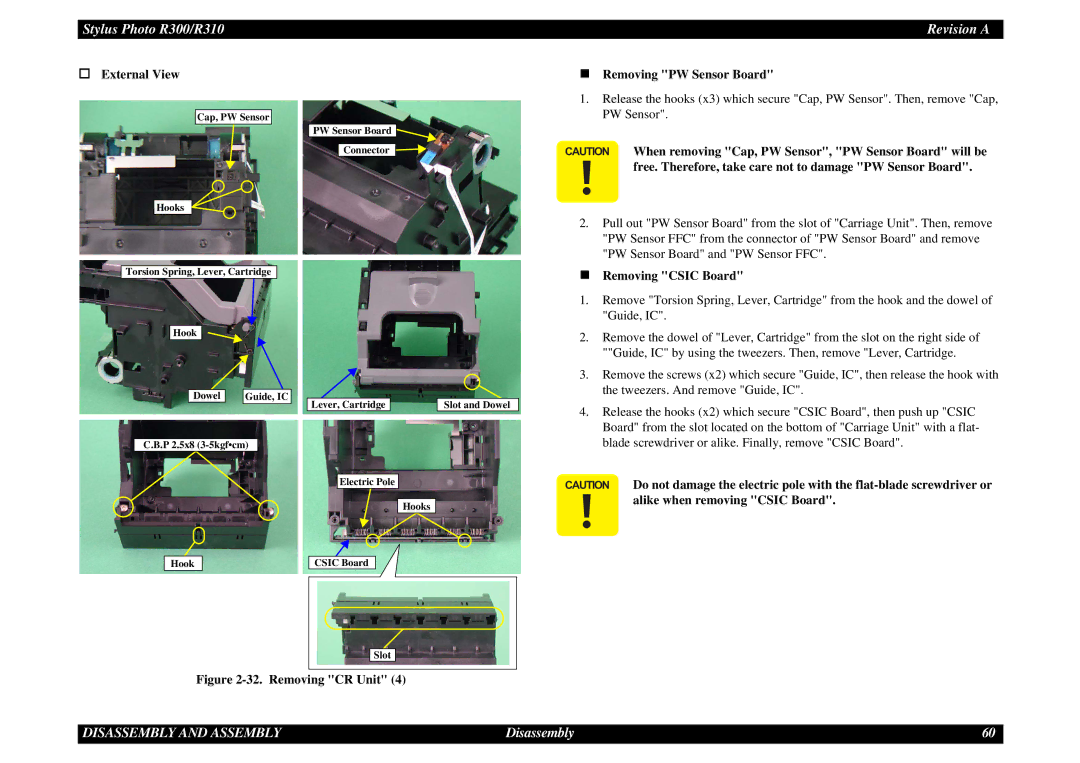
Cap, PW Sensor
PW Sensor Board ![]()
Connector
Hooks
Removing "PW Sensor Board"
1.Release the hooks (x3) which secure "Cap, PW Sensor". Then, remove "Cap, PW Sensor".
CAUTION When removing "Cap, PW Sensor", "PW Sensor Board" will be free. Therefore, take care not to damage "PW Sensor Board".
2.Pull out "PW Sensor Board" from the slot of "Carriage Unit". Then, remove "PW Sensor FFC" from the connector of "PW Sensor Board" and remove "PW Sensor Board" and "PW Sensor FFC".
Torsion Spring, Lever, Cartridge
Hook
Dowel |
| Guide, IC |
|
|
|
C.B.P 2.5x8
Hook
Lever, Cartridge
Electric Pole
Hooks
CSIC Board
Slot and Dowel
Removing "CSIC Board"
1.Remove "Torsion Spring, Lever, Cartridge" from the hook and the dowel of "Guide, IC".
2.Remove the dowel of "Lever, Cartridge" from the slot on the right side of ""Guide, IC" by using the tweezers. Then, remove "Lever, Cartridge.
3.Remove the screws (x2) which secure "Guide, IC", then release the hook with the tweezers. And remove "Guide, IC".
4.Release the hooks (x2) which secure "CSIC Board", then push up "CSIC Board" from the slot located on the bottom of "Carriage Unit" with a flat- blade screwdriver or alike. Finally, remove "CSIC Board".
CAUTION Do not damage the electric pole with the
Slot |
Figure 2-32. Removing "CR Unit" (4)
DISASSEMBLY AND ASSEMBLY | Disassembly | 60 |