Stylus Photo R300/R310 | Revision A |
Make sure that "Waste Ink Pads" (x6) are set correctly to the rib and the dowel of "Housing, Lower".
Waste Ink Pad, Small |
Waste Ink Pad, Upper (Top) Waste Ink Pad, Lower (Bottom)
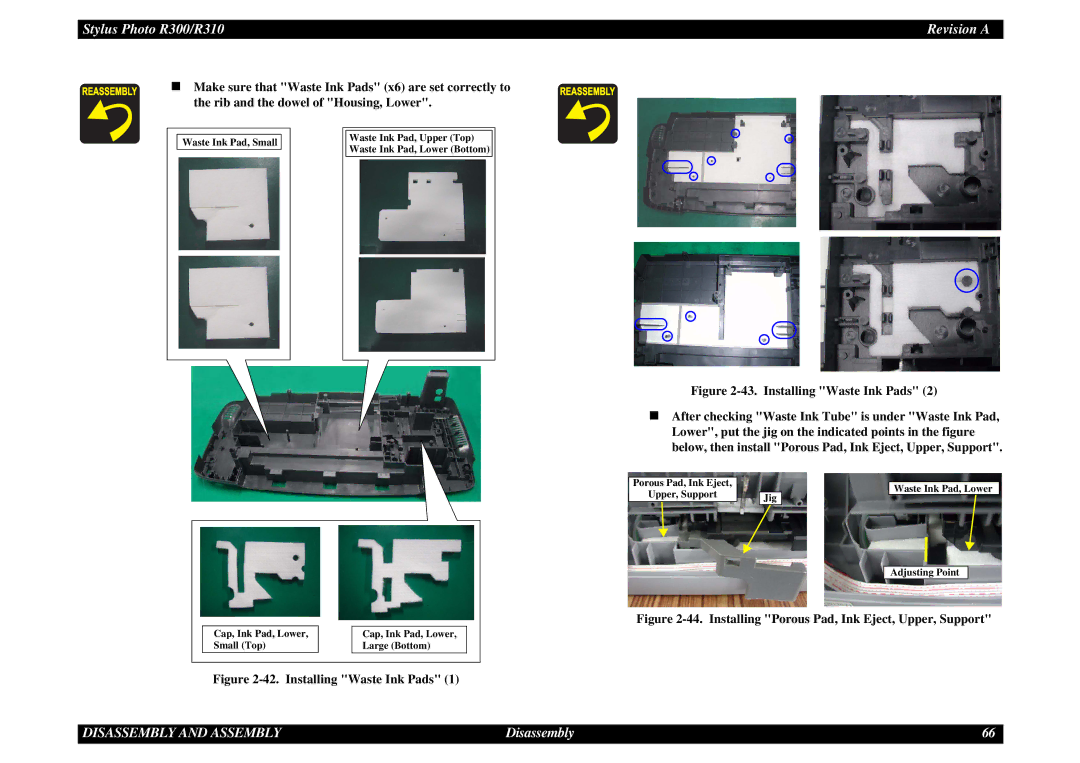
Figure 2-43. Installing "Waste Ink Pads" (2)
After checking "Waste Ink Tube" is under "Waste Ink Pad, Lower", put the jig on the indicated points in the figure below, then install "Porous Pad, Ink Eject, Upper, Support".
Porous Pad, Ink Eject, |
|
|
|
|
|
|
| Waste Ink Pad, Lower | |
Upper, Support |
|
|
| |
| Jig |
|
| |
|
|
|
|
|
Cap, Ink Pad, Lower, | Cap, Ink Pad, Lower, |
Small (Top) | Large (Bottom) |
Figure 2-42. Installing "Waste Ink Pads" (1)
Adjusting Point
Figure 2-44. Installing "Porous Pad, Ink Eject, Upper, Support"
DISASSEMBLY AND ASSEMBLY | Disassembly | 66 |