Stylus Photo R300/R310 | Revision A |
2.3.20 Removing PF Motor
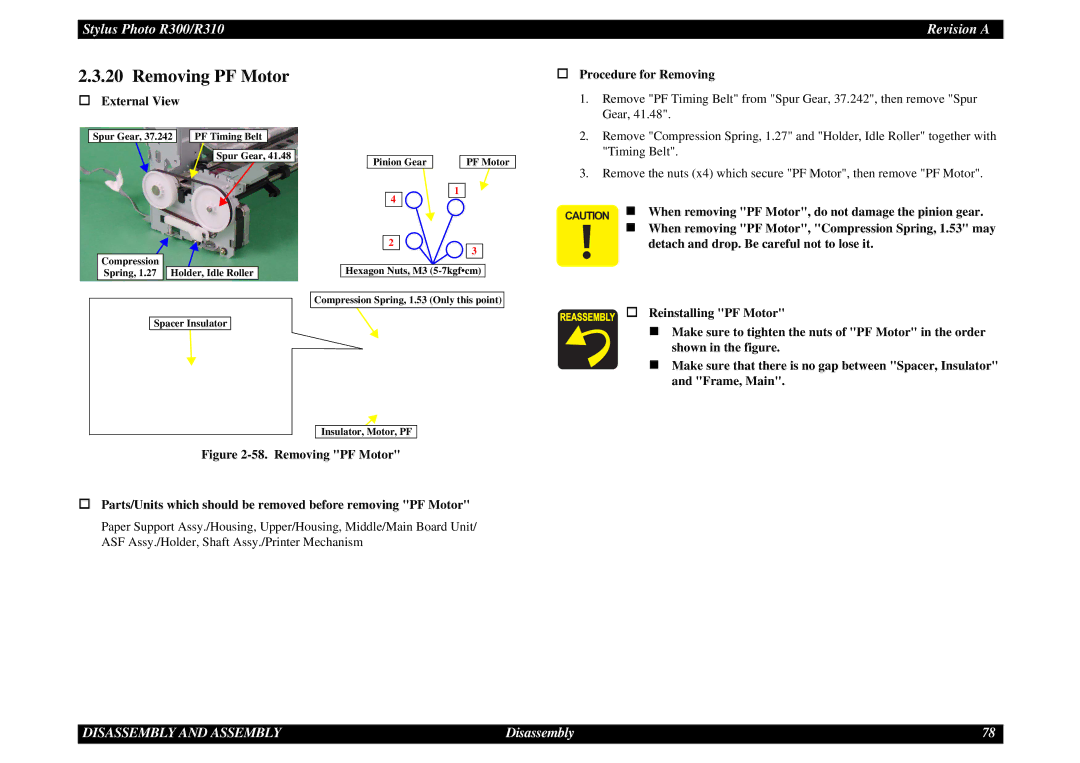
External View
Procedure for Removing |
1. Remove "PF Timing Belt" from "Spur Gear, 37.242", then remove "Spur |
Gear, 41.48". |
Spur Gear, 37.242 |
| PF Timing Belt |
Spur Gear, 41.48
Pinion Gear |
| PF Motor |
2. | Remove "Compression Spring, 1.27" and "Holder, Idle Roller" together with |
| "Timing Belt". |
3. | Remove the nuts (x4) which secure "PF Motor", then remove "PF Motor". |
4
1
CAUTION When removing "PF Motor", do not damage the pinion gear.
Compression
Spring, 1.27 Holder, Idle Roller
Spacer Insulator
2 ![]()
![]()
![]() 3
3
Hexagon Nuts, M3
Compression Spring, 1.53 (Only this point)
Insulator, Motor, PF
When removing "PF Motor", "Compression Spring, 1.53" may detach and drop. Be careful not to lose it.
Reinstalling "PF Motor"
Make sure to tighten the nuts of "PF Motor" in the order shown in the figure.
Make sure that there is no gap between "Spacer, Insulator" and "Frame, Main".
Figure 2-58. Removing "PF Motor"
Parts/Units which should be removed before removing "PF Motor"
Paper Support Assy./Housing, Upper/Housing, Middle/Main Board Unit/ ASF Assy./Holder, Shaft Assy./Printer Mechanism
DISASSEMBLY AND ASSEMBLY | Disassembly | 78 |