6 |
Creating a New Project
A new project is created by selecting the New Project option from the File menu. Before you execute this function you should know exactly what Panel components will be used .
Carry out the following steps:
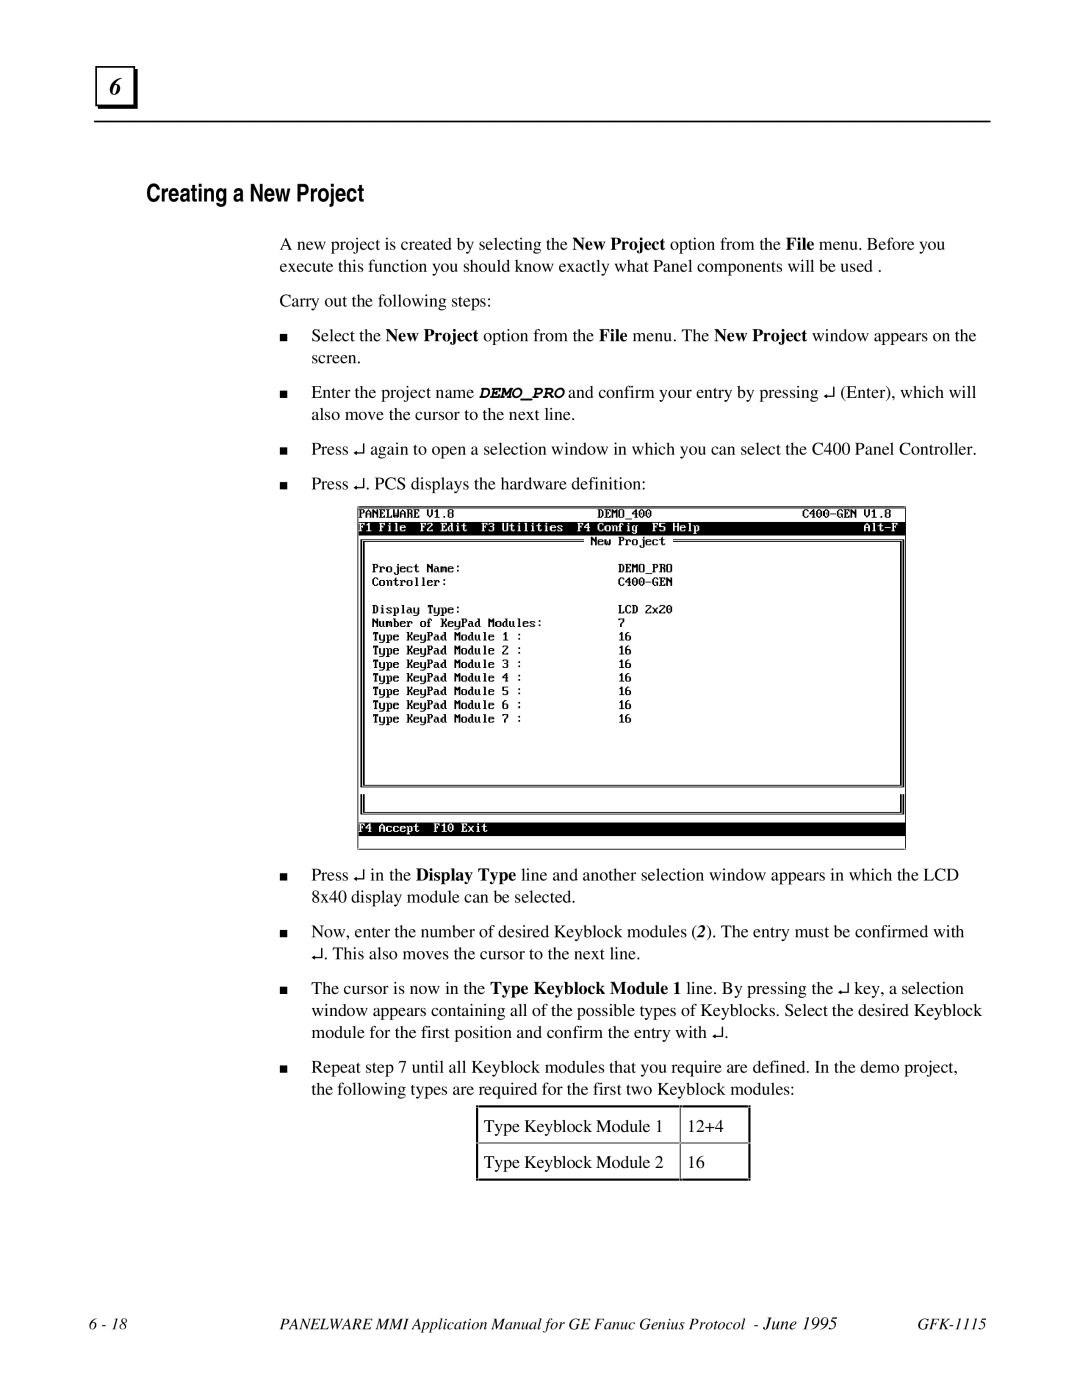
■Select the New Project option from the File menu. The New Project window appears on the screen.
■Enter the project name DEMO_PRO and confirm your entry by pressing ↵ (Enter), which will also move the cursor to the next line.
■Press ↵ again to open a selection window in which you can select the C400 Panel Controller.
■Press ↵. PCS displays the hardware definition:
■Press ↵ in the Display Type line and another selection window appears in which the LCD 8x40 display module can be selected.
■Now, enter the number of desired Keyblock modules (2). The entry must be confirmed with ↵. This also moves the cursor to the next line.
■The cursor is now in the Type Keyblock Module 1 line. By pressing the ↵ key, a selection
window appears containing all of the possible types of Keyblocks. Select the desired Keyblock module for the first position and confirm the entry with ↵.
■Repeat step 7 until all Keyblock modules that you require are defined. In the demo project, the following types are required for the first two Keyblock modules:
Type Keyblock Module 1
Type Keyblock Module 2
12+4
16
6 - 18 | PANELWARE MMI Application Manual for GE Fanuc Genius Protocol - June 1995 |
