6 |
Genius GBC Series 90-70 Connection
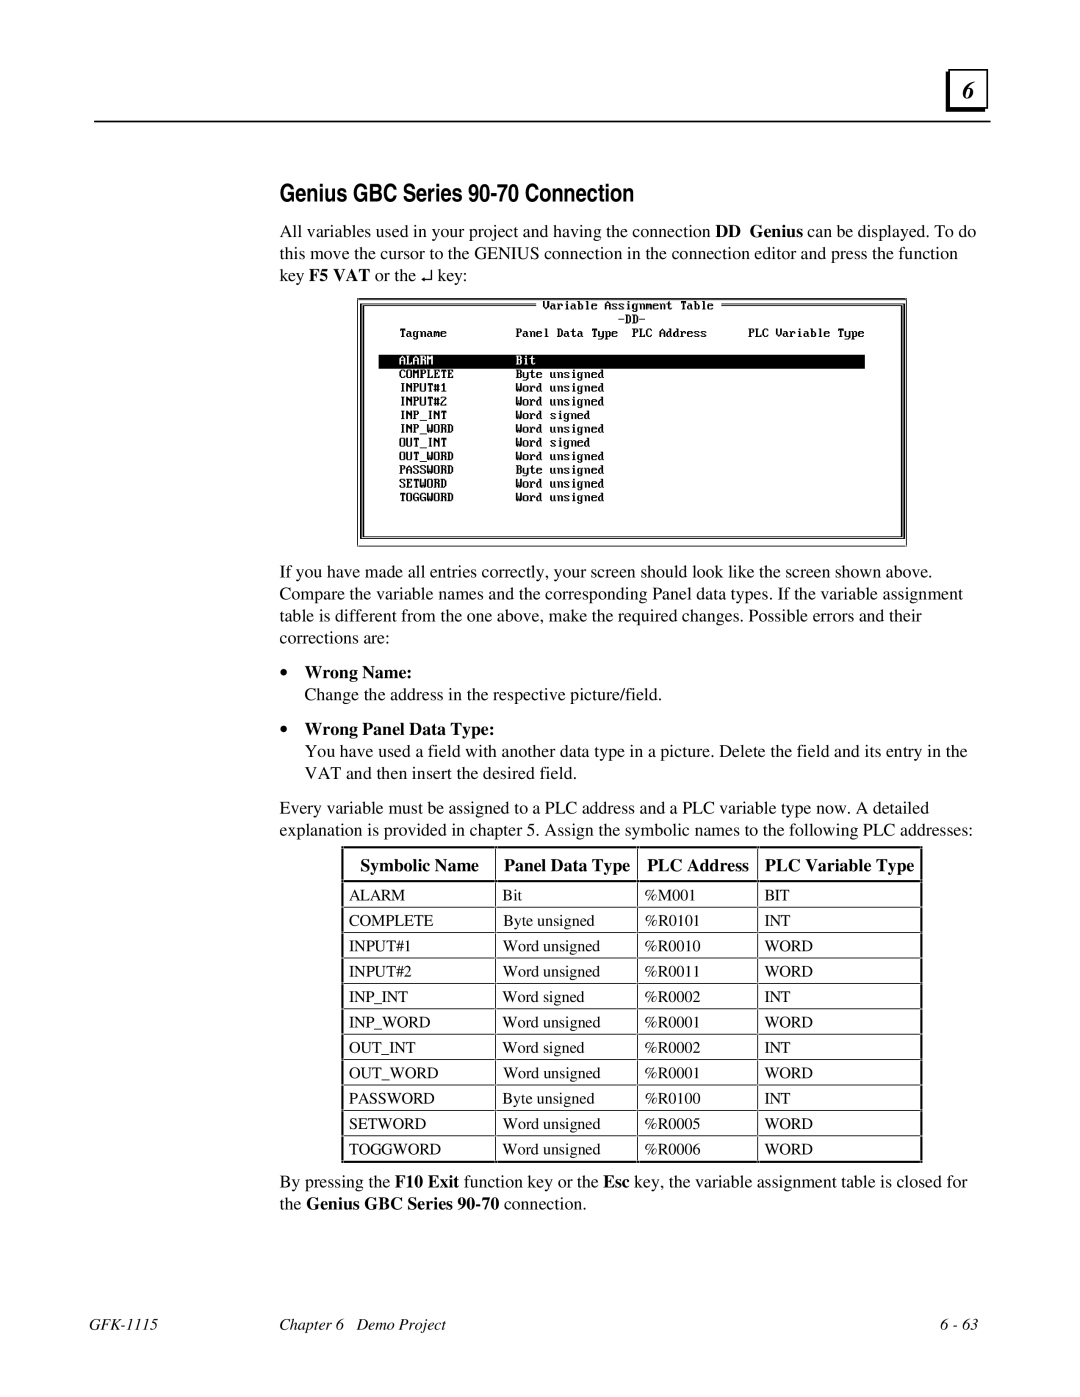
All variables used in your project and having the connection DD Genius can be displayed. To do this move the cursor to the GENIUS connection in the connection editor and press the function key F5 VAT or the ↵ key:
If you have made all entries correctly, your screen should look like the screen shown above. Compare the variable names and the corresponding Panel data types. If the variable assignment table is different from the one above, make the required changes. Possible errors and their corrections are:
∙Wrong Name:
Change the address in the respective picture/field.
∙Wrong Panel Data Type:
You have used a field with another data type in a picture. Delete the field and its entry in the VAT and then insert the desired field.
Every variable must be assigned to a PLC address and a PLC variable type now. A detailed explanation is provided in chapter 5. Assign the symbolic names to the following PLC addresses:
Symbolic Name
Panel Data Type PLC Address PLC Variable Type
ALARM
COMPLETE
INPUT#1
INPUT#2
INP_INT
INP_WORD
OUT_INT
OUT_WORD
PASSWORD
SETWORD
TOGGWORD
Bit
Byte unsigned
Word unsigned
Word unsigned
Word signed
Word unsigned
Word signed
Word unsigned
Byte unsigned
Word unsigned
Word unsigned
%M001
%R0101
%R0010
%R0011
%R0002
%R0001
%R0002
%R0001
%R0100
%R0005
%R0006
BIT
INT
WORD
WORD
INT
WORD
INT
WORD
INT
WORD
WORD
By pressing the F10 Exit function key or the Esc key, the variable assignment table is closed for
the Genius GBC Series 90-70 connection.
| Chapter 6 Demo Project | 6 - 63 |
