Attaching a Parallel Printer Cable
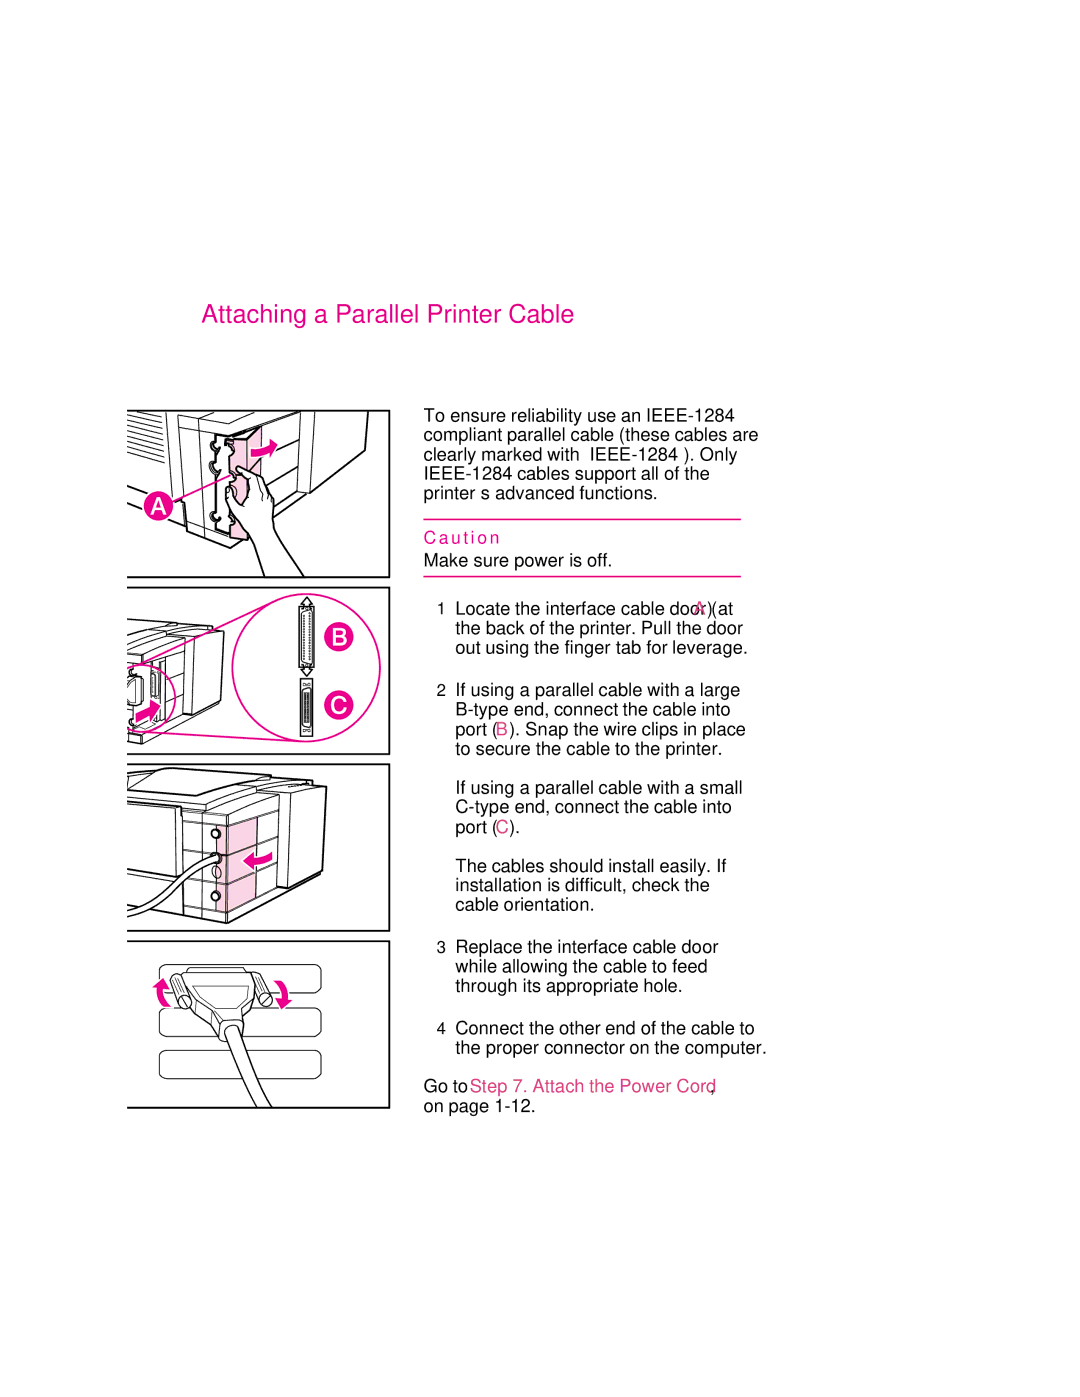
To ensure reliability use an
C a u t i o n
Make sure power is off.
1 Locate the interface cable door (A) at the back of the printer. Pull the door out using the finger tab for leverage.
2 If using a parallel cable with a large
If using a parallel cable with a small
The cables should install easily. If installation is difficult, check the cable orientation.
3 Replace the interface cable door while allowing the cable to feed through its appropriate hole.
4 Connect the other end of the cable to the proper connector on the computer.
Go to Step 7. Attach the Power Cord, on page
EN