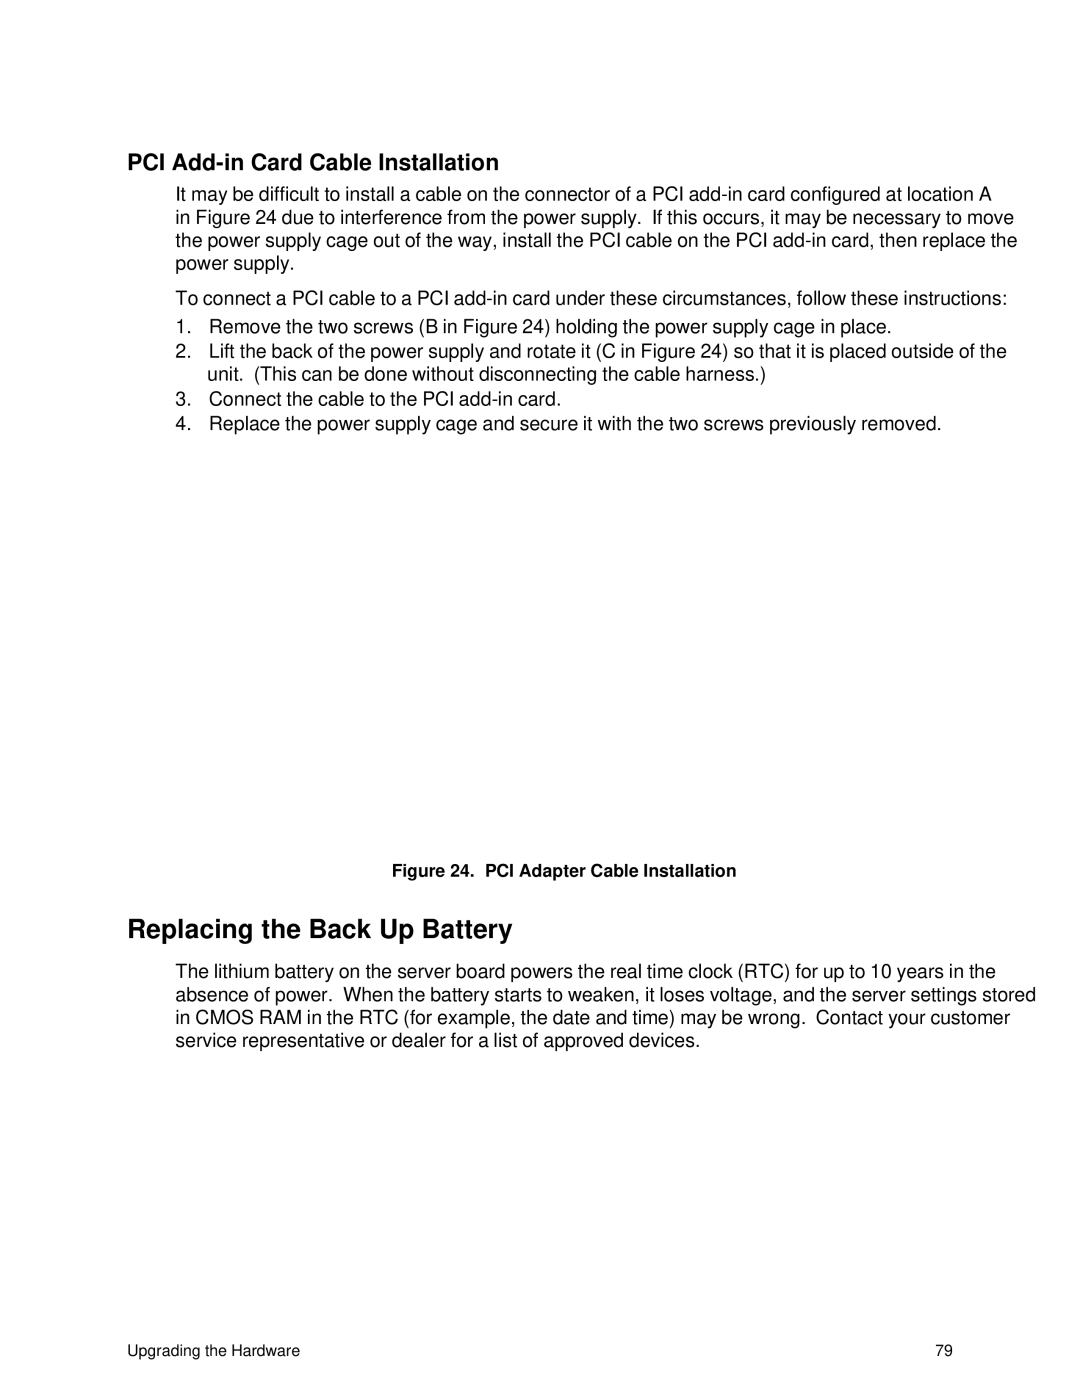
PCI Add-in Card Cable Installation
It may be difficult to install a cable on the connector of a PCI
To connect a PCI cable to a PCI
1.Remove the two screws (B in Figure 24) holding the power supply cage in place.
2.Lift the back of the power supply and rotate it (C in Figure 24) so that it is placed outside of the unit. (This can be done without disconnecting the cable harness.)
3.Connect the cable to the PCI
4.Replace the power supply cage and secure it with the two screws previously removed.
Figure 24. PCI Adapter Cable Installation
Replacing the Back Up Battery
The lithium battery on the server board powers the real time clock (RTC) for up to 10 years in the absence of power. When the battery starts to weaken, it loses voltage, and the server settings stored in CMOS RAM in the RTC (for example, the date and time) may be wrong. Contact your customer service representative or dealer for a list of approved devices.
Upgrading the Hardware | 79 |