Community configuration
By default, two SNMP Communities exist:
•private, with Read/Write privileges and status set to Enable
•public, with
These are
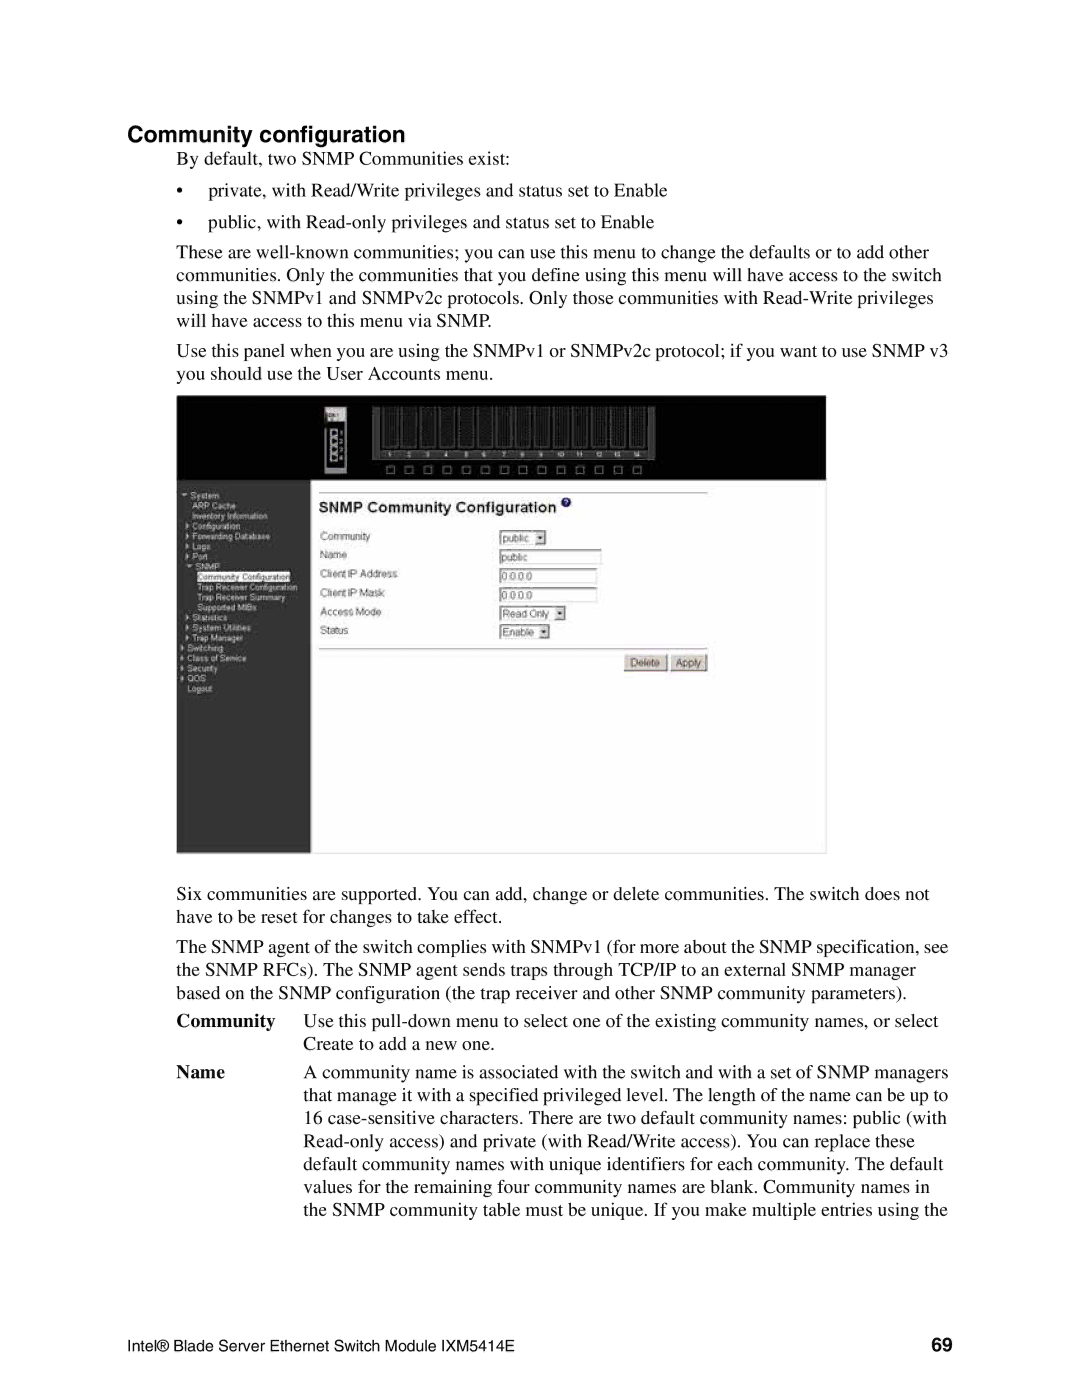
Use this panel when you are using the SNMPv1 or SNMPv2c protocol; if you want to use SNMP v3 you should use the User Accounts menu.
Six communities are supported. You can add, change or delete communities. The switch does not have to be reset for changes to take effect.
The SNMP agent of the switch complies with SNMPv1 (for more about the SNMP specification, see the SNMP RFCs). The SNMP agent sends traps through TCP/IP to an external SNMP manager based on the SNMP configuration (the trap receiver and other SNMP community parameters).
Community | Use this |
| Create to add a new one. |
Name | A community name is associated with the switch and with a set of SNMP managers |
| that manage it with a specified privileged level. The length of the name can be up to |
| 16 |
| |
| default community names with unique identifiers for each community. The default |
| values for the remaining four community names are blank. Community names in |
| the SNMP community table must be unique. If you make multiple entries using the |
Intel® Blade Server Ethernet Switch Module IXM5414E | 69 |