Printer Overview
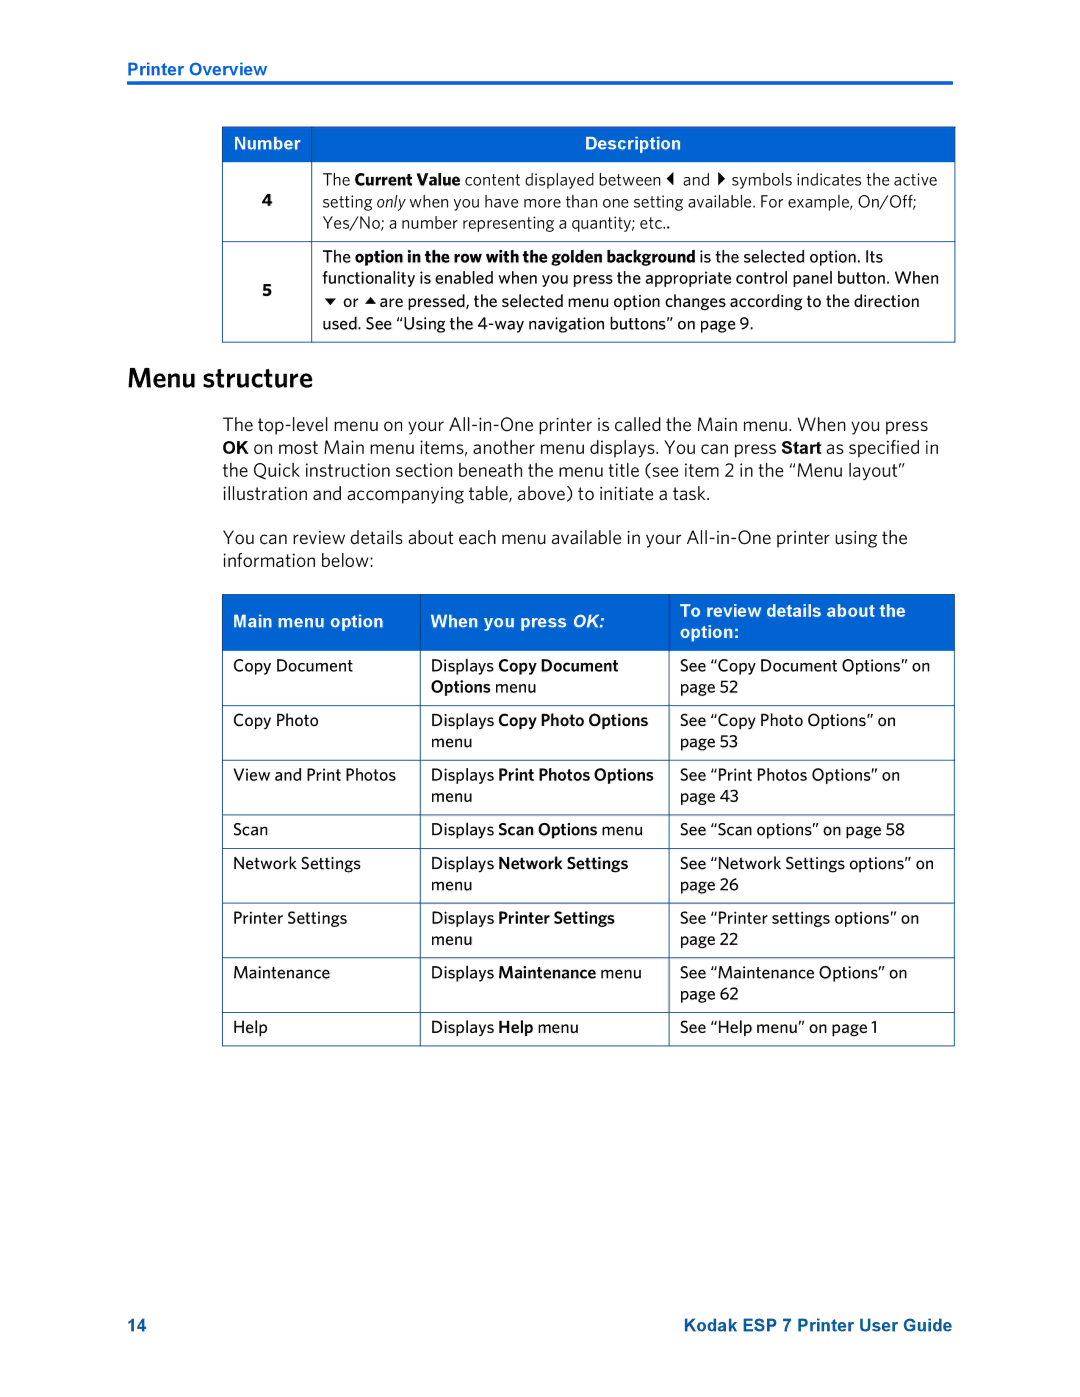
Number | Description |
|
|
The Current Value content displayed between and symbols indicates the active
4setting only when you have more than one setting available. For example, On/Off; Yes/No; a number representing a quantity; etc..
The option in the row with the golden background is the selected option. Its
5 | functionality is enabled when you press the appropriate control panel button. When | |
or are pressed, the selected menu option changes according to the direction | ||
| ||
| used. See “Using the |
Menu structure
The
You can review details about each menu available in your
Main menu option | When you press OK: | To review details about the | |
option: | |||
|
| ||
|
|
| |
Copy Document | Displays Copy Document | See “Copy Document Options” on | |
| Options menu | page 52 | |
|
|
| |
Copy Photo | Displays Copy Photo Options | See “Copy Photo Options” on | |
| menu | page 53 | |
|
|
| |
View and Print Photos | Displays Print Photos Options | See “Print Photos Options” on | |
| menu | page 43 | |
|
|
| |
Scan | Displays Scan Options menu | See “Scan options” on page 58 | |
|
|
| |
Network Settings | Displays Network Settings | See “Network Settings options” on | |
| menu | page 26 | |
|
|
| |
Printer Settings | Displays Printer Settings | See “Printer settings options” on | |
| menu | page 22 | |
|
|
| |
Maintenance | Displays Maintenance menu | See “Maintenance Options” on | |
|
| page 62 | |
|
|
| |
Help | Displays Help menu | See “Help menu” on page 1 | |
|
|
|
14 | Kodak ESP 7 Printer User Guide |